Welcome to Fudge 201, otherwise known as “trials and tribulations”. Before you jump into beating fudge, study up on the intro to fudge and fudge for newbs. We come now to the fork in the road, where people either give up or keep trying.
Beating fudge is the final step one takes before turning or pouring it into the pan.
When am I done beating it?
Once the fudge has cooled, you can choose to make the fudge easily, or you can “elect the way of pain”. Stirring fudge by hand is hard, tiring, and can break your wooden spoon.
Fudge can be beaten successful with a mixer. It is okay to stop the mixer periodically (it won’t set immediately like ice cream does). How long to beat fudge is one of those things. Nobody can really tell you, and experience is the best teacher.
I have made two successful batches of penuche fudge in my KA, using the flat beater attachment, and beating time was 28 (twenty-eight!) minutes. I was really surprised it took so long, since most KA recipes have to be adjusted to shorten the beating time. Each batch I scraped down the sides 4 times.
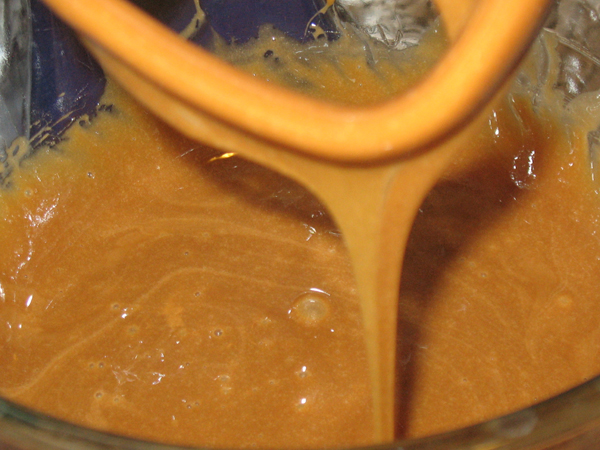
At first the fudge is dark and shiny, almost wet looking. You will notice the vanilla on the top, and also a layer of grease. That’s normal. As you beat it, the colour will lighten gradually, and the wet shine will fade. That glossy shine will not disappear completely though, but the best way I can describe it is this; when it’s ready to turn into the pan, there is some gloss, but not all over.
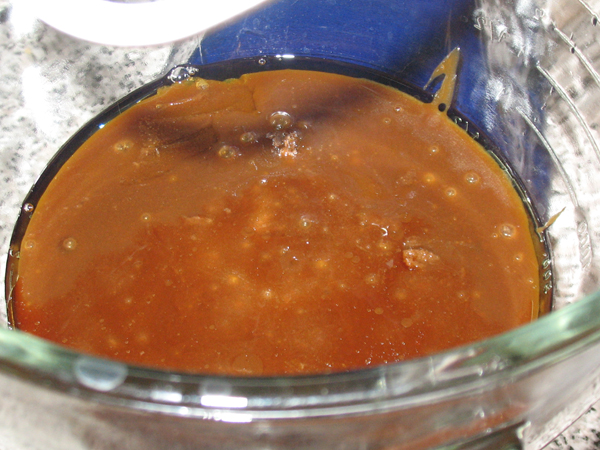
I start with speed 1 on my KitchenAid, and alternate between speeds 2 and 3. It really depends on the recipe you’re following. Compare the colour here to the first picture.
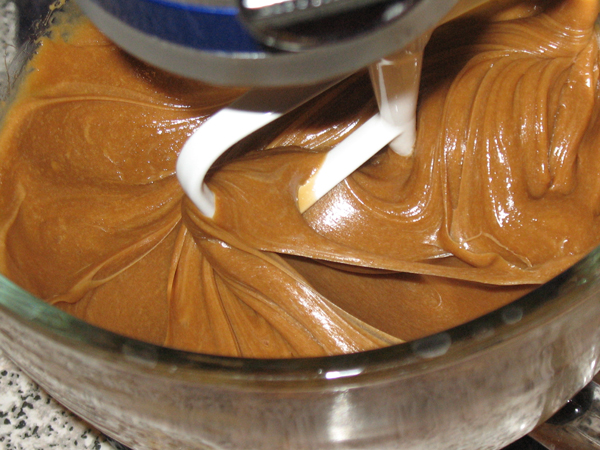
As the beater turns, the fudge will collapse in on itself to fill any void in the bowl. This flowing action will never actually stop, you can’t judge when the fudge is done by watching the beater in motion, you have to lift it.
When you lift the blade to scrape down the bowl, the fudge will flow down to the lowest point of the beater and fall down like a thick ribbon. THIS IS IMPORTANT. This ribbon is key. The way the ribbon behaves is your signal that the fudge is done. Get to know it. LOVE IT.
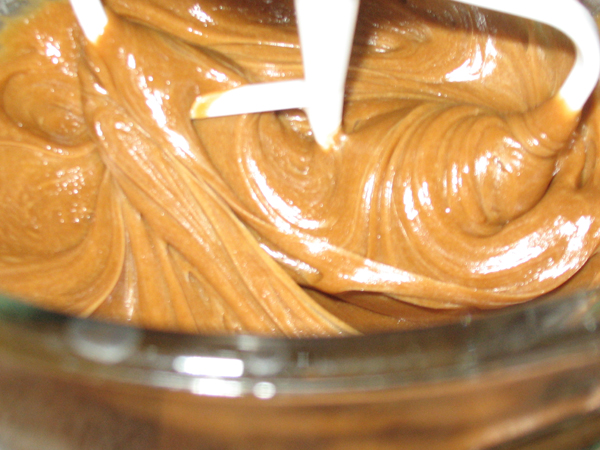
It seems like you’re not getting anywhere, when in fact, you are. After about 20 minutes, the fudge still looks the same, but see how it kind of looks like there are waves in it? If you stop the beater the fudge will still fill the void, but now as it’s mixing, you will see that wave pattern keep occurring as the blade is in motion. This is a good sign, you’re heading in the right direction.

A few minutes later it will start to look this this. Do you see how the fudge is no longer completely covering the beater as it’s in motion? The fudge is starting to look stretched.
Around 20-25 minutes you’ll notice a change when you scrape down the bowl. Now the spoon needs to be forced through the fudge, it’s not parting like water.
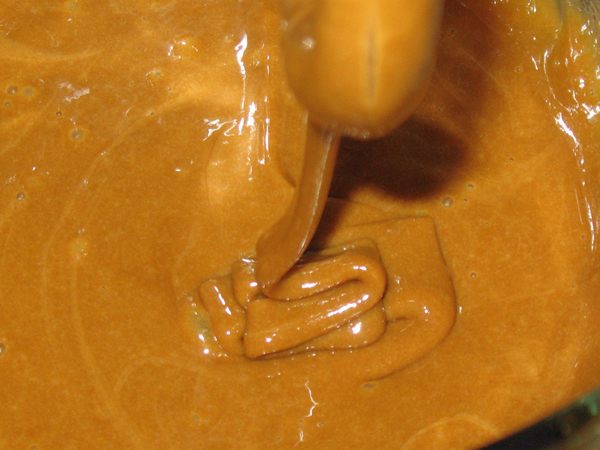
See how the fudge ribbon is partially hanging to the side? We’re getting close, it used to fall straight down from the lowest point of the beater but now it’s hanging to one side.

The ribbon becomes less opaque. If you turn the mixer onto speed 3, you may notice a slight change in the sound of it, the usual smooth whirring noise has a slight chug like it’s working harder than normal.
And when it’s ready, the fudge ribbon will get “stringy” like this. At earlier stages when you clean the beater, the fudge will pull off like a big ribbon, but now it starts separating into thin strings. That means it’s time to stop IMMEDIATELY.

If you’re adding stuff like nuts or fruit, you do that right before turning into the prepared pan.
Use a strong spatula to scoop the fudge out of the mixing bowl and into the pan. I’ve found from experience that you can scrape out the entire bowl, it will settle into the pan and will have some bubbles on the top but it doesn’t affect the taste or texture at all. The bubbles will not pop though.

Enough lecturing, I’m ready for a recipe!
I recommend Old Tyme Fudge recipes. My very first successful fudge was from this website, and the author writes simple, easy to follow instructions. The recipes are sorted by difficulty level. Start with something easy, once you’ve gotten a batch to turn out you can move onto the fancier stuff.
And now grasshopper, you are ready for the final course.

Thank you for this explanation. I was trying to figure out if I really needed to use a wooden spoon for half an hour or if I could just use a mixer. Your site is extremely hard to read on a full size screen with the low contrast text and lime green background, but I was able to see the text by highlighting it. Good to see someone else got it to work, I’m going to try it now, following your pictures. Thanks!
This was helpful.I have made my chocolate fudge and divinity for twenty years so I know how it will look when it’s ready but I’m getting ready to use my new kitchen aid artisan and needed a bit of a confidence build up! Thanx!
Sorry about the font and colour problems, thank you for letting me know.
Sorry about the font and colour problem. Thanks for letting me know.
Very helpful article. Used my new ka artesian twice in the last few days. Boy, this thing beat my fudge and barely warmed up! Love it! It’s heavy yea, but sure does it’s job.
I hope you fudge turned out great!