A dessert of ice and fire

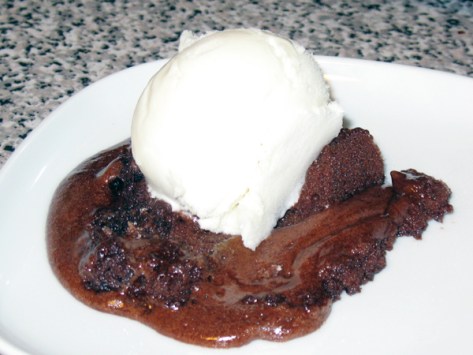
Warm cake made from Belgian chocolate, with a hot centre that erupts onto the plate, cooled with frozen yogurt. Say hello to my first lava cake!

On my way home yesterday, I ran into Boyfriend on the subway. This might not seem like a big event, since we live together, but I love serendipity. I commemorated that happy chance with a dessert that’s hot and cold, decadent and sweet.

I found a recipe for “molten chocolate cakes” in Chocolate! favourite recipes for cakes, cookies, pies, puddings & other sublime desserts by Good Housekeeping, which is available on Amazon.com and Amazon.ca.

Good to know before you start: You don’t have to cook them all at once, the batter can be refrigerated or frozen, to bake as needed – oops, wish I realized this myself!

Chocolate will seize if it comes into contact with moisture, so always make sure the pans and utensils are dry, and use low heat without a cover to prevent condensation

Time required: 1 hr

Yields: 8 cakes

Cost per portion: $3.50

Total cost if you have none of the ingredients: $28.00 or higher

Special kitchen implements I used:

  • electric beaters
  • 8 ramequins
  • baking pans large enough to hold the ramequins
  • kitchen scale

Ingredients:

  • 4 oz of semi-sweet Belgian chocolate (equivalent to 4 squares)
  • ½ C butter (1 stick), room temp
  • ¼ C heavy cream
  • ½ TSP vanilla extract
  • ¼ C granulated white sugar
  • ¼ C flour
  • 4 eggs, room temp (need 2 full eggs + 2 egg yolks)

Step 1 – preheat oven to 204°C / 400°F. Grease and sugar ramequins, and place them into baking pan(s).

Step 2 – use a serrated blade to chop the chocolate. I’m glad I used the premium stuff, because Callebaut Belgian chocolate is delicious. I get mine from Domino’s in the St. Lawrence Market.

It’s easier if you cut the chocolate from an angle.

Including the weight of the container I needed 5.3 oz, so weigh it out and set it aside.

Step 3 – take 2 of the 4 eggs, and separate the yolk from the white. Return whites to fridge.

Step 4 – using a mixer on High speed for 10 minutes, beat: sugar, 2 eggs, and 2 egg yolks. Stir down the sides a few times, and it will get thicker and lemon-coloured.

Step 5 – (I did this while the mixer was going.)

In a sauce pan on Low, melt: butter, heavy cream, and chocolate.

Stir the chocolate constantly until the mixture is smooth. Chocolate has a very low melting temperature, and it will scorch if you let it get too hot.

Step 6 – remove from heat and stir in vanilla.

Step 7 – gently whisk in the flour, until just combined

Step 8 – fold the egg mixture into the chocolate, adding one third at a time.

Mmm, the way it looked  reminded me of chocolate cheesecake ice cream, which I haven’t had since I was a kid. WANT NOW.

It took quite awhile for the batter to reach a uniform colour.

Step 9 – ladle the batter into the ramequins, and bake for 8-9 minutes.

Check for doneness by shaking the pan, the edges of the cakes should be set but the centres should jiggle.

Step 10 – cool on rack for 3 min, in pan

Step 11 – remove ramequins from baking pan, run thin blade around the edges of each cake to loosen it from the ramequin; then immediately turn them upside down onto a plate and serve

I was a little surprised how flat they look. I was expecting more volume, but since there is no leavening agent it makes sense. I added some vanilla frozen yogurt.

Verdict: Yum. I’m quite pleased. They were delicious and visually interesting. Boyfriend really liked them too, and said “Oh wow, this is good, this is really good.”  I snuck one into his lunch as a surprise when he gets to work. Am waiting to hear how it tasted after being microwaved. :/

Before last night, I had never eaten lava cakes, so I’m glad that situation has been rectified.
Lemon bars

When life hands you lemons, add sugar and rejoice.

I don’t recall eating lemon bars before, but I do love lemon and figured this would be something I’d enjoy. It’s a beautiful spring day and to help my immune system get over my cold, I planned a citrus dessert for tonight’s meal. See? You can justify any baked treat if you try!

This recipe is from Betty Crocker Baking Basics – recipes and tips to bake with confidence, which is available on Amazon.com and Amazon.ca.  If you like lemon tarts you’ll probably like this.

Time required: 2 hours

Yields: 25 pieces

Cost per slice: $1.08

Total cost if you have none of the ingredients: $27.00

Special kitchen implements I used:

  • lemon juicer
  • zester
  • electric beaters
  • baking pan: 8″ x 8″

Ingredients:

  • 1 C flour
  • ½ C butter (1 stick), room temp
  • ¼ C icing sugar
  • 1 C granulated white sugar
  • 3 lemons (2 TBSP juice and 2 TSP grated peel)
  • ½ TSP baking powder
  • ¼ TSP salt
  • 2 eggs, room temp
  • 4 drops yellow food colouring (optional)

Step 1 – preheat oven to 176°C / 350°F.

Step 2 – in a medium bowl, use a wooden spoon to cream together: butter, flour, and icing sugar.

It will form a ball:

Step 3 – place dough into ungreased baking pan, press it flat with your hand.  (The book says that if the dough is sticky, to dip your fingers in water, but I didn’t notice a problem.)

Step 4 – bake 20 minutes.  Meanwhile…

Step 5 – in a mix master bowl, beat: granulated sugar, lemon juice, lemon peel, baking powder, salt, and eggs.  Add everything at once, and beat on High for 3-4 min until fluffy.

I wasn’t able to add lemon zest because the lemons were slightly overripe, which led to easy juicing, but difficulty in grating the peel.

Foolishly, I drank a little bit of the juice – sans sugar. Wow. Sour. But it smelled so good. Lemons can be deceiving. >.<  <— that’s the face I made.

(Hmm. It occurs to me that I didn’t beat it on High, just Medium, that explains a lot…oh well.)

Step 6 – as soon as crust is finished baking, pour liquid onto hot crust.

Step 7 – bake 25-30 min.  Test for doneness by lightly pressing down onto the top, when it’s done, the top will spring back up, but if it leaves an indentation it’s not done.

Step 8 – cool 1 hour (in pan).  See how it bubbled onto the pan?  I’m not sure why the recipe said to avoid greasing the pan. Oh snap. Why are the edges so dark?

Step 9  – cut into squares…

…and sprinkle with icing sugar.

Verdict: I liked this. In retrospect I’d remove it from the oven 2-3 minutes earlier. The edges are a bit crisp. The recipe said to add yellow food colouring but I skipped that, freshly squeezed lemon juice has lots of colour.

I brought this outside and we ate it on the patio, enjoying the beautiful spring evening. Boyfriend said it reminded him of short bread cookies filled with lemon. I suspect this will go nicely with tea.

Playlist: hard rock

“Down with the sickness”

Well, I am sick. Boyfriend came home from work with a nasty bug, and within two days I caught it, and this is officially a House of Misery ™.

Not much baking going on here. Currently the fanciest thing I’m making is soup from a can. Actually I’m not even doing that, just lying on the couch and sadly mumbling about tea and soup, until Boyfriend catches my subtle hints and makes it for me.

Easter dinner was a far cry from what I’m used to; grilled cheese sandwiches and canned soup. That would be horribly depressing, but luckily on Good Friday, Boyfriend and I were invited to dinner with friends at their home, and it was lovely – if I focus on Friday instead of Sunday it’s okay.

I haven’t done much this weekend, aside from playing the new Mortal Kombat game on PS3. If you enjoyed the first three MK games, do yourself a favor and buy it. Right now. It is so good, it’ll make you forget about all the mediocre games released between 1997 and 2010. Total old school goodness. This is the first MK I’ve loved in 15 years.

In fact, this MK is so good, it almost makes me forget about the pain in my throat and the ringing in my ears – almost.

Patty’s pumpkin cheesecake bites

This idea has been percolating in my brain for awhile. I like pumpkins. I like cheesecake. Could they combine into something cool like Voltron? Turns out yes, yes they can.

The pumpkin is a native squash of North America and harvested in autumn. Being Canadian and born in October, this pleases me greatly. How many other types of produce can be used as doorstops and in competitive sports? I’m dying to go pumpkin chucking now.

Good to know before you start:

  1. The proportions that I used yielded a cheesecake with a subtle flavour. If you like the bold taste of pumpkin and want that punch-out flavour you’ll need to increase the amount of pumpkin and spices used.
  2. Let the cream cheese sit at room temperature for at least 2 hours.

Time required: 2 days (overnight chilling)

Yields: between 40-64 pieces

Cost per slice: $1.42

Total cost if you have none of the ingredients: $57.00

Special kitchen implements I used:

  • electric beaters
  • baking pans: 9″ x 13″ nestled inside a 14.5″ x 10.5″ pan
  • tinfoil & plastic wrap
  • flour sifter (for the sugar)

Crust ingredients:

  • 5 TBSP unsalted butter, melted
  • 1¾ C graham cracker crumbs
  • 1/4 TSP ginger

Filling ingredients:

  • 4 blocks of cream cheese, softened (32 oz or 1,000 g)
  • 1¼ C dark brown sugar
  • ½ TSP cinnamon
  • ⅛ TSP cloves
  • ⅛ TSP pumpkin spice
  • ⅛ TSP allspice
  • ⅛ TSP nutmeg
  • pinch of ginger
  • 2 TBSP powdered cornstarch
  • ½ C heavy cream
  • ½ TSP vanilla bean paste
  • 5 large eggs, room temp
  • 1 C pumpkin filling

Topping ingredients:

  • 1½ C sour cream
  • 3 TBSP granulated white sugar
  • 1 TSP vanilla bean paste

Step 1 – using centre rack, preheat oven to 176°C / 350°F.  Fill kettle and boil. After water boils, leave on Low for use later.

Step 2 – line 9″ x 13″ baking pan with foil, and grease the foil.

Step 3 – melt butter in sauce pan on Low.

Step 4 – measure out the graham cracker crumbs and mix in the ginger.

Step 5 – stir graham crumbs into butter and remove from heat.

Step 6 – press the crumbs into the prepared pan by hand and bake 10 min, then cool on rack.

Step 7 – in a medium bowl, combine: brown sugar, cinnamon, cloves, pumpkin spice, allspice, nutmeg, ginger, and cornstarch.

Stir them together, and since brown sugar tends to clump I ran it through a flour sifter.  (This picture is before sifting.)

Step 8 –  in mix master on Medium speed, beat cream cheese for 5 minutes. Use a  rubber spatula to scrape down the sides of the bowl constantly.

Step 9 – once the cream cheese is beaten up, stir in the sugar mixture, one third at a time.

Step 10 – beat in the eggs, one at a time, don’t over beat.

Step 11 – beat in pumpkin filling.

Step 12 – stir vanilla bean paste into heavy cream, the add to cream cheese.

Step 13  – pour into prepared pan, and place that pan inside the large baking pan. Using the hot water from the kettle, pour water into the outside pan so it rises about halfway up the side of the pan containing the cheesecake.

Bake in oven 50 minutes. When you remove cake from oven, turn oven off.

Step 14 – in a small bowl or measuring cup, mix together sour cream, sugar, and vanilla bean paste to create topping.

Pour this onto the cheesecake and carefully spread it with a soft spatula.

See the little black flecks? Those are the pods from the vanilla bean.

Step 15 – place this back into the oven for 5 minutes (oven is off).

Step 16 – cool on rack for 2 hours, then cover with plastic wrap and refrigerate overnight.

Step 17 – in the morning use the tinfoil to lift the cake out of the pan. Use a hot knife and cut it into 8 or 9 strips, and then cut each strip into 5 or 6 pieces.

Step 18 – let pieces sit at room temperature for 20 minutes before consuming.

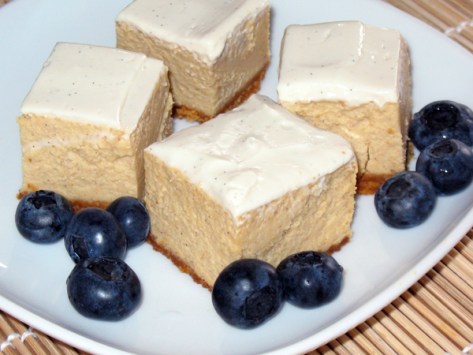
Verdict: I’m very happy with this. Initially I worried that the spices and pumpkin would be overpowering, so went easy on those amounts, but next time I’d increase it to 2 cups of pumpkin filling, and at least half a teaspoon for each spice. This particular cheesecake had a subtle yet distinctive pumpkin flavour. I garnished them with blueberries and fired up the espresso machine to make cinnamon dolce lattes for two. Boyfriend said, “Yum.”

I’m famous! SpatulaGoddess in a restaurant near you!

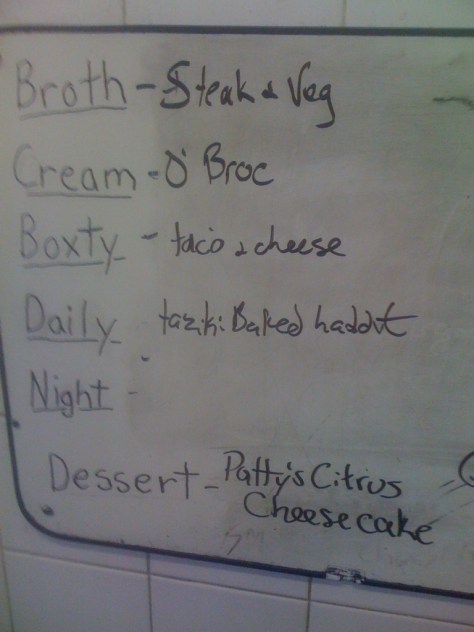
My citrus cheesecake is the featured dessert at The Old Triangle Irish Alehouse this week in Moncton!!

The restaurant is located at 751 Main Street, downtown Moncton, NB, E1C 1E5, and opens at 11am daily. If you’re in the area check it out!

I found out a few minutes ago. So cool. I love the Maritimes!

Patty’s blackberry crostata (that wasn’t)

A crostata is type of pie, an Italian baked dessert tart with an open face. It has a bottom crust and a filling, but no top crust. The pastry is folded so it comes up over the edge of the fruit and forms a small rim.

I won’t write this step-by step because if you can’t make a pie already, frankly you’re doomed. Here is the abbreviated version:
  • Roll a pie crust flat and place it on a cookie sheet
  • Make filling: mix 2-3 C fruit with ¼ C sugar & 2 TBSP flour
  • Place filling on crust, stopping about 2-3″ from the edge
  • Fold the crust up and over the edge of the fruit pile
  • Use your google-fu to view methods of folding the crust
  • Bake at 218°C / 425°F for 30-35 minutes
  • Cool and devour

I made mine with blackberries, which tasted wonderful, but alas not quite so picturesque:

And it all seemed to be going so well! Until I started rolling the pastry, and then I started swearing like a sailor and shouting in rage. After it finished baking and we sampled it, I changed my mind. This tasted great. Pie + blackberries = win.

Pie crust is the bane of my existence. All of my pie crusts are uneven, torn, patched, and could not be called “round” even if you were being generous. They become something which I not-so-fondly refer to as  “Frankencrust”.

Sorry pie crust, it’s not you, it’s me.

It has to be me, because this recipe in the hands of other people works out well, which leads me to believe the problem is my pastry rolling technique, or lack thereof.  I’ve tried making the pasty in advance, refrigerating the pastry before rolling, the counter and rolling pin are nicely floured, used a chilled marble slab, rolling from the centre in the method described by others, and still no luck.

Boyfriend says I am too hard on myself, and that the taste is important, not the look. I just can’t help from wishing that I could “get it”. I want to make a pie that looks so awesome you say OMG WANT NOMNOMNOM. Not something that looks like it fell off the reject pile.

I thought a crostata was the answer I had been searching for. A pie with half the crust, how easy this will be. Hah. My cookbook has a lovely picture of a crust folded over like some ninja pastry origami, and while I knew my first attempt would probably have room for improvement, I wasn’t expect this.

If a pastry with half the amount of crust isn’t the answer, all I can do is keep trying. Boyfriend is wholly behind this idea.

Hot fudge sauce

An “impact event” occurs when two celestial bodies collide. Chocolate being the food of the gods, a Baking impact event is when two flavours hit you like a bolt of lightning and your taste buds sing; everything changes and you dream up more ways to bring them together. That’s how I feel about hot fudge sauce and frozen yogurt. So simple, so delicious!

I made hot fudge sauce for Boyfriend tonight as a surprise. I learned to make this when I was 8 years old, it’s from Master Your Microwave which is available on Amazon.ca. The book stands out in my mind for 2 reasons; it was the first recipe I ever made of my own volition, an innocent time when I didn’t understand arcing and would put metal pans in the microwave to watch the pretty blue sparks. (Sorry Mom.)

Time required: 10 minutes

Yields: double batch

Total cost if you have none of the ingredients: $18.00

Cost per serving: minuscule

Kitchen implements I used: microwave & microwave-safe glass bowl

Ingredients:

  • 1 C granulated white sugar
  • 6 TBSP cocoa
  • 3 TBSP powdered cornstarch
  • pinch of salt
  • 1 C water
  • 4 TBSP butter
  • 2 TSP vanilla

Instructions:

Step 1 – in large glass bowl, combine dry ingredients

Step 2 – whisk in water

Step 3 – microwave on High for 8 minutes, stirring every 60 seconds.

It remains fairly watery until the 6 minute mark, and at that point it starts turning into a thick gelatinous goo (which was considered and discarded as a potential name for this blog):

After the 8 minute mark, it’s thoroughly thickened up:

Step 4 – stir in butter and vanilla, whisking until thoroughly combined

Step 5 – add to frozen yogurt…

… or stuff it into a cream puff. (Great idea Boyfriend!)

Verdict: delicious as expected! I used to make this all the time but haven’t made it in years, and found myself yearning for some tonight. Alas I had no bananas to add to my sundae. You could also make some fresh caramel, mmmmm.

Boyfriend said, “Oooh. That’s good. That’s really good. It’s like everything that’s good melting in your mouth at the perfect temperature.”

Patty’s blackberry cream puffs

A flaky pastry bursting with freshly made whipped cream and tart blackberries is a wonderful way to start your morning.

It’s a good thing I love blackberries because I still have quite a lot of them. Last night I was musing over what to make with them, using ingredients I already had in the cupboard, as I was chatting with Best Friend.

Our conversation reminded me of the day in high school that Best Friend made éclairs on a whim (the first and only time she made them), and they were perfect. This led to inspiration, since a cream puff and an éclair are the same pastry, just shaped differently, and I thought the cavernous insides of a cream puff would be the perfect place to use some berries. Voilà!

My relationship with pastry is wary at best so I used a recipe from Better Homes and Gardens New Cookbook, which is available on Amazon.ca. It’s a good hardcover with a ring binding, lots of pictures and useful tips.

Time required: 1.5 hours

Yields: 12 pastries

Cost per pastry: $2.17

Total cost if you have none of the ingredients: $26.00

Kitchen implements I used:

  • beaters and mixing bowl
  • cookie pan
  • parchment paper

getting started

Pastry ingredients:

  • 1 C water
  • ½ C butter (one stick)
  • ½ TSP salt
  • 1 C flour
  • 4 eggs

Filling ingredients:

  • 1 C heavy cream (whipping cream)
  • 2 TBSP icing sugar
  • ½ TSP vanilla
  • 2 TBSP granulated white sugar (set aside)
  • 2-3 containers of blackberries (set aside)

Good to know before you start:
Place the mixing  bowl and beaters in the fridge now to chill them for the whipped cream – some people will say you don’t need to do this but I find it helps to make a fluffy cream

Don’t stuff the pastry with the filling until ready to serve, to prevent sogginess

Instructions:

Step 1 – preheat oven to 205°C / 400°F.  Line cookie pan with parchment paper (oops, forgot to do that).

Step 2 – measure out flour and set aside.

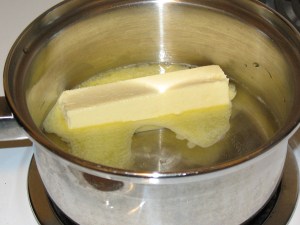
Step 3 – in a sauce pan, combine water, butter, and salt. Heat to boiling.

Step 4 – as soon as it boils, add all the flour (don’t let it sit boiling away or it will start evaporating). Stir vigorously until dough forms a ball, and remove from heat.

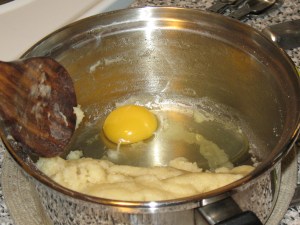
Step 5 – let mixture stand on counter for 10 minutes. Then beat in eggs, one at a time.

Step 6 – drop 12 heaping spoonfuls of dough onto cookie sheet…. hmmmm, something is amiss!  Oh well no matter.

Step 7 – bake 30 minutes and tops should be golden brown. Remove from heat and transfer pastry to wire rack. Cool at least 40 min. (Wishing I had remembered to use parchment paper because they did stick to the pan a little.)

Step 8 – meanwhile in chilled bowl with beaters on Medium; beat heavy cream, icing sugar, and vanilla until soft peaks form.  Some people recommend you wait until the cream is beaten to add the sugar and vanilla but I wanted to get back to my Assassin’s Creed game.

Whipped cream is so easy to make, I’ll never understand why people buy it in stores when the homemade stuff is so much better.

Step 9 – wash and drain the berries.  If the berries are tart sprinkle sugar onto them and toss.

Step 10 – once pastry is cooled, use sharp knife to cut a seam near bottom of pastry, and if you look inside you’ll see it’s fairly hollow.

Step 11 – stuff those bad boys with as much whipped cream and berries as desired!! In this one, the cap of the pastry is filled to capacity. XD

Verdict: Delicious! A perfect addition to afternoon tea or to round off a meal. I suspect this will be equally tasty with blueberries or raspberries, or whatever else you fancy, or drizzled with chocolate ganache. If you have never made this type of pastry before you might be surprised by how few ingredients are required, and how quick and easy it is to make.

Playlist: Meat Loaf

Patty’s blackberry lemon loaf

I remember the first time I ate blackberries. I was in the woods with Dad exploring rural Nova Scotia in the summer, and he pointed out the blackberry cane and said they were good to eat. My first impression was “most delicious marvelous”.

I bought some blackberries the other day and wondered what I could make.

Getting started:

Time required: 3 hours (40 min prep, 1 hr baking, 1 hr cooling)

Yields: one loaf

Total cost if you have none of the ingredients: $32.00

Kitchen implements I used: loaf pan 8″ x 4″

Ingredients:

  • 2 C flour
  • 1 TSP baking powder
  • ½ TSP baking soda
  • ½ TSP salt
  • ½ C to ¾ C sugar (less for sweet berries, more for tart)
  • 1 large egg
  • 1 TSP vanilla
  • 3 TBSP vegetable oil
  • ½ C milk
  • 2 lemons (squeeze ¼ C lemon juice)
  • 1½ C blackberries, washed and drained

Step 1 – preheat oven to 177°C / 350°F.  Lightly grease and flour loaf pan.

Step 2 – using large bowl, whisk together: flour, baking powder, baking soda, salt.  Divide this in half.

Step 3 – using medium bowl, whisk together: sugar, egg, vanilla, and vegetable oil.

Oops, forgot the vegetable oil.

Step 4 – stir half of the dry mix into the wet.

Step 5 – stir in milk and lemon juice. Added the forgotten vegetable oil.

Step 6 – stir remaining dry mix into wet.

Step 7 – fold in berries.  Don’t over stir the batter now or the berries will bleed (unless you want purple streaks through the loaf, if so go crazy)

Step 8 – spoon batter into pan, use spatula to flatten it out

Step 9 – bake 40-50 minutes, when loaf is done toothpick comes out clean (I baked this for 55 min and found the top a bit overdone). Run a knife along the edges of the loaf to loosen from the pan.

Step 10 – let loaf sit in pan for 10 minutes before removing from pan, then cool one hour before slicing. Oh bloody hell not again!!

Sigh. This is now the 5th time my cake-like creation has cracked in twain. On the other hand, I did get a really interesting picture that I wouldn’t have gotten otherwise.

I’m getting really tired of this!!

Verdict: it tasted lovely but looked hideous. I’m at a loss as to why this keeps happening. Next time I’ll reduce baking time by 10 minutes, but I’m not sure what to do to prevent the splitting. <sad face>

Gingerbread top loaf

There are times in life when one hits the jack pot, and I am reminded of this  whenever I open to door to Mom’s house and the warm, sharp scent of a ginger loaf wafts out. This smell alerts a primal area of my brain that soon I will be enjoying tea, a warm piece of ginger loaf, juicy gossip, and fending off questions about Boyfriend.

Alas for me, I do not get to visit Mom’s house often. Time gives perspective and city living certainly has some amazing advantages, but now that I’ve been Away for 4.5 years, I’ve realized that there are some things I will never find up here, such as homemade goods. <sad face>

Luckily I just spent 2 weeks visiting home; and aside from the simple pleasures of getting to know my new niece and listening to Grandpa’s stories, I enjoyed numerous tasty treats!! I’ve been back in the city for a few days, and this weekend I decided the first thing I would bake would be Mom’s gingerbread loaf.

Oh, how innocently it began!

Good to know before you start: if you are feeling congested this is a great dish to make, it clears out your sinuses like you wouldn’t believe

Time required: 2.5 hours (30 min prep, 40 min baking, then cool)

Yields: 16 pieces or more

Total cost if you have none of the ingredients: $26.00

Kitchen implements I used:

  • pastry blender
  • baking pan 9″ x 9″

Ingredients:

  • ½ C shortening
  • ½ C granulated white sugar
  • 1 egg, room temp
  • 1 C molasses
  • 1 C boiling water
  • 2¼ C flour
  • 1½ TSP baking soda
  • 1 TSP salt
  • 1 TSP ginger, ground
  • 1 TSP cinnamon, ground
  • ½ TSP cloves, ground

Step 1 – pre-heat oven 177°C / 350°F. Boil water in the kettle.

Step 2 – grease and flour a 9″ x 9″ pan. Hmm. Something seems odd.

Step 3 – in a small bowl combine: flour, baking soda, salt, ginger, cinnamon, and cloves.

I used a wire whisk to blend the dry ingredients, and before I measured the molasses, I sprayed a light coat of Pam into the measuring cup. (Works like a charm when you’re dealing with sticky ingredients like this or peanut butter.)

Step 4- in a large bowl, cream shortening, sugar, and egg, until fluffy.

In retrospect I’m not sure if a pastry blender was the best idea for this, it was a bit lumpy.

Step 5 – add molasses to wet mixture and beat in well.

Step 6- stir in boiling water.

Step 7 – add dry mixture to wet.

Step 8 – pour mixture into baking pan, bake 45 min. Remove loaf from pan.

Step 9 – cool on rack for at least one hour. This is the moment everything fell apart. Much cursing was done.

I examined the part that remained in the pan. It wasn’t burnt, just stuck. I used a spatula to remove it, and tried setting it in place, which was a bad idea.

So I took the bottom part back off, hence “top loaf”. And you know, it smelled right, and it looked right (until it came out of the pan). That’s when I realized I used the wrong size pan.

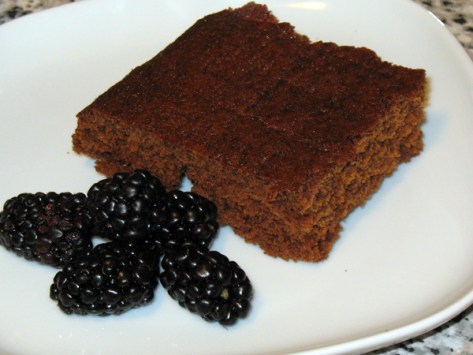
Verdict: What a nightmare. The top side of the loaf was slightly overdone, it had a faint crispness that should not have been there, when ginger loaf is done correctly it’s got the same consistency of banana bread. I assume this was caused by the dough being spread too thin by the length of the pan.

Boyfriend and his friend tested it, and said it was good, but I know I can do better. I was so discouraged, this is the 4th cake/loaf-type thing I’ve made in recent months that fell apart, all that effort and care gone to waste.  Maybe I’ll try this again tomorrow in the proper pan.