Spiced apple & pears

Imagine a warm bowl of apple sauce, with chunks of apple and pear, spiced with cinnamon, cloves, and vanilla bean. While it’s cooking, the most tantalizing smell will have you finding excuses to linger in the kitchen. A sweet topping so warm that it melts the frozen yogurt underneath.

I found this recipe in a book that my mother gave me, Slow Cooker Magic in Minutes, which is available on Amazon.com and Amazon.ca.

It’s a hard cover book with a ring binding and colour photos, with lots of different slow cooker recipes, including some delicious desserts. Prior to reading this I was not aware you could make a dessert in a crock pot. I thought the idea was a little odd, actually, before I tried one. Turns out that slow cooked desserts are amazing!

Good to know before you start:

Sometimes vanilla bean can be substituted with vanilla extract. This is not one of those times. Get the bean! Your taste buds will thank you.

After this has finished cooking and you’ve had a bowl, the rest should be covered and refrigerated. Later you’ll notice that fat rises to the surface (just like stew). Skim that off, and heat the portion that you want to serve.

Don’t use over ripened fruit unless you enjoy the feeling of something disintegrating in your hands. On that same note, if your pears are not quite ripe that is okay, wooden pears are fine for this.

Use either 6 medium-sized fruits or 5 large ones.

getting started

Time required: 6 hours (70 min prep time, the rest is slow cooking time)

Yields: a lot, you will run out of ice cream before you run out of topping

Total cost if you have none of the ingredients: $30.00

Kitchen implements I used:

  • apple peeler & apple corer
  • slow cooker

Ingredients:

  • 5 tart apples
  • 5 pears
  • 8 TBSP butter, unsalted (one stick)
  • 1 vanilla bean
  • 1 lemon (use half)
  • 1 cinnamon stick
  • ½TSP cloves, ground
  • ½ C water
  • 1 C brown sugar, packed

Step 1 – Peel and core apples and pears. Cut each apple slice in thirds, cut each pear slice in half. Place in slow cooker. Don’t worry about the fruit browning.

Cut each apple slice into thirds, and check the middle piece for any core remnants:

Slice the pears horizontally (errr… diagonally):

Place the flat part of the pear on the cutting board and core it, and then each pear slice should be cut in half:

Step 2 – Melt butter in sauce pan on Low.

Step 3 – Add all other ingredients to butter:

  • split and scrape vanilla bean, add seeds and pod
  • cut cinnamon stick in half, add both halves
  • use half of lemon, peel it and remove seeds, add pulp and juice
  • then add brown sugar, cloves, and water

Step 4 – Bring pot to a boil, and boil for 1 min, stirring often.

Step 5 – Pour liquid over apple and pears. Stir until mixture coats all fruit. Bury the bean pod and cinnamon sticks under the fruit.

Step 6 – Cover and cook, stirring every 45 min.  Cook times vary. The book recommends either up to 4 hours on Low, or up to 2 hours on High.

I cook it at leat 5 hours on High and I’ll show you why.

After 45 minutes:

After 90 minutes:

After 135 minutes:

After 180 minutes:

I think it’s best when the fruit has broken down to this stage and everything is soft. It’s a very versatile dessert. I have enjoyed it several ways; served warm on its own, or on top of a bowl or vanilla frozen yogurt, and on pound cake.

warm spiced apple and pear fruit toppingThe book also recommends with whipped cream, crème anglaise, or sponge cake, but I haven’t tried these last three.

One dish of spiced apple pears a day keeps the winter chill away!

And then there was one

Despite that fact that really, I am not a morning person, I actually do enjoy mornings. Boyfriend would disagree, but I’ve never claimed to enjoy the process of waking up or getting out of bed – shudder – however there is something intangible to be found in being the only one awake, and having your home to yourself. Presently I am drinking tea and waiting for Boyfriend to wake up.

After another frustrating hunt through the kitchen it occurs to me that Boyfriend and I ought to re-organize and reduce our possessions. The kitchen is not very big, and after knocking something over for the umpteenth time I flipped out and  took a count.  I found:

  • 2 bread makers (same model)
  • 2 slow cookers (different sizes)
  • 2 toasters (one functional, one… novelty)
  • 5 cutting boards (seriously?!!)
  • 2 kettles (stove-top and electric)
  • 3 indoor grills (various sizes)
  • 3 sets of dry good canisters
  • ridiculous amount of dishes, particularly mugs and glasses
  • numerous duplicate utensils and implements
  • pots and pans up the wazoo
  • endless Tupperware

How did this happen? After the Great Tupperware Purge of August 2010 I don’t understand. Does it spawn more?

Suddenly my habit of buying a mug from new places I visit for the first time no longer seems whimsical, just poor future planning. Especially when out of all the mugs I own, the only one I use is the big green one. But say goodbye to my keepsake from Stonehenge, or the AGO, or the zoo? Never!

When we moved in together, the idea of reducing household items was loosely discussed, and I think we just went with the notion that if both people had the same thing, keep the one in best condition and donate the other.

And then the Resistance started. Neither was willing to part with our bread makers, when both were gifts from our families.

“How nice it will be to make two loaves at once!” I said. (Which we did a grand total of one time.)

“How useful it will be,” Boyfriend said, “to have my electric kettle as back up in case the stove stops working. You’d be sad without tea.”

“I can’t give up my slow cooker!” I said. “My mom gave that to me.”

“So did mine!” he said.

“My toaster actually works,” I said. “Yours has a fake hand inside it.”

“My friends gave me this! I’m not getting rid of it!” he said.

“Fine. Just don’t put it on the counter, that’s valuable kitchen real estate.”

And so it goes on. Maybe this would be a good weekend to re-watch Fight Club, and reflect on how “The things you own end up owning you.”

Apple cake with cream cheese frosting

This was a delicious accident. It was supposed to be my first carrot cake, but instead became my first apple cake, with cream cheese frosting.

apple cake with cream cheese frosting

Back in November I purchased Betty Crocker Baking Basics – recipes and tips to bake with confidence, which is available on Amazon.com and Amazon.ca. It’s been a very useful book.

I planned to make the carrot cake recipe but didn’t have any carrots, so I went to the store, and was promptly distracted by the shiny apple display. I came home and emptied my shopping bag, perplexed with what to do with a bag of Granny Smith apples and cream cheese.

Not to worry! A spice cake can be made with either apples or carrots, and all the other ingredients remain the same

Good to know before you start:

This cake is perfectly delicious without frosting at all, however if you intend to frost this, take the cream cheese out of the fridge now.

After frosting cake must be refrigerated. Let frosting set before cutting.

getting started

(Here is the moment I realized I bought apples instead.)

Time required: 2 hours

Yields: 32 squares

Cost per slice: $1.63

Total cost if you have none of the ingredients: $52.00

Kitchen implements I used:

  • apple peeler & apple corer
  • spatula (do not use a flexible one)
  • baking pan: 9″ x 13″
  • electric beaters

Cake ingredients:

  • 3 tart apples (or 6 medium carrots)
  • 1½ C granulated white sugar
  • 1 C vegetable oil
  • 3 eggs, room temp
  • 2 C flour
  • 1½ TSP ground cinnamon
  • 1 TSP baking soda
  • 1 TSP vanilla
  • ½ TSP salt
  • ¼ TSP ground nutmeg

Frosting ingredients:

  • one package (8 oz) cream cheese, room temp
  • ¼ C butter (half a stick or 4 TBSP), room temp
  • 1 TBSP milk
  • 1 TSP vanilla
  • 4 C icing sugar

Step 1 – preheat oven to 176°C / 350°F, centre rack. Grease and flour baking pan.

Step 2 – peel apples, core apples, and dice into small pieces. Set aside.

apple peelers are GREATso are coring devices

Step 3 – in medium bowl combine:  flour, cinnamon, nutmeg, baking soda, and salt. Set aside.

Step 4 – in large bowl, beat on Low for 30 seconds: sugar, oil, vanilla, and eggs.

Step 5 – beat dry ingredients into wet, adding a third at a time until blended. Once all dry mixture is added, beat on Low for 1 min, frequently scraping the sides.

adding dry to wet

Step 6 – using a hard spatula, stir apple pieces into batter

never using a flexible spatula again

Step 7 – “pour” (hah!) batter in greased pan, use spatula to smooth batter down. Shake pan and let it settle for a few minutes, then place in oven.

Step 8 – bake 40-45 min, it’s done when toothpick inserted in the centre comes out clean. Cool cake in pan, on rack, at least 1 hour.

Step 9 – remove cake from pan and make your frosting.

Step 10 – forgot to take pictures of making the frosting but it wasn’t that exciting anyway:

  • In medium bowl on High, beat the cream cheese until smooth.
  • Add butter, milk, vanilla, and beat on Low until smooth.
  • Still on Low, beat in icing sugar, one cup at a time, until mixture is smooth and spreadable.
  • Store frosted cake in fridge, covered.
  • Let frosting set before cutting cake. Oops.

You can’t tell, but before frosting this I cut off a piece to try the cake on its own. Yum.

mmm I love creamcheese frosting

apple cake with cream cheese frosting

Verdict: I loved this. Boyfriend’s reaction was lukewarm.

Two things I’ll change next time; use apple sauce instead of vegetable oil, and instead of frosting the cake after it cools, I’m going to make the frosting and put it in the fridge, and just frost pieces as they are served because storing a frosted cake in the fridge was irritating.

My favourite part of making this dessert was that while baking, it perfumed my whole home with spiced apple goodness.

Oreo stuffed chocolate chip cookies

A few weeks ago I was googling… something, and found a recipe for a chocolate chip cookie, stuffed with an Oreo. Intriguing!

As far as I know, this idea originated on Picky Palate. I decided to stick with my own chocolate chip cookie recipe, and purchased a bag of double stuffed Oreos. (Purchasing factory-made cookies made me feel like a barbarian.)

Making them was fun, and they’re certainly monstrous:

I suspect these cookies might be very popular with the 4:20 crowd.

Not being part of that crowd myself, I was unmoved.

First bite after the cookie had cooled:

Verdict? Boyfriend thoroughly enjoyed them, and so did our friends. But personally I wasn’t wowed.

They certainly added something to my cookies but I’m not convinced that something was good. I’m glad I tried them but doubt I’ll make them again.

The warm creamy centre was tasty, but the Oreo wafer felt like an intrusion. Maybe twist the brown wafers off and just use the cream to stuff them?

Dunking them in milk was fun. It got me thinking of two future experiments:

  • FudgeeO stuffed double chocolate cookies
  • Pirate stuffed peanut butter cookies

Though I suspect turning either of those ideas into fruition would result in people being unable to poop for a week.

Citrus cheesecake bites

Last night marked my 2nd venture into Cheesecake Territory, to make a creamy filling with tangy citrus fruits, on a bed of vanilla crumbs, topped with a hint of sour cream. I ate a piece this morning with my cup of tea, and oh my!!

Food for thought: did you know that cheesecake originated in Ancient Greece over 4,000 years ago, and that the citrus fruit comes from Southeast Asia?

I found a recipe for “lemony cheesecake bites ” in Good Housekeeping Brownies: favourite recipes for Blondies, Bars & Brownies, which is available on Amazon.com and Amazon.ca.

The recipe title is misleading since it contains lemon, lime, and orange, hence the rename above.

I love citrus fruits. Everything about them appeals to me as an artist; the pleasing round shapes, the colourful peels, the juicy fruits inside, the range of flavours from sweet to tart, and the scent that rises as you open them. The possibilities;  lemon tarts, lemonade, lemon gin, lime Thai, freshly squeezed orange juice….  and they ward off scurvy, too! Let’s hear it for citrus.

Good to know before you start:

  1. remove cream cheese from fridge at least 2 hours before starting
  2. remove the other dairy (butter, cream, eggs) 30 min before starting
  3. do NOT remove the sour cream from the fridge before you need it
  4. you could probably get away with using 1  lemon, and less sour cream
  5. invest in a juicer, they are cheap, they are great
  6. you make the crust first, and while it’s cooling make the filling, and while it’s baking make the topping, which is chilled until needed

Time required: 2 days (overnight chilling)

Yields: 64 pieces

Cost per slice: $0.31

Total cost if you have none of the ingredients: $32.00

Kitchen implements I used:

  • juicer
  • grater / zester
  • rolling pin
  • electric beaters
  • baking pans: 9″ x 13″ nestled inside 14.5″ by 10.5″
  • tin foil, plastic wrap,  & plastic freezer bag

Crust ingredients:

  • 5 TBSP unsalted butter, melted
  • 1 lime (need ¾ TSP freshly grated peel)
  • 1¾ C vanilla wafer crumbs (Mr. Christie’s Nilla vanilla flavoured wafers)

Filling ingredients:

  • 2 lemons, large (need ¼ C juice and 1 TBSP freshly grated peel)
  • 1¼ C granulated white sugar
  • 2 TBSP cornstarch
  • 4 blocks of cream cheese, softened (32 oz or 1,000 g)
  • ½ C heavy cream
  • 5 large eggs, room temp

Topping ingredients:

  • 1½ C sour cream
  • 3 TBSP granulated white sugar
  • 1 orange (need 1 TSP freshly grated peel)

Step 1 – using centre rack, preheat oven to 176°C / 350°F.  Fill kettle and boil. After water boils, leave on Low for use later.

Step 2 – line 9″ x 13″ baking pan with foil, and grease

Step 3 – place cookies in freezer bag and crush with rolling pin, set crumbs aside  (forgot to count how many cookies this requires)

Step 4 – melt butter in sauce pan on Low

Step 5 – grate lime peel, stir into butter, and remove from heat

Step 6 – stir cookie crumbs into butter

Step 7 – spoon crumbs into foil-lined pan, and press down by hand (note: pressing down crumbs with spoon failed, use hand)

Step 9 – bake 10 minutes and cool on wire rack

Step 10 – from lemons, grate peel and set aside, then squeeze juice and set aside.

Step 11 – in a small bowl whisk sugar and cornstarch together

Step 12 – in mix master or large bowl, on Medium speed, beat cream cheese for 5 minutes.  Use a flexible rubber spatula to scrape down the sides of the bowl constantly. Already I am impressed with the texture, looking much better than the previous attempt.

Step 13: one by one, beat in the sugar mix (adding a third at a time), followed by heavy cream, lemon juice, and lemon peel.  It is important to make sure each ingredient is blended well before adding the next. Keep scraping down the sides.

Step 14 – on Low speed, beat in eggs one at a time until just blended, do not over beat

Step 15 – pour filling onto crust, and place 9″ x 13″ pan inside 14.5″ x 10″ baking pan, to form water bath. Carefully pour hot water from the kettle into the larger pan, it should rise about halfway up the side of the small pan.

Step 16 – carefully lift large pan and place in oven, bake 50 minutes until just centre jiggles, then remove from oven and place on rack (turn off oven)

Step 17 – while cake is baking, make topping; in a small bowl stir in sour cream, sugar, and orange peel, cover and return to fridge

Step 18 – immediately after removing cake from oven, spoon sour cream mix onto hot cake, use soft spatula to spread it evenly

Step 19 – return cake to oven for 5 minutes (oven is off)

Step 20 – remove from oven and carefully remove the smaller pan (which holds the cake) from the large pan

Step 21 – place smaller pan on cooling rack until completely cooled, at least 2 hours

Step 22 – cover pan tightly with plastic wrap, chill in fridge overnight

Step 23 – in the morning, use edges of tinfoil to carefully lift the cake out of the baking pan, and use a hot knife to cut a few pieces, return remainder to fridge

Step 24 – let pieces sit at room temp for 10 minutes before consuming

Verdict: citrus cheesecake is delicious. I am really pleased with how this turned out. It smells (and tastes) amazing. Although the lemon is the first flavour you notice, after taking a bite and letting it sit in your mouth, you’ll taste the lime and orange, set off perfectly by the sour cream. I think I’m in love.

Glad I opted to use freshly squeezed fruits instead of bottled juice. It took longer to make than anticipated but I forgot to time myself.

I’ve learned a few things since making my first cheesecake:

  1. cream cheese takes a long time to reach room temperature (2 hours+)
  2. yes, it is important to continually scrape down the sides of the bowl
  3. grating the zest from citrus fruits sucks
  4. yes, the hot knife really should be cleaned and re-heated after each cut
  5. yes, a water bath actually can be too high
  6. always read the instructions with appliances that Mom gives you

Current playlist: Gothic metal

Untitled post is untitled

Tonight I’ll be making a cheesecake bar dessert, but in the meantime, I read a fantastic book recently; Into Thin Air by Jon Krakauer.

It’s a personal account of the disastrous Mt. Everest climb of 1996. The first IMAX movie I saw was  Everest, which (unbeknownst to me) was filmed during the same time that the events of the novel occurred. I will definitely watch the film again soon.

Today I’m on the hunt for a specific item, a 10.5″ x 15.5″ baking pan deep enough to hold a 9″ x 13″ pan, for a water bath, for tonight’s dessert.

However, I sort of overslept and Boyfriend was kind enough to nag me out of bed before he left for the day, and I’m cold. Brrrr. Before venturing outside I am waiting for A) my hair to dry and B) the store to open.

I had a good weekend, finally completed the first Super Mario Galaxy with 120 stars (mad skills!), and a good friend dropped by to visit. Also made a lasagna. The only low point was accidentally updating my BlackBerry to OS 6 – I intended to update the desktop manager and back up my phone, but instead upgraded my OS, and now my RAM is almost gone. Oops.

Just the other day something wonderful happened. I became an aunt, again! Older Sister # 2 had a baby girl, named Sherbert!

Older Sisters # 1 and # 3 have gotten to visit the bebe and to my surprise, I’m very jealous. Overall I do not like children, and that includes infants, but all the same I’m really excited about my niece. I guess because she’s MY niece.

I also intend to find a super-awesome present, so as this bebe grows up I’ll retain my title of favourite aunt who gives cool presents.  Although my older sisters have the home field advantage of being geographically closer to Sherbert, I have the Big City Shopping advantage. If they think that online shopping will even the field, they couldn’t be more wrong.

I’m not competitive, not at all. Boyfriend thinks I’ve lost my mind and laughs at my recent behavior because normally, the only thing baby-related that piques my interest is Baby Smasher. So yes, I’m quite thrilled to be an aunt again!!

Current playlist: 80’s

Malt chocolate brownies

Yesterday I purchased a new cookbook, Good Housekeeping Brownies: favourite recipes for Blondies, Bars & Brownies, which is available on Amazon.com and Amazon.ca.

This is the 2nd GH cookbook I own and I like their style because they are sturdy books with a ring binding, easy to prop up, and have decent pictures. I’m not a big brownie fan, and consequently have only made them 2-3 times before, from a mix.

This recipe caught my eye. Seemed like a good one to try  from scratch.

Mmmm smells like milkshake

Mmmm smells like milkshake

Time required: 20 min prep, 20 min bake, and 1-2 hour cooling

Yields: 32 squares

Cost per brownie: 38 cents

Total cost if you have none of the ingredients: $50.00

Special kitchen implements I used:

  • 9″ x 13″ pan
  • tinfoil
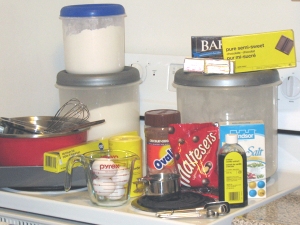
brownies: getting started

getting started

Good to know before you start:

Altogether you need just under 2 whole sticks of butter, but divided into separate (and not equal) parts for the batter and frosting.

A 100g bag of Maltesers is about 1C.  The official recipe calls for 1½C of the candies, so you’d need 2 packages. I had 2 packages but um…. ate quite a few of them while preparing my batter. 1C is fine.

Official baking time is 25-30 minutes, but I removed mine from the oven after 20 minutes, and found that after cooling they were a bit dry. The frosting was applied last night and it still hasn’t set, I suppose it will stay gooey?

Brownie recipe:

  • 1½C flour
  • ½TSP baking powder
  • ½TSP salt
  • ¾C unsalted butter, softened (1.5 sticks)
  • 4 ounces semi-sweet chocolate (4 squares)
  • 2 ounces unsweetened chocolate (2 squares)
  • 1½C granulated white sugar
  • 1 TBSP vanilla extract
  • 4 large eggs, room temp

Frosting recipe:

  • ¾C malted milk powder
  • 3 TBSP milk
  • 1 TSP vanilla extract
  • 3 TBSP unsalted butter, softened
  • 1C icing sugar
  • 1C malted milk balls, quartered

Step 1 – use centre rack, pre-heat oven to 176°C / 350°F.

Step 2 – line a 9″ x 13″ pan with tinfoil, wrap the foil over the outside of the pan to get the shape, then transfer to inside of pan, flatten down, and grease.

brownies: fitting tinfoil to the pan

fitting tinfoil to the pan

Step 3 – make batter, using whisk to combine 3 ingredients in a medium bowl; flour, baking powder, and salt. Set aside.

brownies: melting butter, cracking eggs, mixing dry ingredients

Step 4 – melt butter in sauce pan on Low. Meanwhile…

Step 5 – use serrated blade to chop chocolate

brownies: chopping chocolate

Step 6 – add chocolate to melted butter (still on Low), stir until melted, then remove from heat

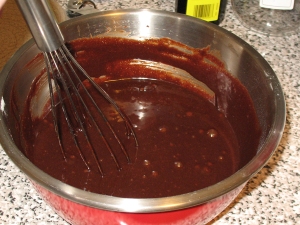
brownies: melting chocolate and butter

Step 7 – use wooden spoon to mix sugar into chocolate, then vanilla – stir until thoroughly blended

brownies: stirring in sugar

Step 8 – beat eggs into chocolate

brownies: stirring in eggs

Step 9 -Transfer chocolate to a large mixing bowl, and add the flour about one third at a time, mixing until blended. (My sauce pan is too small to add the flour to the chocolate in the original pan). Colour lightens quite a bit.

brownies::eggs blended in

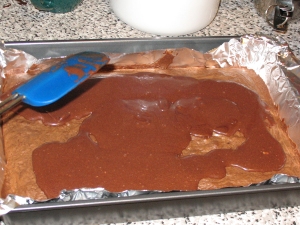
Step 10 – pour batter into foil-lined pan, bake at least 20 minutes. When done, a toothpick inserted about an inch from the edge should be clean.

brownies: pouring into pan

Step 11 – leave in pan, cool on rack completely. Meanwhile…

brownies: baked and cooling

Step 12 – make frosting; using a whisk in a small bowl to stir together3 ingredients; malted milk powder, milk, and vanilla.

brownies: making frosting with malt power, milk, vanilla

Step 13 – cream in butter until blended, I used a pastry blender for this

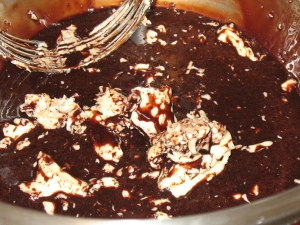
brownies: cream in softened butter

Step 14 – cut in icing sugar, about one third at a time

brownies: stir in icing sugar

Step 15 – spread frosting evenly over brownie

brownies: spread frosting evenly

Step 16 – chop each malted candy in half, and then halve each piece again (quartering them), sprinkle on top of frosted brownie – let set

brownies: quarter each piece of malt candy

About half of the malt pieces are added here:

brownies: sprinkle malt candy over frosting

Step 17 – after frosting has set, lift entire brownie from the pan using the tinfoil edges. Peel tinfoil away.  Use sharp knife to slice lengthwise into 4 strips, then cut each strip crosswise into 8 pieces.

brownies: let frosting set, and serve

I had to beat Boyfriend away with a spoon to keep him from plundering the pan while they set, haha. I enjoyed these a lot. Now I’ve got a serious milkshake craving, and since I’m in possession of a blender and malt power, I’m off to procure some ice cream today. ^^

If you are curious about why I post the total cost of ingredients I will talk about that soon.