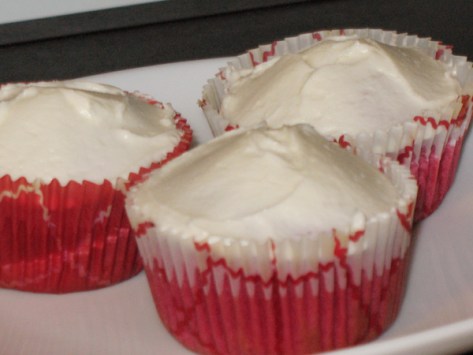
Patty’s peanut butter & white Belgian chocolate brownies

“Mmmm-mmmm!” said Boyfriend, after he ate one of my new brownies; warm from the oven and made with peanut butter and white Belgian chocolate.

I wanted to use up my remaining white Callebaut chocolate, and combine it with peanut butter to make a delicious brownie. I envisioned a layer of peanut butter in the middle but that didn’t work out as expected. It was good, but not what I had planned, so I’ll make this again with a few modifications.

The only brownies that have ever made my heart sing are the gooey cheesecake brownies. I had high hopes for my peanut butter and white chocolate creation.

Good to know before you start: I didn’t use enough flour and I lost track of time while it was baking. The batter had too much liquid, and I’m not sure how long it actually baked, but it was over 30 min. When it came out of the oven it was bubbling at the edges and still liquid, I let it set for 2 hours and prayed it would firm up. I suspect the terrible humidity here is affecting my baking because my chocolate supply (which is stored in a sealed container in the dark) had softened so much I didn’t need to cut it. 0_0

Time required: 2 hours

Yields: 25

Cost per brownie: $1.40

Total cost if you have none of the ingredients: $35.00 (add $15.00 for premium vanilla and chocolate)

Special kitchen implements I used:

  • baking pan: 8″ x 8″
  • tinfoil

Ingredients:

  • 8 oz white Belgian chocolate (equivalent to 8 squares)
  • ¾ C smooth peanut butter
  • 1¼ C butter, room temp
  • 1¼ C granulated white sugar
  • 1 C cocoa powder
  • ¼ TSP salt
  • 2 TSP vanilla
  • 2 eggs, room temp
  • ½ C flour

Instructions:

1. Pre-heat oven to 177°C / 350°F. Line baking 8″ x 8″ pan with tinfoil and grease.

2. Use serrated blade to chop chocolate, set in sauce pan but do not turn on.

3. In the microwave, melt butter.

4. Mix sugar, cocoa and salt into melted butter; then microwave for 30 seconds and stir until thoroughly combined. Let the mixture cool 5 min.

5. Meanwhile, heat the chocolate on low heat, stirring often until melted.

6. Stir peanut butter into chocolate and remove from heat. Set aside.

7. In the brownie bowl, add eggs one at a time.

8. Add vanilla.

9. When everything is combined add flour.

10. Pour half the batter into the prepared pan.

11. Spread peanut butter mixture on brownie.

12. Pour remaining batter on top. (The chocolate layer refused to stay above the peanut butter, it started sinking and looked awful so I thought what the hell and stirred it up.)

13. Bake 30+ min.

14. Cool 2 hours and slice.

Interestingly the bottom of the brownie has a slight crust, while the centre and top are very chewy. No idea what’s up with that. These look kind of ugly!

Verdict: Needs work. I’m going to take my brownie recipe back to the drawing board, I’m still not really satisfied with it, and that needs to get worked out before I start adding funky stuff like white chocolate and peanut butter. I’ll make this again with a few changes.

I’m not heartbroken over this, wasn’t sure if it would be a grand slam or not. Boyfriend loved this so I’ll consider it a success. This one isn’t going onto my recipe index until it’s perfected.

Playlist: Naruto soundtrack

Remarkable mango-rhubarb bites

Je suis la hot. It’s been too hot to bake lately.  This is the first dessert I’ve made in weeks, which is a mango-rhubarb number. Technically it was a bar-type dessert, although the consistency wasn’t what I consider to be a bar. It had cobbler-like qualities.

I adapted this from a recipe I found on The Rhubarb Compendium.  I added mango and ditched the icing sugar. It’s possible my results were skewed since I added the egg at the wrong stage.

Time required:  1.5 hrs

Yields: 12 servings

Cost per portion: $2.70

Total cost if you have none of the ingredients: $32.00

Kitchen implements I used:

  • baking pan 9″ x 13″

Ingredients:

  • 4 C rhubarb, washed and diced
  • 3 C mango, peeled and cored and diced
  • 1 C granulated white sugar
  • 1 C dark brown sugar
  • ½ C white shortening
  • 1 egg
  • 1 TSP baking soda
  • ¼ TSP salt
  • 1 TSP cinnamon
  • 2 C flour
  • ½ TSP vanilla

Instructions:

1. Pre-heat oven to 177°C / 350°F degrees. Grease and flour baking pan.

2. Place rhubarb and mango into a large bowl. Mix in half of the white sugar. Set aside.

3. In a medium bowl, cream shortening, remaining white sugar, and brown sugar.

4. In a small bowl, combine baking soda, salt, cinnamon and flour. Add to wet mixture.

5. Mix in egg and vanilla.

6. Combine wet mixture with fruit, smoosh batter in baking pan.

7. Bake 40 min. Cool on rack at least one hour.

8. Cut into “squares”. Hmmm. Something doesn’t look quite right. This definitely did not leave the pan in a perfect square.

Verdict: I liked this but Boyfriend did not.

He said the texture was “squishy”. Parts of the bar were crunchy, and parts were soft, and I’m not sure why. The rhubarb was crunchy, which makes sense because it was not stewed yet I wasn’t expecting crunchy fruit in a baked dish. It wasn’t bad, just different. I found the mango flavour a little overwhelming, so next time I’d drop the mango entirely and stew the rhubarb prior to baking. But if I was going to do all of that I’d just make a cobbler instead.

Overall I liked this but it wasn’t my favourite rhubarb dish that I’ve made.

Update July 26, 2011: the next day this dessert turned into mush. I’m not sure if it was caused by the heat wave we’re experiencing, or if this particular mix of ingredients don’t hold up well, but I won’t be making this again.

Playlist: Adele

Rhubarb apple crumb bars

The only thing more sour than rhubarb is a spiteful girlfriend. I baked this to get even with Boyfriend who went out of town for the weekend, alas. Eat your heart out.

Yes I am that petty. I adapted this from the “blueberry crumb bars” in Good Housekeeping Brownies: favourite recipes for Blondies, Bars & Brownies, which is available on Amazon.com and Amazon.ca.

I have a few plans to make this turn out better than the first attempt at a fruit crumb bar, which was a burnt nightmare. I think I can get it right this time.

Good to know before you start: The high butter content will easily burn. To prevent this, cover the entire dessert with tinfoil, bake  30 minutes at a high temperature, then remove tinfoil and bake  an additional 25 min at a lower temperature. This ensure the fruit filling is properly cooked but the topping doesn’t burn.

Time required: 2.5 hrs

Yields: 36 piece

Cost per bar: $1.39

Total cost if you have none of the ingredients: $41.00

Kitchen implements I used:

  • baking pan: 10.5″ x 14.5″
  • tinfoil
  • KitchenAid mixer
  • pastry blender

Crust ingredients:

  • 1 C butter, softened (2 sticks)
  • ⅔ C icing sugar
  • 1 TSP pure vanilla extract
  • 2½ C flour

Filling ingredients:

  • 4 C rhubarb, washed and diced
  • 4 C tart apples, peeled, cored, and diced
  • ½ C granulated white sugar
  • 3 TBSP powdered corn starch
  • 2 TBSP water

Topping ingredients:

  • ⅔ C quick-cooking oats, uncooked
  • ½ C flour
  • ⅓ C brown sugar, packed
  • ¼ TSP cinnamon, ground
  • ½ C butter, slightly softened  (1 stick)

Instructions:

1. Pre-heat oven to 190.5°C / 375°F. Line baking pan with foil.

2. Prepare the fruit and set it aside.

3. Prepare crust: in mixer beat the butter, icing sugar and vanilla.

Beat until light and fluffy.

4. Add flour and mix until just combined.

5. Use hands to press dough into baking pan, bake 20 min.

6. Cool on rack 5 min.

7. Meanwhile prepare filling: in a large sauce pan, combine sugar, corn starch, and water.

Add fruit. Bring to a boil over Medium heat, reduce heat and simmer for 5 minutes. Stir often.

8. Meanwhile prepare topping: in a medium bowl stir: oats, flour, brown sugar, cinnamon.

9. Cut in butter with pastry blender, and blend until you have coarse crumbs.

10. Spread fruit mixture evenly over crust.

11. Use hands to sprinkle topping over fruit.

12. Cover with tinfoil and pierce with fork. Bake 30 min.

13. Remove tin foil after 30 min, and lower temperature to 160°C / 320°F. Bake for an additional 25 min.

14. Cool completely in pan before slicing.  When ready to serve, lift from pan, peel foil off the bottom.  Slice lengthwise into 6 strips, then crosswise into 6 pieces.

Verdict: My plan to taunt Boyfriend failed miserably! This was partially assembled when I found out he would be home at 3:30, right when it finished cooling. Foiled!

I decided to be kind and let him have some.

These were delicious. The crust reminded me of shortbread, very buttery and soft.  The rhubarb and apples were nice and tart. The only thing I’d change is to add two more stalks of rhubarb.

I will retry the apple-only version at some point and believe that if I use the tinfoil trick it should be fine.

Playlist: Sailor Moon Super S movie

I am now convinced anything with rhubarb will turn out awesome and make me feel like a baking super star. What rhubarb dessert is your favourite?

O Canada cupcakes – by Patty!

Nothing says Canada like red, white, and maple syrup. Happy birthday Canada! =)

These cupcakes have a lot in common with red velvet, but they are not red velvet, they are full of real maple goodness instead. I wanted to make something with our official colours, and a flavour that is undeniably Canadian.

Time required: 2 hrs

Yields: 24

Cost per cupcake: $1.75

Total cost if you have none of the ingredients: $42.00

Kitchen implements I used:

  • muffin tin & cupcake liners
  • KitchenAid mixer

Cupcake ingredients:

  • 2¼ C flour
  • 1¼ C granulated white sugar
  • ½ C butter (one stick)
  • 1¼ C milk
  • 1 TBSP cocoa powder
  • 3 TSP baking powder
  • 1 TSP salt
  • 1 TSP pure maple syrup
  • 1 TSP pure vanilla extract
  • 3 eggs
  • red food colouring, I just winged it

Buttercream frosting ingredients:

  • 3 C icing sugar
  • 5½ TBSP butter, room temperature
  • ¼ TSP pure vanilla extract
  • ¼ TSP pure maple syrup
  • 2 TBSP milk
  • 1 TBSP of freshly squeezed lemon juice

Instructions:

CUPCAKES:

1. Pre-heat oven 177°C / 350°F.

2. Combine all ingredients in mixing bowl.

3. Beat on High for 4 minutes, scraping sides constantly.

Once everything is in, add the food colouring.

Totally didn’t bother measuring the red dye.

Thinking, “When it starts to resemble Canadian red I’ll stop.”

Perhaps not the best plan.

Yuck, pink isn’t one of Canada’s colours, this won’t do!!

Nothing says “I love my country” like vulva pink batter…  ah well, maybe a miracle will occur in the oven. (Hah, get it?)

4. Ladle into muffin pan, filling about two-thirds of the way.

5. Bake 20 min, and immediately remove cupcakes from pan and place on cooling rack.

6. Cool at least 1 hr.

FROSTING:
1. In large bowl, cream butter and icing sugar together.
2. Add half of the milk, and mix well.
3. Add vanilla.
4. Add remainder of the milk and lemon juice.
5. Mix until you can no longer feel sugar granules.

After they are frosted, get patriotic and devour!!

Hurrah! They turned out red after all! Miracles do happen.

Verdict: You know, this is the first time I have actually gotten exactly 24 cupcakes, usually I run out before I get to the final one. Yes!!

The colour did darken as they baked. Thank God.

The maple flavour was very subtle, almost to the point I didn’t notice it. Next year I’ll increase the amount of maple syrup to at least one tablespoon.

Boyfriend and I ate some cupcakes as we watched the Canada Day fireworks from our balcony.

He said, “Patty, you make great cupcakes. It’s like vanilla cupcakes, with lemon vanilla frosting.” (unintelligible salivating sound).

Playlist: Final Fantasy OSTs