This recipe comes from BHG: New Cookbook: 12th edition which is available on Amazon.com and Amazon.ca
Time required: 1 hr
Yields: 54
Total cost if you have none of the ingredients: $48
Cost per cookie: 88 cents
Spring is in the air folks… The cats are acting like kittens, my allergies are flaring up in huge raging hives, and the bake sales at work have begun for another season.
I was asked if SpatulaGoddess could make something for the bake sale fundraiser for whichever cancer research thing was going on at the time, and I said “No. but I can make something for you.”, not offended by this but it seems my colleagues forget that I was baking my own goods before I met SpatulaGoddess. I won’t say that I have ever made anything as exquisite as my lovely, but I have never served anything that lasted, and the compliments abound… maybe it’s just been too long since I’ve baked for them… BAH!!!
I love peanut butter cookies who doesn’t? I know the ones I love are in the Red Checkered Cookbook that my mom used, and also got for me when I moved out, so I went looking there, my original plan was to make peanut butter ninjamen cookies, but once I found page 218 in that wonderful book my plans changed BIG TIME, beside the cookie recipe I was looking for I saw the recipe I used. I changed the hershey kisses with Reese’s mini peanut butter cups… ENJOY.
Kitchen implements I used:
- Nemo the KitchenAid
- large baking sheet
- parchment paper

Ingredients
Ingredients:
- ½ C white shortening
- ½ C smooth peanut butter
- ½ C granulated white sugar
- ½ C golden brown sugar, packed
- 1 tsp baking powder
- ⅛ tsp baking soda
- 1 egg
- 2 TBSP milk
- 1 tsp vanilla
- 1¾ C white flour
- ¼ C granulated sugar (reserved)
- 1 package of mini peanut butter cups
Instructions:
Pre-heat oven to 176°C / 350°F

Flour, milk/egg/vanilla, sugars/baking powder/soda, shortening/peanut butter
1. Put shortening and peanut butter into mixing bowl.
2. Put the ½ cup of granulated sugar, brown sugar, baking powder, and baking soda, in a separate bowl.
3. Put milk, egg, and vanilla in a separate container.
4. Put flour in a separate bowl.
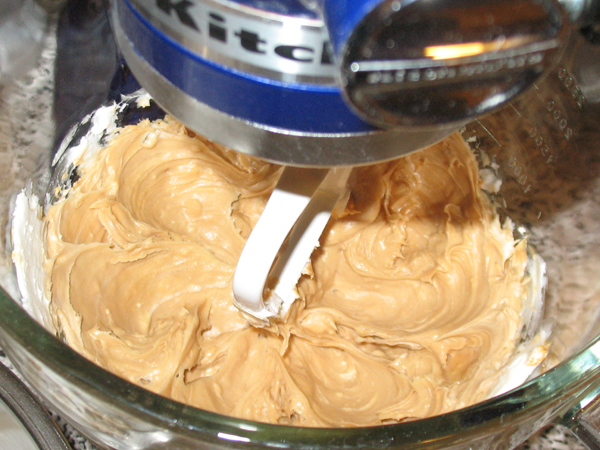
Nemo doing his thing
5. Beat “Step 1” ingredients with an electric mixer for 30 seconds.
6. Add “Step 2” ingredients and beat until combined, scraping the bowl.
7. Beat in “Step 3” ingredients.
8. Beat in as much of “Step 4” ingredient as you can, stir in the rest. I am guessing this was written for those that do not have access to a Kitchen Aid… cuz Nemo KICKS ASSSSSS and has no issues mixing in almost 2 cups of flour.
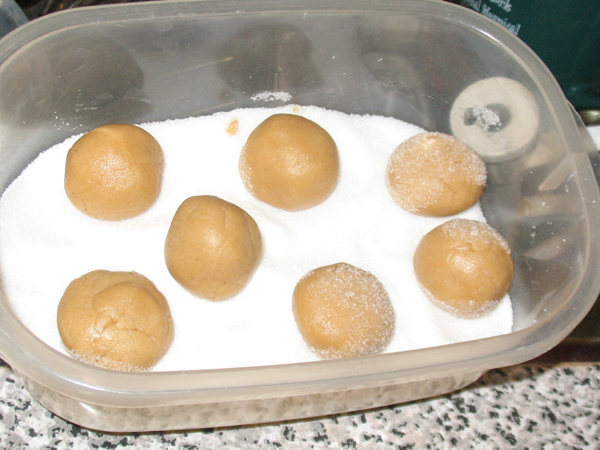
mmmmmmmmmmmmmmmmmm Peanut butter balls in sugar.
9. Roll the dough into 1-inch balls, and roll them in the rest of the sugar.
10. Place balls 2 inches apart, (ballroom) am I right fellas? Ahem.. anyways back to the topic at hand. 2 inches apart on an ungreased cookie sheet.
11. Bake at 350°F for 10 – 12 mins or until edges are firm and bottoms are lightly browned.
12. Immediately press a mini peanut butter cup into the middle of each cookie, and transfer to a wire rack and let cool
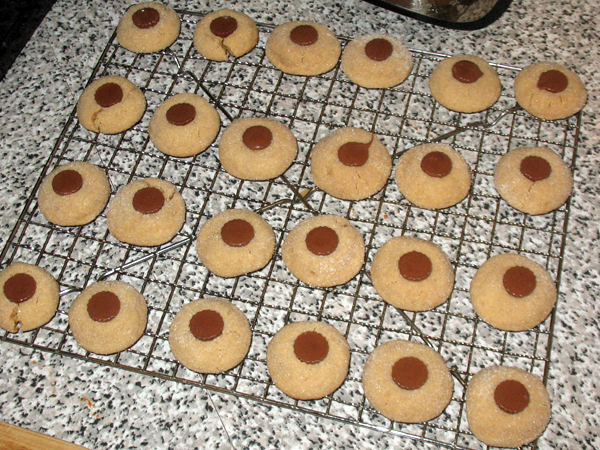
Cooling
Verdict: As I said to my buddy from work whom I sent a pic of these to after making them… “I AM A MUTHER$&#*^$ GENIUS!!!” These far exceeded my expectations, I was thrilled with how great these turned out. SpatulaGoddess was so impressed she wants me to make more… But isn’t willing to let me play with the centres. I know there are other great things to stick in the middle of a peanut butter cookie.
Playlist: Godsmack, Disturbed, Slipknot, Random J-pop… that’s how I roll