I love crème brûlée. Cold, silky custard, topped with a layer of caramelized sugar, which looks like a golden brown pane of glass, waiting to be crunched with a spoon. Made with real vanilla bean and I’m in heaven. Oh, bliss!
This is my dessert of choice when I dine out, and I learned to make it at home in 2010. Making the custard is the easy part, but getting the caramelized sugar just so is tricksy.

Time required: 2 days (custard takes 40 min, plus over night chilling)
Yields: 6 portions
Cost per custard: $2.16
Total cost if you have none of the ingredients: $16.00 (plus $12.00 for a real torch)
Special kitchen implements I used:
- strainer
- 6 glass ramequins
- 1 deep baking pan 9″ x 13″
- blowtorch (propane tank, regulator, and flint)

Good to know before you start:
TIMING this dessert is difficult. The custard has to be prepared, baked, left to stand, chilled, left to stand again, sugared, torched, and chilled again. Ask 5 people how to make this dish and expect 5 different opinions on how long each stage takes. You might need to experiment. I highly recommend making the custard the night before you plan to eat this. If you want to make the topping out of brown sugar or demerara sugar, leave 6 TBSP of that sugar out to dry over night, dry sugar is much easier to caramelize.
TORCHES: you can make your own blowtorch for $12.00, with 3 parts; a mini propane tank, air regulator, and flint. This works much better than any kitchen torch you find in kitchen-specific shops. Don’t caramelize the sugar with an oven broiler because that heats the custard, when it’s supposed to be served cold.
SUGAR TOPPING: I’ve tried using granulated white sugar, golden brown, dark brown, icing/confectioners, turbinado, demerara, and a blend of white and brown. It’s hard to make it look right. I think brown sugar tastes best but since it is moist, it’s hard to caramelize (so leave some out overnight). Neither white sugar nor icing sugar produced the result I wanted. Fine-grain sugars like demerara and turbinado are what most recipes recommend, yet I haven’t been able to get the consistency that I want. Your kilometers may vary.
RAMEQUINS: these are very cheap, made from fluted ceramic or glass. The best ones for this dish are shallow and wide, because that provides more surface area for the caramelized sugar.
Although it’s called “burnt cream”, you do not want to actually burn it, one or two dark spots is okay, but you’re trying to achieve a golden brown caramelized colour, not dark brown or black.
Crème Brûlée ingredients:
- 2C light cream, room temperature (some people use Heavy or Half & Half)
- 5 egg yolks, room temperature
- ⅓ C granulated white sugar
- ½ vanilla bean, split & scraped
- ⅛ TSP salt
- 1-2 TSP demerara sugar per portion (do not add until serving)
Step 1 – pre-heat oven to 325°F / 162°C, using centre rack.
Step 2 – fill kettle with water and simmer
Step 3 – add cream and vanilla bean (pods and shell) to sauce pan


Step 4 – heat on LOW until scalded and remove from heat. When scalded, the bubbles have just started to form and break the surface. It’s normal for a skim to form.

Step 5 – in a medium bowl, mix sugar and salt together
Step 6 – separate the yolks from the egg whites, (freeze the whites), and gently whisk yolks into sugar mixture until just combined


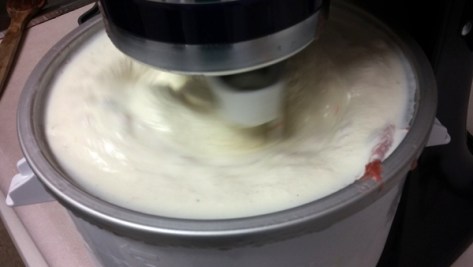
Step 7 – temper the hot cream into the egg mixture; add about a third of the cream, gently stir, add another third, stir, then add the final third (doing this slowly in thirds prevents the egg from scrambling)


Step 8 – pour liquid through a strainer, into a glass measuring cup

As you can see, straining is important for this dish. You don’t want any part of the skim or shell pieces in your custard:

Step 9 – fold a dish towel until it sits evenly in the bottom of a 9″x13″ pan, and place your ramequins atop the towel.
Step 10 – use a spoon to scrape the bottom of your glass measuring cup, where all the vanilla bean has sunk, and make sure each ramequin has a fair amount of the bean; then pour the strained liquid into the ramequins:

Step 11 – place pan in oven, and carefully fill pan with hot water from the kettle, until the water reaches at least halfway up the sides of the ramequins, this is a bain marie which ensures the custards cook evenly without drying out. Don’t let the water touch the custard:

Step 12 – bake for 30-40 minutes until the edges of the custard are set. Test for doneness by shaking, the centre should wobble like Jell-o. If the whole surface shakes give it 3-5 more minutes. If nothing shakes it’s overdone. This depends heavily on your oven, and the size and shape of your ramequins.
Step 13 – remove from oven, and carefully remove ramequins from pan. Set them on a rack to cool for at least one hour.

Step 14 – cover each ramequin with plastic wrap, and chill at least 2 hours (overnight chilling is best)

Step 15 – removing from fridge 30 minutes before consuming. After 20 minutes, remove the plastic wrap, and use a folded piece of paper towel to gently blot the surface to remove any condesation.
Step 16 – sprinkle the demerara sugar on top, tilting and tapping each ramequin to cover the entire surface.
Step 17 – place the ramequin on a fireproof surface, like a marble slab, and use the blowtorch, with a low flame, holding it about 2-3 inches from the surface. I start in the middle and slowly go in clockwise circle to the edges. The sugar will turn a dark golden brown, but if it turns black it’s burnt.
I’ll show you a custard with too much sugar, and another with just enough.
This one has far too much sugar:

Step 17 – return to fridge for 10 minutes, then eat. How long to leave it in the fridge before eating is up for debate. Some people say 30 min, some say 45, I do 10. If you leave it too long the sugar starts running down into the custard and won’t crack, so this is where you really have to experiment.
Attempt # 1 is so ugly, I’m ashamed:

Attempt # 2 is perfect! This used 2 rounded teaspoons of sugar:


Using a blow torch makes me nervous. I’m afraid of fire. The key to not buring the sugar is be patient, don’t hold the flame too close, and keep it moving in a circle.
So, I didn’t realize before I bought my ramequins that the shallow ones work best. Mine are narrow and deep, holding: 0.25L / 0.2 qt / 105 x 550 mm / 4.8″ x 2″. Eventually I’d like to replace them with shallow ones.
Last night I used demerara sugar… the ugly one was used with the sugar fresh out of the bag, the nice one was made with sugar that had dried out over night and was crushed with a rolling pin. It was definitely easier to melt the sugar this way. I still prefer the taste of brown sugar, so I will look at drying out equal parts brown and demerara, and combining them.
Update Oct 9, 2011: When this entry was posted I forgot to add the salt measurement. Oops. Fixed.