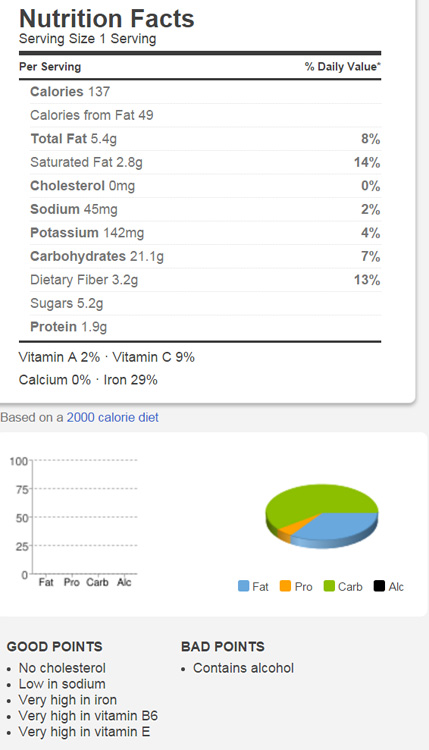
Vanilla rhubarb ice cream

20160824_115535

Yesterday Maui and I made ice cream together! I was so excited to make ice cream again. I found out she hadn’t seen Labyrinth (imagine) so we watched that while we waited for the ice cream to finish.

Before you get started: These instructions are written for using a Kitchen Aid ice cream maker. You need to freeze the bowl at least 24 hours in advance, and make the base of the ice cream the day before.

Yields: 16 servings of approx 120 mL (½ cup) per serving

Ingredients:

  • 590 mL Half and Half (2½ cups)
  • 8 egg yolks
  • 200 g granulated white sugar (1 cup)
  • 590 mL Heavy Cream 35% (2½ cups)
  • 1 vanilla bean, split and scrapped
  • 0.5 g salt (⅛ tsp)
  • 200 g chopped rhubarb (2 cups) + 25 g white sugar (2 tbsp)

Instructions:

1. In a sauce pan on Medium, heat the Half and Half until it’s steaming but not boiling. Stir often. Remove from heat and set aside.

2. In mixing bowl, whip the yolks and sugar until just combined.

3. Gradually add the heated mix to the sugar, (I used a strainer since a skim developed). Once all the hot mixture has been added and the mixture is combined, return it to the sauce pot.

4. Add the vanilla bean to the pot.

5. Cook on Medium until small bubbles form at the edge and mixture steams, don’t boil it.

6. Transfer to mixing bowl with a spout  (I strained it again), stir in whipping cream and salt. Using a bowl with a spout is the best thing you can do since you’ll be pouring this into a moving mixer later which you cannot stop as you pour.

7. Cover and chill overnight.

8. Half an hour before you’re ready to start the ice cream, turn the rhubarb into jam-like consistency. Put the chopped fruit and the sugar in a sauce pan, heat on Medium for a bit until it starts to break down, then keep on Low until it’s pulpy, stirring often. Once the fruit is broken down, set it aside.

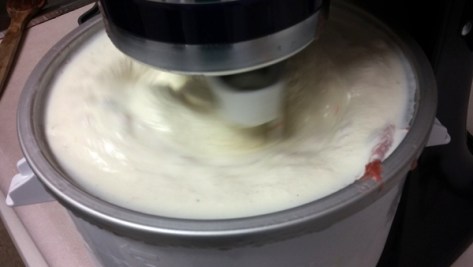
9. Time to churn ice cream! Put the drive assembly in place and set the dasher into the frozen bowl. Turn mixer on to Speed 1 BEFORE you add the cooled mixture. Churn at least 20 minutes until the machine makes a clicking noise.

20160823_163455

Churn it up!

10. Spoon the rhubarb into the ice cream and stir a bit more.

20160823_164824

20160823_164841

11. Store in air-tight container and freeze.

20160823_165624


Enjoy!

20160824_115535

Verdict:

Delicious!  I will add an extra cup of rhubarb next time, since I can’t see much pink in the ice cream. I can taste it but I was envisioning striations of fruit through the ice cream which didn’t really happen.

I will also churn the ice cream for longer, I found that the bottom of the bowl was still soupy and hadn’t firmed up.  That fixes itself once you freeze it, but to enjoy it right away I think you do need to churn it longer, or maybe risk stopping the bowl and using a spatula to scrape it up from the bottom?  I don’t know. Last time I stopped the bowl while ice cream making everything immediately froze to the side of the bowl.

Raspberry cranberry muffins

20160716_172630

I am so glad my friend Mary turned me on to muffins for breakfast. SO DELICIOUS.

This recipe was adapted from Cat Can Cook’s amazing banana muffin recipe.

Time required: 30 min

Yields: 12

Cost per muffin: 45 cents

Total cost if you have none of the ingredients: $46

Ingredients:

  • 25 g Splenda
  • 2 eggs
  • 76 g unsalted butter, melted
  • 1 tsp pure vanilla extract
  • 4 oz water
  • 188 g flour
  • 5 g baking powder
  • 5 g baking soda
  • 0.5 g Half Salt or salt
  • 150 g frozen raspberries
  • 150 g frozen cranberries

Instructions:

  1. Pre-heat oven to 176°c / 350°f. Generously grease the muffin tin.
  2. In a mixer, combine all wet ingredients (except the fruit).
  3. In a new bowl, combine all dry ingredients.
  4. Gradually add dry to wet.
  5. Add the fruit. If you want blue muffins like me, beat the batter until it turns bright pink. Spoon into muffin tin.
  6. Bake 24 min and transfer to baking rack.

20160716_172314

Verdict:

I love this muffin recipe!! It’s so versatile, it makes fantastic banana muffins, blueberry muffins, and now these. I am in heaven.


Blueberry muffins with carbalose flour

These were adapted from a Carbquik recipe by Chef Gregory Pryor. They taste a little like pancakes and that’s just awesome. Another Poon-friendly treat.

20160610_174317

Ingredients:

  • 250 g Carbuik
  • ⅔ cup almond milk, unsweetened
  • ½ cup to ¾ cup water, enough to make the batter goopy
  • 2 tbsp powdered Splenda
  • 1 egg
  • ¾ cup frozen blueberries

Directions:

  1. Pre-heat oven to 204°c / 400°f.
  2. Place muffin liners into muffin cups.
  3. Stir all ingredients together until combined, then add berries.
  4. Bake 16-20 min.

20160610_181420

Verdict:

I enjoyed these. The flavour reminds me of blueberry pancakes, win! Peeling the liners off was difficult, they were much easier to handle the next day. My next baking goal is to experiment with other types of sweeteners and see if they are better to work with compared to Splenda.

Chocolate protein one-bite brownies

20160604_103032

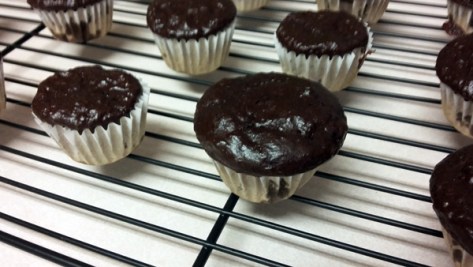
Experiment # 2 was a success. I took a recipe posted to the Dr. Poon page called Phase 1 “Poonified” protein chocolate cupcakes by Cintia P. and made a few tweaks.

20160604_095532

Before you get started: I’m working with carbalose flour to reduce the net carbs in my baked goods. I used vanilla protein powder because I’ve got a 2 lb jar of the stuff and I don’t like it, and baking with it seemed like a good way to use it up.

Yields: 20

Cost per brownie: 13 cents

Total cost if you have none of the ingredients: $71.22

Ingredients:

Instructions:

  1. Pre-heat oven to 175°c / 350°f and put paper liners into mini muffin tin.
  2. Beat egg, vanilla, and half of the water. Reserve remaining water.
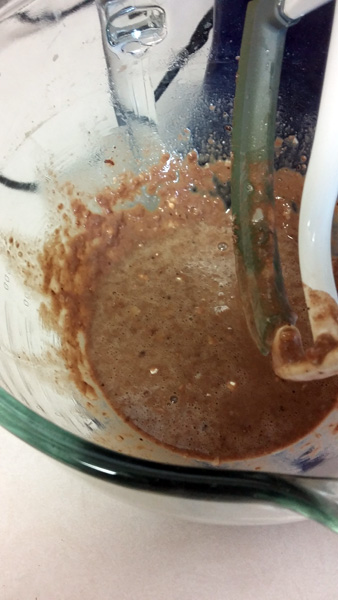
  3. Combine dry ingredients. Pour into wet, half at time.20160604_100319
  4. Mix in remaining water and stir until combined.
  5. Pour into muffin tin, filling about three quarters. 20160604_101021
  6. Bake 12 min then cool on rack. 20160604_102941

Verdict: These were very easy to make and I’m pleased with the flavour and consistency. The outer layer of the brownie stuck to the liner.

I think they’d be much better with chocolate protein powder, but I like drinking the chocolate so I’m stuck using the vanilla to get rid of it.  I might add double the amount of cocoa power perhaps.

So far baking with Carbquik seems easy and it’s a nice challenge to find recipes and adapt things to the Dr. Poon lifestyle.

No bite brownies

So these happened and they don’t taste good. What’s annoying is they smell like chocolate pudding and they ought to taste good, but they’re foul. This was my first time baking with Carbquik and protein powder. Learning curve!

20160603_162246

I’m trying to make a low-fat, low-carb treat that’s acceptable to people on phase 1 of the Dr. Poon Metabolic lifestyle and I’m going back to the drawing board. When a brownie tastes bad fresh out of the oven you’re doomed.

The pie that dared not speak its name

So after today, we’re never talking about this again. I made a pie crust with spelt flour, which has provided good results for my muffins, and terrible results in my cookies. Add pastry dough to the list of items I will never make with spelt again.

20160513_172658

The dough was very thick, and tore terribly while I was rolling it. I had planned to make two pies but gave up after rolling out the first. It was just way too difficult to work with.

20160513_170623


This pie was doomed from the start, Boyfriend Unit had a tough time coring the apples, they were very hard. The taste of the pastry wasn’t to my liking.

It’s not bad, I mean it’s apple pie so GET IN MY MOUTH, it’s just not what I’m accustomed to producing.  Back to the drawing board.

Patty’s vegan muffins 2.0

This is the same recipe as the first vegan muffins with two minor additions. They turned out great for a healthy and delicious breakfast.

20160507_121959

I used the organic lemon extract I purchased at The Spice Trader, and added ground cinnamon. These were so good fresh out of the oven, Boyfriend Unit just woke up as they finished and we ate them for breakfast. The smelled so amazing.

20160507_121343

French Corner Bakery & Patisserie review

Yesterday was my first visit to French Corner Bakery & Patisserie. I am now planning many more visits.  ^^

20160324_154025

French Corner is located at 1224 Dundas Street West, Unit 114, Mississauga, ON, L5C 4G7.  They have an active Facebook page and you can see many delightful pictures of their wares from Yelp reviewers.

My friend and I ventured forth in the aftermath of a freezing rain to sample the goods.  She has been there many times and told me about how much the bakery has expanded since she started visiting.

Review:

Another pasty gem hiding in plain site, what is with these amazing French patisseries in unexpected neighbourhoods?

We visited around 3:30 pm on a Thursday afternoon.  There were a few other customers but it wasn’t packed (thank you weather!), which was nice. Both counter staff were friendly and helpful. The food we tried was very good, and reasonably priced.

The front area is a long rectangle, with a counter running lengthwise and a large display case. You can see into the back where the staff are at work creating their works of art which is neat.

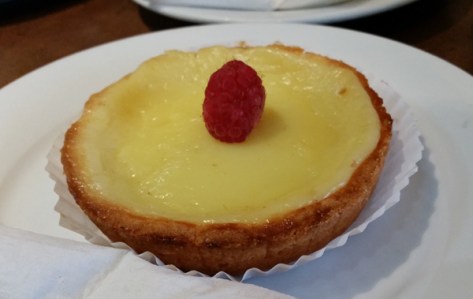
Aside from pastries and baked goodies, they also offer fresh breads, soups and salads, hot drinks, lots of lovely things.  The only thing I found odd was that the pastry displays are not labelled, this for example is obviously a lemon tart, but some other items were not so obvious to me what they were called. It was fine however, the lady behind the counter patiently explained each item that I was interested in.

20160324_154020

I had the lemon tart and the night and day mouse.  The tart was wonderful, the lemon curd was tangy and light, in a nice firm crust.  The mousse was amazing, I will definitely try both of these items again!

My friend had pistachio mouse and a red raspberry item, which I forget the name.

20160324_154030

The cup of hot chocolate was perfect for a cold spring day.

20160324_154042

I’m looking forward to bringing Boyfriend Unit to this bakery with me next time.

Vegan banana muffins, experiment # 2

I didn’t set out to make a vegan muffin. It just happened during the course of testing out ingredient substitutions.  This muffin had some improvements over the previous effort, the inside was a lot closer to a regular muffin than the 1st healthy banana muffin experiment.  But I’ve discovered something disheartening during these substitution tests.

20160309_180756

An ingredient that reduces calories will up the sodium or the fat, or an ingredient to replace dairy will raise the values I’m trying to lower.  It seems you can have one or the other, but not both.  (Not that I’ve tried everything, but based on my experiments so far, when something goes down, something else goes up.)  It’s rather annoying.

These new muffins weight in at:

nutrition

This is still much better than a muffin from a fast food restaurant, but it has more calories, fat, carbs, sodium, and sugar than it’s non-vegan predecessor.  Wuah!

Before you get started: There’s a thorough explanation on substituting flaxseeds for egg whites on this great resource Vegan Baking.

Time required: 30 min

Yields: 12

Total cost if you have none of the ingredients:  $45-ish

Cost per muffin: 52 cents

Ingredients:

  • 4 large bananas
  • 188 grams organic sprouted spelt flour
  • 25 grams granulated Splenda
  • 60 grams red palm oil + 4 oz water
  • 5 grams baking powder
  • 4 grams pure vanilla extract
  • 10 g ground flax seed + 1.5 oz warm water

Instructions:

  1. Pre-heat oven to 176°c or 350°f.  Grease the muffin tin well.

20160309_165353

2. Whisk warm water into the flaxseed and let stand 10 min.  It will turn into sludge. Yummy!

20160309_170426

3. Meanwhile mash the bananas, then beat in the Splenda, red palm oil, water, and vanilla.  Once the flaxseed sludge is ready, add it to the wet mixture and beat until combined.

20160309_172143

Wowzers this looks vile.

4. In a seperate bowl, stir the baking powder into the spelt flour, then add gradually to wet mixture.

5. Bake 24-26 minutes. Tah-dah!

20160309_175904

Verdict:

Loved these.  The consistency isn’t overly chewy like last time.  There’s a very slight graininess to them, which I suspect is the flaxseed.  The muffins rose quite high in the oven and collapsed to hockey puck height when they came out.

I let them sit out overnight and in the morning, the outside was firm but not hard, the inside was still moist.  This was definitely a muffin that impressed more when it was oven-fresh, but still good the next day.

I don’t foresee making them this way again due to the calorie and fat content. They were really good though!

Do you know of any ingredient substitutes that improve the nutritional values?

Healthier banana muffins, experiment # 1

I went back to the drawing to work on the treasured banana muffins.  I opted to cut the Splenda by 50%, eliminate salt, use red palm oil in lieu of butter, use egg whites, and spelt flour again.

20160308_182316

Unlike blueberry trial # 4 which had a very thick batter with spelt flour, this batter was quite runny.  They took an extra 2 minutes to cook through, and they do feel very moist, with a chewy consistency.  These muffins did not rise very high.

20160308_182339

Boyfriend Unit noted that this time, he can’t detect the Splenda aftertaste that was present in the 2nd blueberry trial. Perfect!  These muffins clock in at:

banana muffins Mar 8

I am quite pleased with these muffins, but not ready to post a recipe.  I’m still looking into cutting the sodium so stay tuned.