École Chocolat review

I’de been wanting to up my chocolatiering skills in preparation for Christmas 2015. I can usually learn a fair amount from reading and online tutorials, but lately it felt like I had hit a plateau.  When I heard about École chocolat I was immediately intrigued, but hesitant.

École chocolat is an online school based out of Vancouver, BC, founded in 2003 by Pam Williams, a master chocolatier who also founded the truffle business Au Chocolat in 1981.  Pam has authored two books on chocolate, Oh Truffles by Au Chocolat and Raising the Bar: the Future of Fine Chocolate.

Still, I couldn’t find any reviews or first hand accounts of École chocolat, and I was leary of spending a lot of money on an e-school that isn’t accredited. I hemmed and hawed for awhile, and decided to go for it. I’m glad I did.

École chocolat offers several courses:

  • Professional Chocolatier
  • Business Planning
  • Professional Chocolatier + Business Planning (cheaper than doing the two courses individually)
  • Chocolate Making from bean to bar
  • Quality Assurance for Chocolatiers
  • Master Chocolatier programs all over the globe
  • Chocolate Connoisseur courses

I took the Professional Chocolatier + Business Planning program. It’s a 4 month course, which you mostly do at your own pace but assignments have deadlines.  If you pass your assignments you receive your diploma.

How much did it cost?

  • Summer-fall 2015 tuition was $830 CAD + 13% HST = $937.90
  • School supplies cost $403.41 which includes taxes and shipping

Depending on what’s available to you locally you may be able to get the supplies for less.  I think the list was too much stuff, some of the items I still haven’t used, such as the chocolate chipper, acetate, and pastry brushes.

I’ve only used the cocoa butter and marble slab one time so far.  On the other hand, I probably would never have tried working with cocoa butter if they hadn’t said I needed it, and it’s a pretty cool product!  So I don’t regret buying any of the supplies, but they were were expensive and I am someone who already owned a lot of chocolatier supplies.

The school has a relationship with Chef Rubber who offers a starter kit for EC students containing some of the harder to source items. I was interested, but their shipping costs from US to Canada were over $100.  No thanks!

What was the course like?

Challenging.  Fun.  Interesting.  I learned so much.  The Master Chocolatier course has one instructor, the Business Plan portion has another.  Both instructors are fairly prompt at answering questions, and there is an active forum, one for students and one for grads.

I would recommend this course to anyone who has worked with chocolate and is interested in learning more techniques with some guidance. As long as you’re motivated to get work done, on time, you will be fine.

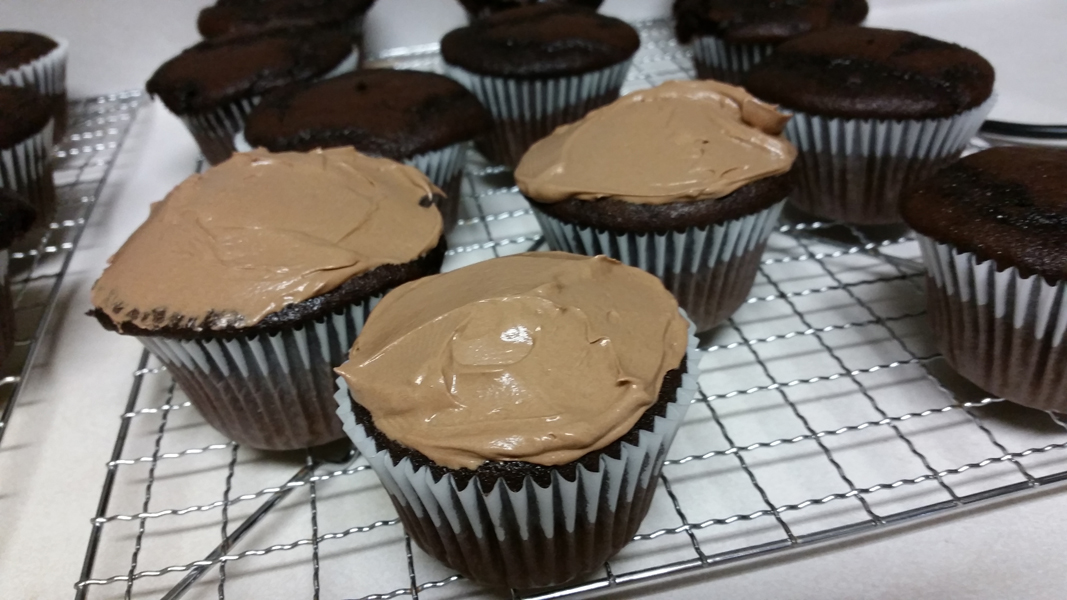
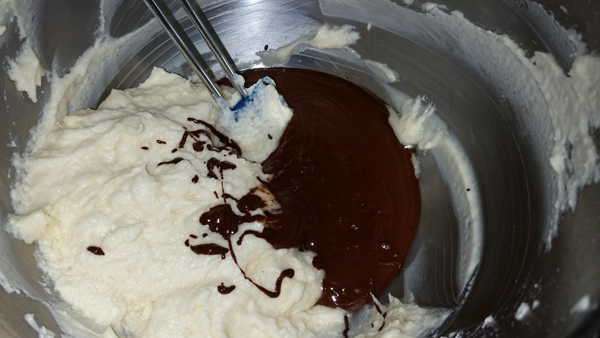
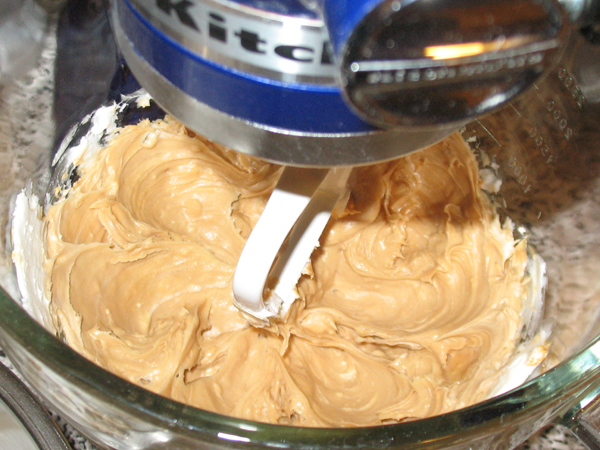
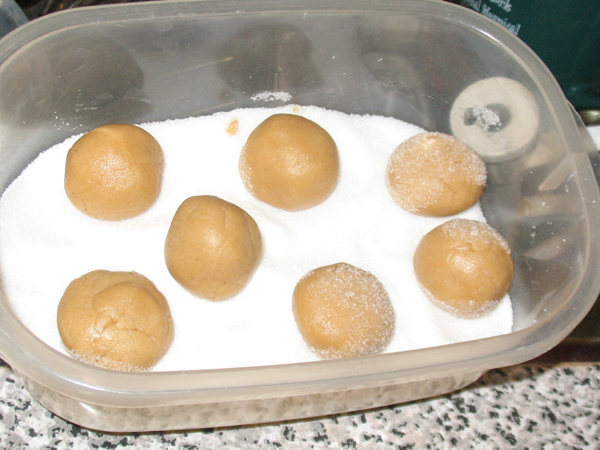
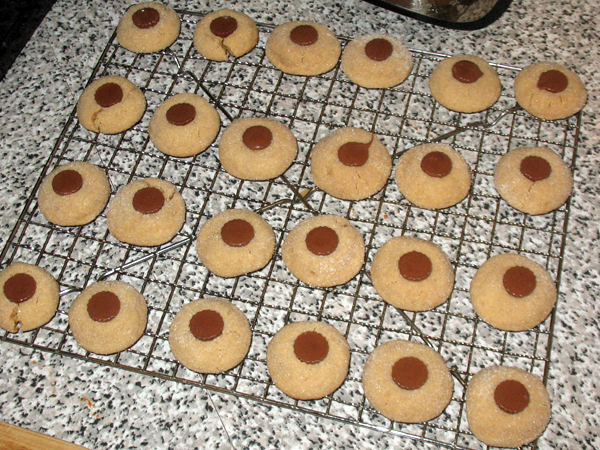
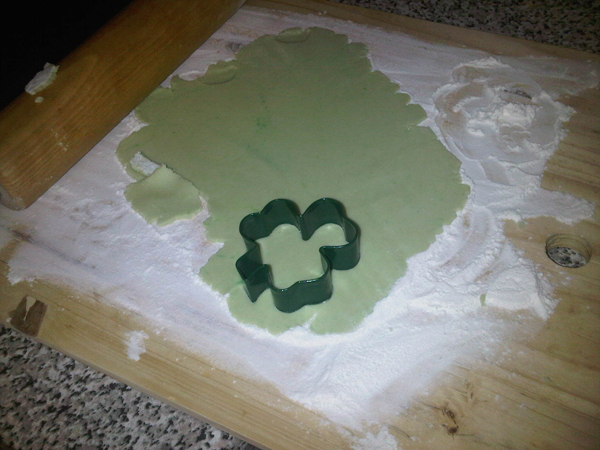
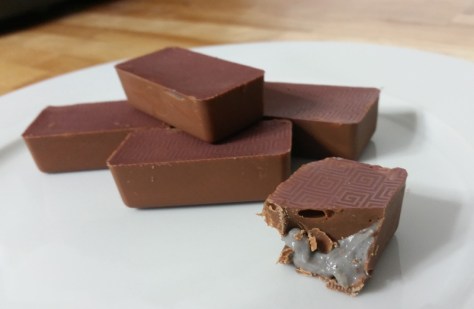
Recipe creation was a blast.  I had some home runs, like this blueberry crème brùlée milk chocolate, which my was introduction to using transfer sheets.  This is possibly one of the tastiest things I have ever thought of.

20151009_085458

And uh… I had some dismal failures.  Like nougat.  But it doesn’t matter if your attempt doesn’t work out, as long as you go through the process, take notes and learn, that’s all they’re looking for on most of them.  Some of my recipe creations were total disasters.

What did I learn?

Too much to quantify!  The course has a huge amount of downloadable reference material, and I’m still going through some of it. I think they really do cover pretty much everything.  Some highlights were the history of chocolate, production practices, flavours, design, decoration, business case studies, and how to contact wholesalers and find distributors in my area, which turned out to be a wonderful opportunity.  And they teach lots more.

The assignments were straightforward, and some of them really push you into experimenting with ideas you’d never try on your own.

The Business Plan part of the course wasn’t exactly what I expected.  It was good, don’t get me wrong.  I just had different expectations about what I would learn.  I still came away with knowledge I didn’t have before going in and that’s what counts.

I plan to sign up for EC’s Quality Assurance program in the future.  As a Professional program grad I get a discount on future courses. ^^

Was it worth it?

Yes. I graduated with honours, learned new skills and have a higher sense of accomplishment in my chocolate work.  My diploma hangs on the wall and makes me smile every time I see it.

It was expensive for an uncredited program.  I understand why it’s not accredited, because the students are all over the world, but as a Canadian I would have loved if it was accredited in Canada.

My Christmas chocolates this year were the best yet and I am much more confident after becoming an EC grad.

Advertisement

Devil’s food cupcakes with chocolate buttercream

20140726_183953

So these were delicious, if not quite as expected. I’ve made these before and went for the double chocolate experience this time. I skipped most of the pictures for this one since I’ve done it previously.

The cake and frosting recipe are included in Good Housekeeping Chocolate!: Favorite Recipes for Cakes, Cookies, Pies, Puddings & Other Sublime Desserts which is available on Amazon.com and Amazon.ca and one day I swear I’m going to test every frosting recipe inside.

As usual, go big or go home. I used Callebaut Belgian chocolate for this.

20140726_160231

Time required: 2 hours

Yields: hopefully 24 cupcakes

Cost per cupcake: $2.16

Total cost if you have none of the ingredients: $42-$52 depending on the quality of vanilla extract and the chocolate

Special kitchen implements I used:

  • KitchenAid mixer
  • incorrectly sized-muffin tin! (don’t do this)

Cake ingredients:

  • 2 C flour
  • 1 C unsweetened cocoa
  • 1½ TSP baking soda
  • ½ TSP salt
  • ½ C unsalted butter (one stick), room temp
  • 1 C golden brown sugar, packed
  • 1 C granulated white sugar
  • 3 eggs, room temp
  • 1½ TSP vanilla extract
  • 1½ C buttermilk  (or add 1 TBSP of vinegar to regular milk, stir and let sit)

Frosting ingredients:

  • 2 C icing sugar
  • 1 C butter, softened (2 sticks)
  • 3 TBSP milk
  • 1 tsp pure vanilla
  • 6 ounces semi-sweet Belgian chocolate, chopped

Cake instructions:

1. Pre-heat oven to 177°C / 350°F. Place cupcake liners in trays.

2. In a medium bowl combine: flour, cocoa, baking soda, and salt. Set aside.

3. In a mixing bowl at low speed, beat: butter, brown sugar, and white sugar, until blended. Increase speed to high: beat 5 min until it’s light and fluffy.

4. Reduce speed to medium and add the eggs one at a time.

5. Beat in vanilla.

6. Add the dry mixture and buttermilk alternating like so: half of the flour, all the buttermilk, and the rest of the flour. After each addition beat until just combined. Scrape the sides a few times and make sure the batter is smooth.

7. Bake about 18 minutes for full-size cupcakes or 14-15 min for minis. A toothpick inserted should come out clean.

20140726_172136

UGH WHY!! Not again. What the hell is this? This is what happens when you use a small muffin tin instead of the right size pan. Ugh.

8. Let cupcakes cool in pan one minute before removing from pan and placing on rack.  Cool before frosting. Judiciously select which ones to use in final photo.

Frosting instructions:

1. On low heat melt the chopped chocolate, stirring occasionally, then set aside to cool 5 min.

20140726_181813

2. Beat together until smooth: icing sugar, butter, milk, vanilla.

20140726_182106

3. Add chocolate and keep beating until well-combined. Beat on High about 2 min.

20140726_183047

Scrape down the bowl every 30 seconds.

20140726_183116

It lightens up quite a bit.

20140726_183556

Verdict:

I love this devil’s food recipe, it’s delicious. There are lots of ways to frost it and this is my first go at chocolate buttercream. It tasted great. I was surprised how soft this frosting was, it’s not runny, but it’s not suitable for piping. It is delicious however.

I’m not sure what happened to my cupcake pans, must have misplaced them in the move. This muffin tin is too shallow. I was conscious of not over-filling them and they still went kaboom.

I’ve been toying with the idea of reverse-engineering a Joe Louis for awhile and this frosting consistency has convinced me I can do it. Stay tuned.

Playlist:

Type O Negative – Love You to Death


Peanut butter blossoms (by Boyfriend!)

IMG_2022

This recipe comes from BHG: New Cookbook: 12th edition which is available on Amazon.com and Amazon.ca

Time required: 1 hr

Yields: 54

Total cost if you have none of the ingredients: $48

Cost per cookie: 88 cents

Spring is in the air folks… The cats are acting like kittens, my allergies are flaring up in huge raging hives, and the bake sales at work have begun for another season.

I was asked if SpatulaGoddess could make something for the bake sale fundraiser for whichever cancer research thing was going on at the time, and I said “No. but I can make something for you.”, not offended by this but it seems my colleagues forget that I was baking my own goods before I met SpatulaGoddess.  I won’t say that I have ever made anything as exquisite as my lovely, but I have never served anything that lasted, and the compliments abound… maybe it’s just been too long since I’ve baked for them… BAH!!!

I love peanut butter cookies who doesn’t?   I know the ones I love are in the Red Checkered Cookbook that my mom used, and also got for me when I moved out, so I went looking there, my original plan was to make peanut butter ninjamen cookies, but once I found page 218 in that wonderful book my plans changed BIG TIME, beside the cookie recipe I was looking for I saw the recipe I used.  I changed the hershey kisses with Reese’s mini peanut butter cups… ENJOY.

Kitchen implements I used:

  • Nemo the KitchenAid
  • large baking sheet
  • parchment paper
Ingredients

Ingredients

Ingredients:

  • ½ C white shortening
  • ½ C smooth peanut butter
  • ½ C granulated white sugar
  • ½ C golden brown sugar, packed
  • 1 tsp baking powder
  • ⅛ tsp baking soda
  • 1 egg
  • 2 TBSP milk
  • 1 tsp vanilla
  • 1¾ C white flour
  • ¼ C granulated sugar (reserved)
  • 1 package of mini peanut butter cups

Instructions:

Pre-heat oven to 176°C / 350°F 

Step 1-4

Flour, milk/egg/vanilla, sugars/baking powder/soda, shortening/peanut butter

1. Put shortening and peanut butter into mixing bowl.

2. Put the ½ cup of granulated sugar, brown sugar, baking powder, and baking soda, in a separate bowl.

3. Put milk, egg, and vanilla in a separate container.

4. Put flour in a separate bowl.

Nemo doing his thing

Nemo doing his thing

5. Beat “Step 1” ingredients with an electric mixer for 30 seconds.

6. Add “Step 2” ingredients and beat until combined, scraping the bowl.

7. Beat in “Step 3” ingredients.

8. Beat in as much of “Step 4” ingredient as you can, stir in the rest.  I am guessing this was written for those that do not have access to a Kitchen Aid… cuz Nemo KICKS ASSSSSS and has no issues mixing in almost 2 cups of flour.

mmmmmmmmmmmmmmmmmm  Peanut butter balls in sugar

mmmmmmmmmmmmmmmmmm Peanut butter balls in sugar.

9. Roll the dough into 1-inch balls, and roll them in the rest of the sugar.

10. Place balls 2 inches apart, (ballroom) am I right fellas?  Ahem.. anyways back to the topic at hand.  2 inches apart on an ungreased cookie sheet.

11. Bake at 350°F for 10 – 12 mins or until edges are firm and bottoms are lightly browned.

12. Immediately press a mini peanut butter cup into the middle of each cookie, and transfer to a wire rack and let cool

Cooling

Cooling

Verdict:  As I said to my buddy from work whom I sent a pic of these to after making them… “I AM A MUTHER$&#*^$ GENIUS!!!”  These far exceeded my expectations, I was thrilled with how great these  turned out.  SpatulaGoddess was so impressed she wants me to make more… But isn’t willing to let me play with the centres.  I know there are other great things to stick in the middle of a peanut butter cookie.

Playlist: Godsmack, Disturbed, Slipknot, Random J-pop… that’s how I roll

Grandma’s Scotch cakes – St. Patrick’s style

IMG_1787

This is my Grandma’s cookie recipe which was published in a local book by her church society. I have pimped them up for St. Patrick’s Day which is my favourite day of the year. Scotch cakes are really quick to put together! If you are a lazy froster like me they are even faster.

Toronto-20130317-00775

I had a lot of trouble with my camera today.

Time required: 1 hour

Yields: around 24-28 cookies depending on the size of your cookie cutter

Total cost if you have none of the ingredients: $38

Cost per cookie: $1.35

Kitchen implements I used:

  • KitchenAid
  • cookie cutter ala shamrock

Ingredients:

  • 2 C flour
  • 1 C butter, softened
  • ½ C icing sugar
  • ½ C powdered corn starch
  • ½ tsp salt
  • food colouring as desired
  • optional frosting (3 C icing sugar, 5 TBSP butter, 2 TBSP milk, 1 TBSP lemon juice, dash of vanilla, 2 drops mint oil)

Instructions:

1. Pre-heat oven to 204°C / 400°F.

2. Cream the butter.

3. Combine all other ingredients (except the dye) in a bowl, and slowly add to the butter and beat til just blended, then add dye. It will look crumbly when it’s done.

Toronto-20130317-00779

4. Roll the dough into a big ball and knead it for a few minutes, then separate dough into 2-3 balls.

5. One at a time, roll out each ball on a floured surface until about ¼” thick. Use awesome cookie cutter and transfer to pan.

Toronto-20130317-00781

6. Bake 7 minutes, cool in pan 1 min, then transfer to wire rack. The edges should be slightly golden.

Toronto-20130317-00784

7. Meanwhile make your frosting. Beat softened butter, then add icing sugar, milk, vanilla, and lemon juice. Beat until combined, then add dye and peppermint oil.

Peppermint oil is really strong, you do not want to overdo it here.

Frost your cookies and top with leprechaun poop if desired.

IMG_1786

Verdict: These were really good. Sláinte!

Playlist: Bon Jovi – Bad Medicine

Pumpkin ice cream

The Starks are always right. Pumpkin-flavoured everything is coming.

Before you get started: Freeze your ice cream bowl for at least 15 hours.  After all the ingredients are combined, chill at least 1 hour before churning. This recipe is from the book that came with the attachment.

Time required: 3 hours (under 1 hour of actual work)

Yields: about 8 cups of ice cream

Total cost if you have none of the ingredients: $29.

Cost per scoop: maybe $1.80

Kitchen implements I used:

  • Nemo the KitchenAid mixer
  • ice cream maker attachment
  • mesh strainer

Ingredients:

  • 1½ C half and half (or light cream)
  • 6 egg yolks
  • ¾ C granulated white sugar
  • ½ TSP vanilla
  • ¾ TSP pumpkin pie spice
  • 1½ C heavy cream
  • 1½ C canned pumpkin

Instructions:

1. Scald the half and half in a heavy-bottomed sauce pot.

2. Combine yolks, sugar, and vanilla.

3. Use a strainer, and gradually temper in the hot half and half. Eww yuck skim.

4. Whisk in pumpkin pie spice.

5. Return mixture to stove, heat on medium-low for 10 min, stirring frequently. It’ll thicken. Don’t let it boil though.

6. Remove pot from heat.

7. Add canned pumpkin and heavy cream to mixing bowl. Strain in the hot mixture and whisk together.

Some desserts cannot be strained enough. I wholeheartedly endorse straining anything that involves scalded dairy.

Have no fear, it will all combine into this.

8. Chill at least one hour before churning into ice cream.

9. When you are ready to make ice cream, churn on speed 1 for 15-20 minutes until dasher clicks.

It stayed pretty fluid until about 15 minutes, that’s when I could see it was starting to firm up. Mine took 18 minutes before the first click.

I am pleased to report this time that I have figured out the frozen bowl completely, it stayed in place, and no thumbs were pinched.

10. Transfer to tupperware container and freeze at least 1 hour before serving.

11. Let thaw a few minutes before scooping with beautiful blue KitchenAid scoop!!

Verdict: Boyfriend says it tastes just like pumpkin pie, it was so good. I can’t really tell what it tastes like because I have a cold and my taste buds have died. :[

Making ice cream is so great! What shall I do with all of the frozen egg whites I have left over?

Playlist: Halo OST

Belgian chocolate peanut butter ice cream

It’s Thanksgiving. I have no pumpkin. But I have something better.

This was a three-person enterprise made by yours truly, Boyfriend, and our friend V. This recipe is from the book that came with my ice cream maker, and I used my favourite Callebaut Belgian chocolate instead of baking squares, and added peanut butter chips. It was even more of a production than the cookies ‘n cream if you can imagine!

Before you get started: Your ice cream bowl needs to be frozen for at least 15 hours.

Once your start churning the ice cream, never, ever stop the mixer.

Time required: 2 days (1.5 hours of actual work and overnight chilling)

Yields: about 8 cups of ice cream

Total cost if you have none of the ingredients: $41, depending on the quality of chocolate

Cost per scoop: maybe $2.50

Kitchen implements required:

  • Nemo the KitchenAid
  • ice cream attachment
  • strainer

Ingredients:

  • 2 C heavy cream, divided
  • 60 g semi-sweet chocolate (2 oz)
  • 60 g unsweetened chocolate (2 oz)
  • 2 C half and half
  • 1 C granulated white sugar
  • ⅓ C cocoa
  • 8 egg yolks
  • 4 TSP vanilla extract
  • ⅛ TSP salt
  • 184 g milk chocolate (6.2 oz)
  • 1 C peanut butter cup pieaces

Instructions:

1. Chop the chocolate with a serrated blade, weigh it out and set aside. (The milk chocolate needs to be kept seperate, but the semi-sweet and unsweetened can be put in the same bowl.)

2. Using a double boiler on low, heat ½ C of the heavy cream, with the semi-sweet and unsweetened chocolate. Stir often and once chocolate has melted smoothly, remove from heat.

3. In a different sauce pan on medium, heat the half and half to steaming. Remove from heat. (I convinced Boyfriend and V to do the stirring and pot watching because I HATE that part. Ah, helpers!)

4. In a small bowl combine sugar and cocoa. Set aside.

5. In mixer combine egg yolks and sugar/cocoa mix, beat til blended.


6. Gradually temper in the warm chocolate/cream mixture into the yolks. Strain the warm half and half into the yolks. Don’t skip straining, it catches a huge skim which you don’t want in your ice cream. Or maybe you do. Ew. Blend on low until mixture is thoroughly combined.

7. Return mixture to sauce pan, heat to scalding (small bubbles form under surface but don’t let it boil). It will thicken up a bit but don’t worry.

8. Remove from heat, and stir in the remaining 1½ C of heavy cream into the hot mixture. Cover and chill overnight.

9. The next day, place frozen bowl in mixer and start the mixer. Pour in chilled mixture, all at once, and beat on speed 1 for 10-15 minutes.

So yeah… what I said about don’t stop once you’ve started? The bowl was making a funny noise, and Boyfriend determined I put the bowl on backwards. The mixer was stopped for 30 seconds to re-position the bowl. Bad idea. By the time the mixer started back up, the ice cream had completely frozen to the bowl and he had to churn it by hand like crazy to get it going again, while I cursed and shouted in the background.

“It’s ruined. It’s going to be awful. Look, it’s not even moving!”

“It’s not ruined, it’s going to be fine!”

10. When 30 seconds remain, add milk chocolate, and peanut butter chips.

11. Transfer to tupperware container and freeze at least 2 hours.

12. Let stand 10 minutes before scooping.

Verdict: Wow, this is delicious. It reminds me a lot of Chocolate Supreme ice cream which I haven’t had in years. It’s very rich though. Three scoops was way too much.  Can’t wait til V gets to try it.

Playlist: Halo OST

Cookies ‘n cream ice cream

For reasons I have never been able to fathom, Boyfriend does not like ice cream. But that’s totally cool, because that means there is more for me. Behold! Homemade ice cream!!

How did I make ice cream, you ask? Well! My wonderful family sent me the KitchenAid ice cream maker for my birthday. It’s an attachment designed to fit any model of a KA mixer, and I have been lusting after it for months. I can’t believe it’s finally mine!!

Before you get started: Making ice cream can be a two-day process. The bowl used to churn the cream needs to be frozen for at least 15 hours, and the recipe may require that you chill the mixed ingredients over night. This particular recipe (from the book that comes with the attachment) is very similar to making custard. I used real vanilla bean instead of extract though.

There is a helpful video here which shows how to assemble and use the attachment. Changing the ingredients or the ratios can screw up your finished product.

Time required: 2 days (1.5 hour of actual work)

Yields: I don’t even know, it’s a lot.

Total cost if you have none of the ingredients: $20.

Cost per scoop: Can you price joy? I don’t think so.

Kitchen implements I used:

  • Nemo the KitchenAid mixer
  • ice cream maker attachment
  • strainer

Ingredients:

  • 2½ C half and half
  • half of one vanilla bean, split and scraped
  • 8 egg yolks
  • 1 C granulated white sugar
  • ⅛ TSP salt
  • 2½ C heavy cream
  • 10 Oreo cookies

Instructions:

1. In a heavy-bottomed sauce pan on medium heat, combine scraped vanilla bean and the half and half. Heat to steaming.

2. Combine egg yolks, sugar, and salt. Using speed 2 for 30 seconds is enough.

3. Pour hot mixture through strainer and temper into the eggs, and whisk on low to combine.

4. Return entire mixture to stove top, and heat to scalding.

When small bubbles form at the edge it’s ready. Oops. This has heated too much. I used a different sauce pot for the second time and the bottom is too thin. Ugh I knew changing pots was a bad idea but I couldn’t be bothered to wash and dry my best pot for this type of stuff. That’ll teach me.

5. Transfer mix to a metal bowl and place into cold water bath. This will cool the temperature to prevent it from cooking.

After I poured the mixture into the red bowl, I looked at bottom of the sauce pan. Uh oh. This is not good. Scorched eggy mixture. I hope my ice cream doesn’t taste like burnt eggs. That would be worse than having no ice cream at all. :/

Hopefully the strainer caught all the bad stuff. (Don’t force stuff through the strainer, that defeats the point of straining.)

(Instant water bath! Sink! Ice cubes! Water!)

6. Cover mixture and chill overnight.

7. The next day, chop up Oreos and set aside.

8. Fit the drive assembly over the pin on the head of the mixer. Take chilled ice cream bowl from freezer, assemble the lock on the base, and set it in the stand. Set the dasher inside the bowl and turn mixer on lowest speed. The head should grab the dasher and turn smoothly.

Now here is where I ran into problems. Try as I might, the bowl would not fit into the base. I wish I had tested this before freezing, but now I’m panicking that my bowl is thawing so I decide to go ahead, and I’ll just hold the bowl steady while it churns. (Not the best idea, a KA mixer churns like you wouldn’t believe even on low and I got my thumbs pinched.)

9. In one pour, add the entire chilled mix to the running mixer (if the mixer is stopped your ingredients will flash freeze to the side of the bowl).

10. Churn on lowest speed for 20 minutes. It will start rising up the sides, the middle looks the right texture but the edges are soft and liquidy, I tried to scrape down the rim a few times but at this point it becomes gloriously messy. I wasn’t worried because from everything I have read about making ice cream at home, it’s normal to get soft serve and you freeze it to harden further.

11. When you have 30 seconds left, add the Oreos. The KA recipe said to use one and half cups of chopped Oreos. That was too much, they flew out of the bowl and hit me in the face. I got Oreos and ice cream everywhere.

12. It’s done! The ice cream is soft serve at this state, so transfer to a tupperware container and freeze for a few hours.

13. When you’re ready to enjoy some, let it sit 5 minutes on the counter before scooping.

Verdict: Delicious!! I invited a friend over and we enjoyed this lovely ice cream on my patio.

I was afraid I ruined it last night when I overcooked it during the second heating phase, but it turned out wonderfully! I’m still unclear why the bowl didn’t fit into the bottom of the mixer. After I cleaned the dishes I tested this again, and the bowl sits in there correctly without the locking piece – so I’m confused. The base lock is specifically for use with the tilt-head Artisan which I have. Oh well. I still got ice cream! And it was wonderful! I will see if I can figure out how to get the bowl situated correctly next time… when I make BELGIAN CHOCOLATE PEANUT BUTTER! Gwahahahah!

Playlist: The Legend of Zelda – Symphony of the Goddesses concert

Cinnamon rolls (with assistance from the defender of the universe)

I’ve never made bread without using my breadmaker, and I’ve never made cinnamon rolls at all. However!  Faint heart never won fair dessert, so I thought I’d give it a try today.

This recipe is from Betty Crocker Baking Basics – recipes and tips to bake with confidence, which is available on Amazon.com and Amazon.ca. This is definitely a recipe you need to read through a few times before attempting.

Time required: 4 hours

Yields: 15 rolls

Total cost if you have none of the ingredients: $38.

Cost per roll: $2.54

Kitchen implements I used:

  • KitchenAid mixer
  • small sauce pan
  • candy thermometer
  • 9″ x 13″ pan
  • rolling pin

Dough ingredients:

  • 3½ C to 4C of all-purpose white flour (divided)
  • ⅓ C granulated white sugar
  • 1 TSP salt
  • 4½ TSP fast-acting yeast
  • 1 C milk
  • ¼ C unsalted butter, softened
  • 1 egg
  • cooking spray

Filling ingredients:

  • ½ C granulated white sugar
  • 2 TSP ground cinnamon
  • ¼ C unsalted butter, softened

Glaze ingredients:

  • 1 C icing sugar
  • 1 TBSP butter, softened
  • ½ TSP vanilla
  • 1 to 2 TSP milk

Dough instructions:

1. Make the dough in the bowl for your mixer, combine: 2 C flour, sugar, salt, and yeast. (Measure out another 2 C of flour and set it aside.) Blend ingredients well with wooden spoon. It took not quite two of those little packets to get enough yeast.


2. Heat milk in a sauce pan on medium until temperature reads between 49°C and 54°C (120°F to 130°F).

3. Add warm milk, egg, and butter to dry ingredients.

4. Beat on low for 1 min, stopping to stir down sides 3 times. Everything should be moistened now.

Beat on medium for 1 min, scrape sides 2 times.

5. Now add the reserved flour, half a cup at a time, and gently beat it in with the wooden spoon. (This was about the time I remembered my KitchenAid has a bread hook, but oh well.)

According to the book, you just stir in the flour as you add it, but my dough was not absorbing the extra flour, the lump of dough kept moving around the bowl but none of the flour got sucked in. Bread dough is kind of weird, I’ve never seen it before. It’s… almost gunky at first, then it gets ropey. Hard to describe.

Anyway I stuck it back in the mixer for a minute and beat the hell out of it. Suggest you uh… find your own path to making bread. Don’t follow my path which is fraught with peril. From the bowl of flour I reserved from the original measuring, I used all but about ½ C.

6. Knead the dough on a floured surface for 5 minutes.. (What does that even mean?) I decided to put wax paper on a collapsing table, thunk the dough down, and punch the shit out of it. Why? Because I have a teeny tiny amount of counter space and it’s currently all covered in stuff I was too lazy to remove prior to starting this endeavor. In hindsight this may have not been the best idea, but the timer dinged and my 5 minutes were up. Thank God.

7. Spray a bowl with cooking spray, plop the dough in the bowl, and turn it so it gets covered in the cooking spray (I’m not clear why you do this, but that’s what the book said to do).

Cover the bowl with plastic wrap (whether to cover loosely, or tightly, is a bone of contention). Leave the bowl alone for 1.5 hours in a draft-free area. I grabbed Voltron to show scale.

8. Behold! The mighty process of fermentation. (That’s what the yeast does to make the bread rise, adding the water re-activates the yeast to produce carbon dioxide, which rises.)

Unwrap the dough and press one finger into it. If the indentation remains in the dough it’s ready. I got so excited about punching the dough I forgot to do this step.

My dough hath risen, am feeling confident, half the battle is won.

Onto the filling!

Filling instructions:

9. Spray the 9″ x 13″ pan with cooking spray.

10. In a small bowl combine white sugar and cinnamon. Set aside.

11. Punch the dough to deflate the gas. (Apparently you aren’t supposed to go Chuck Norris on it, just one or two love taps is enough? Boring!)

12. Flour the counter top or wherever you intend to flatten the dough, and use your hands to spread it out.

13. Roll it into a 10″ x 15″ rectangle.

14. Spread the softened butter over surface, and sprinkle with cinnamon sugar mix.


15. Starting with the long side, roll the dough up like a jelly roll.

Try to get an evenly shaped roll of dough. Best of luck with that part.

16. Use a serrated knife to cut into 15 pieces. Or 13, or whatever.

17. Place the pieces into the greased pan.

Cover with plastic wrap again, and leave for 30 min to rise again.

Now it’s time to bake those bad boys.

Baking the rolls:

Pre-heat oven to 176°C / 350°F, and use centre rack.

Take the plastic wrap off the tray of rolls, and bake them for 30 minutes.

18. Remove rolls from the pan immediately and transfer to wire rack. Let cool 5 minutes.


Now all that’s left is to make the glaze and you are done. Finally!

Glaze instructions:

19. Combine icing sugar, butter, vanilla, and milk. Stir until smooth and drizzle over warm rolls.

Sit back and enjoy the results of what feels like an entire day’s work.

Verdict: God, this took forever. I think they are a little bit over done, but Boyfriend thinks they are perfect. I’d take 5 minutes off the baking time when I make them again. They tasted great.

Playlist: Song of the Hero  – The Legend of Zelda, Symphony of the Goddesses

Patty’s ultimate peanut butter cookies

It’s round 2 of Patty vs. Peanut Butter. Are these the cookies I’ve been waiting for? Stay tuned and find out.

I adapted this recipe from the Good Housekeeping Cookies! book, which is available on Amazon.com and Amazon.ca if you’re interested.

Time required: 1 hr

Yields: 2 dozen or so

Total cost if you have none of the ingredients: $54

Cost per cookie: $2.25

Kitchen implements I used:

  • KitchenAid mixer
  • cookie trays

Ingredients:

  • 2¾ C flour
  • 1 TSP baking powder
  • ½ TSP baking soda
  • ¼ TSP salt
  • 1 C butter, softened
  • 1 C creamy peanut butter
  • 1 C brown sugar, packed
  • ½ C granulated white sugar
  • 2 TBSP corn syrup
  • 2 TSP vanilla
  • 2 eggs
  • ½ C Chipits Reese’s peanut butter chips
  • ½ C Chipits milk chocolate chips
  • ½ C Chipits Skor toffee chips

Instructions:

1. Pre-heat oven to 190°C / 375°F.

2. In medium bowl combine flour, baking powder, baking soda, and salt. Set aside.

3. In mixer cream together butter, white sugar, brown sugar, and peanut butter (it’s a lot easier to get the peanut butter out if you lightly grease the cup first). Beat until fluffy.

4. Beat in eggs, vanilla, and corn syrup. I always mix all the wet stuff together then pour into the dough because I am lazy.

5. On low speed, add the dry mixture by thirds, beat until just combined.

6. Mix in the chips, then cover and chill dough for 30 min.

This is some seriously heavy dough.

7. Roll dough into balls and bake for 12 min. Do that fork thing if you want.

8. Cool in pan 1 min, then transfer to wire rack.

9. Pour some milk and enjoy!

Verdict: Tonight we have company, a friend who is a self-proclaimed cookie connoisseur. He tasted one of these, and decided, “It’s actually pretty much perfect.”

I really enjoyed these.

Playlist: The Legend of Zelda symphony

Jareth’s deep-dish streusel peach pie

In celebration of Labyrinth Day yesterday I made this last night:

Why do I celebrate Labyrinth Day? In the hopes that one bite will transport me to a place guy like this:

Goblin King! Be still my heart.

This recipe comes from KitchenAid 3 cookbooks in 1 which is available on Amazon.com  I bought the book for this recipe in particular actually, have been waiting for months for June 13 to roll round so I could try this out.

Time required: 2 hours

Yields: 9 pieces

Cost per slice: $4

Total cost if you have none of the ingredients: $36

Kitchen implements I used:

  • pastry blender
  • baking pan: 8″ x 8″
  • wax paper
  • rolling pin
  • mesh strainer

Ingredients:

  • 2 large cans of peaches, drained (save ¾ C of syrup)
  • ⅓ C granulated white sugar + 1 TBSP saved for later
  • 1 TBSP powdered corn starch
  • ½ TSP vanilla
  • ½ C packed brown sugar
  • 2 C flour, divided into 1½C and ½C
  • ⅓ C quick oats
  • ¼ C butter (half a stick)
  • ½ TSP ground cinammon
  • ½ TSP salt
  • ½ C white shortening
  • 4 TBSP cold water

Instructions:

1. Pre-heat oven to 176°C / 350°F. Drain peaches and save the syrup.

2. In a sauce pan on low, heat white sugar (all except the 1 TBSP) and corn starch.

When it melts, stir in ¾ C of the peach syrup, adding it gradually.

Keep mixture on low for 10 min, it should thicken. Remove from heat and add vanilla. Set aside.

3. Combine in a bowl: brown sugar, ½ C flour, oats, and cinnamon. Stir in melted butter and you’ll have a crumbly topping. Set aside.

4. Combine in a bowl: remaining 1½ C flour, 1 TBSP sugar, and salt. Cut in shortening.

5. Add water one tablespoon at a time and mix with fork.

6. Roll out crust until it measures 10″ square. I rolled it out between two layers of wax paper.

7. Trim away excess and press crust into pan. Peel off wax paper.

Tah-dah!

8. Drop peaches onto crust, add warm syrup, add topping.

9. Bake 45 min. Cool on wire rack.

The book says to serve warm. I tried one piece last night warm, and one piece this morning. I liked it better the next day.

Verdict: I liked this. I imagine with fresh peaches it would be extra good, but after what happened on Labyrinth Day 2011 I couldn’t be bothered. My big plan was to post this last night at the 13th hour (1am), but I got sleepy. I intended to send Boyfriend into work with some but I was enjoying a pleasant dream about Jareth and I didn’t get up in time. Goblin King, you can peach me away anytime.

Playlist: Labyrinth soundtrack