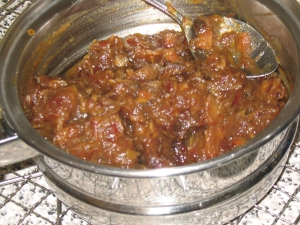
Nanny’s date squares

My nanny was a fabulous cook. I remember most of her cooking quite fondly, especially her date squares. When I was in elementary school, each afternoon I would walk to Nanny’s house, and she would be waiting with lunch ready for me. We would chat, and watch Batman and Fun House, and then she would waive me off, and sing, “Off you go, into the wild blue yonder!” as I walked back up the hill to school. I haven’t eaten a date square since she died.

IMG_1761

Mom sent me this recipe (basically the Purity recipe, with extra dates). I opened the carton of dates today, and the smell hit me. I picked up my knife and put it down. I put the dates back in the carton. Then I dumped them out again. For a moment it felt like I was back in Nanny’s kitchen. But I opened my eyes, and there was just me, and a pile of dates, waiting to be chopped. Would these be close to my memory of her date squares?

Time required: 3 hr (2 hr is cooling time)

Yields: 48 squares

Total cost if you have none of the ingredients: $30

Cost per square: 62 cents

IMG_1753

Kitchen implements I used:

  • 8″ square pan
  • tin foil
  • pastry blender

Ingredients:

  • 1 lb pitted dates, halved
  • 1 TBSP brown sugar
  • ½ C water
  • 1 C flour
  • ½ tsp baking soda
  • ⅛ tsp salt
  • 1 C butter, softened
  • 1 C lightly-packed brown sugar
  • 2 C rolled oats

Instructions:

1. Pre-heat oven to 162°C / 325°F. Line pan with foil and grease.

2. In a sauce pan combine: dates, sugar, and water. Bring to a boil and simmer for 5 min or until it reaches the mushy consistency of jam. Set aside to cool.

IMG_1754

I worried that I scorched the dates, and put more water in them and simmered for another 5 minutes.

IMG_1755

3. In a large bowl combine: flour, baking soda, and salt.

4. Cut in butter.

IMG_1757

5. Cut in brown sugar and oats. My pastry blender got gunked up by the oats so I used my hands for this part.

IMG_1758

6. Press half of the mixture into greased pan. Couldn’t take a picture of this as both hands were covered in food by this point.

7. Cover evenly with date filling. I used a spoon to smooth it down.

8. Cover with remaining topping mixture. It doesn’t really crumble, but you can pinch it apart and drop it randomly, it’s not supposed to be completely covered so it doesn’t matter if there are gaps.

IMG_1759

9. Bake 35-40 min until light golden brown.

10. Cool completely before cutting.

IMG_1760

Hmm. Looks right. Smells right.

IMG_1762

Verdict: And tastes right. These were good; not as good as Nanny’s, but pretty good. I was afraid they would suck, and I would be sad. But they were good, and I was still a bit sad. But a little happy too.

Date squares are gloriously sticky, juicy, sweet, and a little bit crunchy. They go great with a cup of tea, which I am enjoying right now.

Playlist: Stateless – Bloodstream

Graham cracker lemon squares

I recently purchased more lemons so I’d have an excuse to make another lemon… something, anything. The lemon tart I made the other week vanished mysteriously from the fridge, and we were a house sans lemon. And that’s no state to be. I wondered if lemons and graham crackers would be good together, so I got working on a little idea.

Time required: 1 hour

Yields: maybe 30

Total cost if you have none of the ingredients: $19

Cost per slice: $1.57

Kitchen implements I used:

  • Nemo the KitchenAid
  • sauce pan
  • juicer
  • zester
  • mesh plate
  • shallow baking pan

Crust:

  • ⅓ C butter, unsalted
  • 1½ C graham cracker crumbs
  • 3 TBSP granulated white sugar

Filling:

  • 1 C lemon juice (2-3 large lemons)
  • grated zest of one lemon, wash and dry it first
  • 1 C granulated white sugar
  • 6 TBSP unsalted butter, cut into pieces
  • 2 eggs
  • 2 egg yolks

Instructions:

1. Pre-heat oven to 176°C / 350°F. Line baking pan with foil.

2. Melt butter in the microwave. Stir in sugar and graham crumbs.

3. Pat into prepared pan and bake 10 min. Cool on wire rack.

4. Get started on the lemon curd. Combine the juice, zest, sugar, and butter in a sauce pan and heat on Low until the butter is melted. Remove from heat.

5. Beat the eggs and yolks, and temper in the hot butter mix.

6. Return to stove and heat on Low until curd thickens (stir often), and when it starts to bubble, remove from heat.

7. Strain and pour directly onto crust. Ah, beautiful!

8. Bake 5 min. Cool on rack, then cover and chill for at least an hour before slicing.

Swear like a sailor when the saran wrap ruins the surface.

Verdict: Very tart. Very good. Wishing I had let the lemon settle before baking, as it’s rather high on one end, and bare on the other, but aside from the cosmetic issues this is pretty good. One day I will find the bottom of my fluted tart pan, which is still M.I.A., and then maybe I’ll make, oh I don’t know, an actual tart.

Playlist: Depeche Mode

Pumpkin roll

“Pumpkiny goodness.”

(That’s what Boyfriend came up with when I said I didn’t know how to introduce this post.)

This recipe comes from Nestlé’s Chocolate 3 Books In 1 which is available from Amazon.com.

Time required: 2.5 hours

Yields: 10 slices

Cost per slice: $4.43

Total cost if you have none of the ingredients: $44.34

Special kitchen implements I used:

  • baking pan: 15″ x 10″
  • sifter
  • wax paper and plastic wrap

Roll ingredients:

  • ¾ C flour
  • ½ TSP baking powder
  • ½ TSP baking soda
  • ½ TSP ground cinnamon
  • ½ TSP ground cloves
  • ¼ TSP salt
  • 3 eggs, room temp
  • 1 C white sugar
  • ⅔ C pure pumpkin

Frosting ingredients:

  • 8 oz block of cream cheese, room temp
  • 1 C icing sugar, sifted
  • 6 TBSP butter, room temp
  • 1 TSP vanilla extract

Instructions:

1. Pre-heat oven to 190.5°C / 375°F.  Prepare baking pan by greasing it, then line with wax paper, then grease and flour the paper. Then place a large piece of wax paper down on a flat surface and dust it with icing sugar for later.

2. Combine: flour, baking powder, baking soda, cinnamon, cloves, and salt.

3. In a mixer, beat eggs and sugar until it thickens.  Add pumpkin.

4. Stir flour mixture into wet, adding about one third at a time.

5. Pour into prepared pan and spread evenly.  Bake 13 min, when it’s done if you press lightly on the top with a spoon it should bounce back up.

6. Invert pan onto flat piece of wax paper.  Carefully peel the paper off the back (the bottom) of the cake.

7. Start at the end closest to you, and using the piece of wax paper on the bottom, gently roll the cake up onto itself, and place on wire rack to cool.

8. Meanwhile, make frosting by combining all ingredients in mixer and beat til smooth.

9. Unroll the cake, and remove the wax paper.  Spread frosting across it, and roll back up. Good luck with this part.

10. Cover in plastic wrap and chill for at least one hour.

To prevent roll from spreading out, creatively ram it into a pan and put other items in the pan to hold it against the side.

11. Slice and serve!

Verdict:

“I don’t know how to classify this post.”

“How about delicious?”

“You liked it that much eh?”

This turned out really well. I’d recommend less frosting, the amount you get from the recipe is really too much, it was oozing everywhere.  A thin layer of frosting would be fine.

Playlist: enjoying the silence!

Skor blondies

Faithful follower: this is for you! I have emerged from my penuche-induced coma to make a batch of blondies. Actually this is the first thing I’ve baked since Thanksgiving, and it feels quite good!

I found this recipe on the back of a package of Chipits.

A blondie is similar to a brownie, however the major ingredient difference is using brown sugar instead of cocoa. These are made with Skor bits, and apparently skor is the Swedish word for shoes. Why a chocolate bar was named after shoes is a mystery right up there with getting the caramel inside the Caramilk. These are the matters I just do not understand.

Time required: 2 hr (30 min prep, 23 min bake, 1 hr cool)

Yields: 36 pieces

Total cost if you have none of the ingredients: $31.00

Cost per piece: $0.86 (hurrah for the most fiscally responsible thing I’ve ever baked!!)

Special kitchen implements I used:

  • baking pan: 9″ x 13″
  • tinfoil

Ingredients:

  • ½ C butter, softened
  • 1 C brown sugar, packed
  • 2 eggs
  • 2 C flour
  • 1 TSP baking powder
  • ½ TSP baking soda
  • ¼ TSP salt
  • 200g package of Skor Chipits (butter toffee pieces)
  • ¼ C semi-sweet chocolate chips

Instructions:

1. Pre-heat oven to 177°C / 350°F. Line baking pan with tinfoil and grease.

2. In a mixer beat butter, brown sugar, and eggs until combined.

So yeah, this is the first time I’ve given poor Nemo a whirl in over a month. That’s right, I am on first name terms with my KitchenAid. All things of beauty need a name!!

Back to our wet mixture: beat until smooth and combined.

3. In a medium-sized bowl, combine: flour, baking powder, baking soda, and salt.

4. Add dry mixture to wet, one third at a time. Don’t overbeat or the mixture will become too hard.

5. Add 1 cup of Skor pieces, and the chocolate chips (the recipe suggested 1C of chocolate chips but I only had enough for ¼C).

6. Smoosh batter into prepared pan.

7. Bake for 23 min, top should be golden brown.

8. Remove from oven and immediately pour the remaining Skor pieces on top.

9. Cool on wire rack for at least 1 hour. Peel off tinfoil and serve.

Verdict:

“What is that delicious smell?” asked Boyfriend when he came home.

We ate some, and they were pretty good. I have a weakness for butter toffee, buying Skor Chipits may have been a grave mistake. I expect there are all sorts of recipes which would benefit from adding Skor bits. Stayed tuned and find out.

Playlist: Matthew Good Band – Giant

Patty’s turtle brownies

Ah, turtles. Despite the fact that I hate nuts, I thoroughly enjoy Nestlé Turtles, and I really enjoy turtle brownies (sans nuts). I haven’t baked much lately because I AM SUPER STRESSED OUT, and today I was in the mood for something simple. I decided to make half with nuts for Boyfriend because I am a really nice person.

Good to know before you start:

This process involves caramelizing sugar, which I have written about before, so let me sum up: caramelizing can be rather dangerous and lead to hideous scarring. Try not to maim yourself.

Time required: 2 hours (40 min prep, 20 min bake, 1 hr chill)

Yields: about 30 pieces

Cost per piece: $1.66

Total cost if you have none of the ingredients: $18.00

Kitchen implements I used:

  • baking pan: 9″ x 13″
  • parchment paper
  • pastry blender

Ingredients:

  • 2 C flour
  • divided amounts of brown sugar, 1 C and ¾ C
  • divided amounts of margarine, ½ C and ¾ C
  • 1½ C chopped walnuts (optional)
  • 2 C milk chocolate chips

Instructions:

1. Pre-heat oven to 176° C / 350°F. Line baking pan with parchment paper.

2. In a large bowl, mix 1 C of sugar with the flour, and cut in ½ C margarine. with a pastry blender, blending until coarse crumbs form.

You can do this the smart way and use pre-measured blocks of margarine, or you can do it the foolish way. Anyway, moving right along…

3. Pat mixture into baking pan.

4. Sprinkle nuts onto crust. Ugh, disgusting. I’m only doing this for Boyfriend’s sake so I’ll put nuts on half. Or… one third. Yup looks like half to me!

5. In a heavy-bottomed sauce pan, melt the remaining amounts of sugar and margarine (¾ C of each), and stir constantly. Once mixture is boiling, let it boil for 1 minute, then immediately pour onto crust.

Use a spatula to carefully spread the caramel, work quickly because as the caramel cools it will firm and start to tear up the crust.

6. Bake in the oven for 20 min.

7. Sprinkle chocolate chips over hot crust. Wait 3 minutes, giving the chocolate time to melt.

8. Use spatula to gently spread chocolate.

9. Chill for at least one hour and cut into squares.

His and hers! No nuts for me. Seriously, why would anybody want to spoil turtles with nuts? Reptiles lay eggs anyway.

Verdict: Delicious! I love turtle brownies, they are cheap, they are quick, and they are easy to make.

Playlist: Lacuna Coil

What is your favourite stress-free dessert to fall back on?

Boyfriend’s First Blog Post… Ever ;~)

Boyfriend here.

So I have my own blogging account now, never had one before, and don’t know if I’ll even keep up on my own blog, but here is my very 1st blog post, on my girlfriends’ blog.  Thats right world be jealous, my girlfriend is a Spatulagoddess.

My lovely girlfriend had never really made Rice Krispies Squares(RKS) before, but I have many times, so when I heard she was gong to try making them, I put my 2 cents in about making Peanut Butter Chocolate Chip Rice Krispies Squares(PBCCRKS).  She wasn’t interested :~(  so she went ahead and made her RKS which turned out great.  I told her that was fine, I would just make mine at a later date.

And that date was tonight.

For starters PBCCRKS are made the EXACT same way that one makes regular RKS, only I added 3 large soup spoons worth of Peanut butter in, and then eye-balled out the semi-sweet chocolate chips, mix it all together. 

Now take it from me, it is much better to prep all this before, hand because once the melted marshmallows start to cool it becomes real “fun*sarcasm* trying to mix it up.  I decided to make these tonight on a whim, and just went to er.  It would been much less messy, and easier on the arm if I hadda prepped everything 1st.

Thank you to Mom, for making these for me as a kid, and for always being there for me when I call to find out what it was you actually did.  I know I could always google it, but Mom always knows best.

And thank you to my wonderful Girlfriend who always inspires with her treats.

This is Boyfriend signing off


P.s. Lol she is checking my punctuation.  Must be careful you don’t want to anger a Spatulagoddess

P.s.s.  LOF’nL not allowed to spell them the way I want to, I “have to spell it the same way as on the box” for the Record I spell them Peanut Butter Chocolate Chip Rice Crispy Squares.

P.s.s.s. I love this woman from the bottom of my heart

no really signing off now ;~)

Rice Krispies squares

Eureka! I have done it!  I have finally made Rice Krispies squares! Fourth attempt was successful. There was no burning or marshmallow shrinkage this time.

Am so happy. Never making these again!

Recipe:

  • ¼ C melted butter
  • 400 g bag of large marshmallows (official recipe uses one 250 g pkg)
  • ½ TSP vanilla extract
  • 6 C cereal

Instructions:

1. Grease 9″ x 13″ pan.

2. In a large glass bowl melt butter for 1 min.

3. Add marshmallows, stirring until evenly coated. (I cut the marshmallows in half first.)

4. Microwave on High until melted smooth (it took 4 minutes, stirring every 60 seconds).

Wow making these sucks. It’s gooey and sticking to everything, ugh!!

5. Stir in vanilla, then stir in cereal. Hmm. This is the largest glass bowl that I have, and it wasn’t large enough. Yet another excuse to never do this again.

6. Press into prepared pan and chill for an hour.  I used a buttered spoon but it’s impossible to get this crap off the spoon and into the pan. Forget “square”. It is quite lumpy and not sitting flat in the pan, after 5 minutes I’m pissed off from fussing with it and just stick it in the fridge.

Verdict: They tasted pretty decent. I used a lot of marshmallows.

Boyfriend tells me they taste just like they are supposed to. We have a lot of cereal and another bag of marshmallows left over, and he has a different way of preparing them, so my next post might be written by him. 0_0

I was feeling very ashamed of my deficiency, but now I have crossed these squares off of my list of things to make. Never again!!

What supposedly-easy food item is your personal bane?

Playlist: Diablo dungeon theme

Remarkable mango-rhubarb bites

Je suis la hot. It’s been too hot to bake lately.  This is the first dessert I’ve made in weeks, which is a mango-rhubarb number. Technically it was a bar-type dessert, although the consistency wasn’t what I consider to be a bar. It had cobbler-like qualities.

I adapted this from a recipe I found on The Rhubarb Compendium.  I added mango and ditched the icing sugar. It’s possible my results were skewed since I added the egg at the wrong stage.

Time required:  1.5 hrs

Yields: 12 servings

Cost per portion: $2.70

Total cost if you have none of the ingredients: $32.00

Kitchen implements I used:

  • baking pan 9″ x 13″

Ingredients:

  • 4 C rhubarb, washed and diced
  • 3 C mango, peeled and cored and diced
  • 1 C granulated white sugar
  • 1 C dark brown sugar
  • ½ C white shortening
  • 1 egg
  • 1 TSP baking soda
  • ¼ TSP salt
  • 1 TSP cinnamon
  • 2 C flour
  • ½ TSP vanilla

Instructions:

1. Pre-heat oven to 177°C / 350°F degrees. Grease and flour baking pan.

2. Place rhubarb and mango into a large bowl. Mix in half of the white sugar. Set aside.

3. In a medium bowl, cream shortening, remaining white sugar, and brown sugar.

4. In a small bowl, combine baking soda, salt, cinnamon and flour. Add to wet mixture.

5. Mix in egg and vanilla.

6. Combine wet mixture with fruit, smoosh batter in baking pan.

7. Bake 40 min. Cool on rack at least one hour.

8. Cut into “squares”. Hmmm. Something doesn’t look quite right. This definitely did not leave the pan in a perfect square.

Verdict: I liked this but Boyfriend did not.

He said the texture was “squishy”. Parts of the bar were crunchy, and parts were soft, and I’m not sure why. The rhubarb was crunchy, which makes sense because it was not stewed yet I wasn’t expecting crunchy fruit in a baked dish. It wasn’t bad, just different. I found the mango flavour a little overwhelming, so next time I’d drop the mango entirely and stew the rhubarb prior to baking. But if I was going to do all of that I’d just make a cobbler instead.

Overall I liked this but it wasn’t my favourite rhubarb dish that I’ve made.

Update July 26, 2011: the next day this dessert turned into mush. I’m not sure if it was caused by the heat wave we’re experiencing, or if this particular mix of ingredients don’t hold up well, but I won’t be making this again.

Playlist: Adele

Rhubarb apple crumb bars

The only thing more sour than rhubarb is a spiteful girlfriend. I baked this to get even with Boyfriend who went out of town for the weekend, alas. Eat your heart out.

Yes I am that petty. I adapted this from the “blueberry crumb bars” in Good Housekeeping Brownies: favourite recipes for Blondies, Bars & Brownies, which is available on Amazon.com and Amazon.ca.

I have a few plans to make this turn out better than the first attempt at a fruit crumb bar, which was a burnt nightmare. I think I can get it right this time.

Good to know before you start: The high butter content will easily burn. To prevent this, cover the entire dessert with tinfoil, bake  30 minutes at a high temperature, then remove tinfoil and bake  an additional 25 min at a lower temperature. This ensure the fruit filling is properly cooked but the topping doesn’t burn.

Time required: 2.5 hrs

Yields: 36 piece

Cost per bar: $1.39

Total cost if you have none of the ingredients: $41.00

Kitchen implements I used:

  • baking pan: 10.5″ x 14.5″
  • tinfoil
  • KitchenAid mixer
  • pastry blender

Crust ingredients:

  • 1 C butter, softened (2 sticks)
  • ⅔ C icing sugar
  • 1 TSP pure vanilla extract
  • 2½ C flour

Filling ingredients:

  • 4 C rhubarb, washed and diced
  • 4 C tart apples, peeled, cored, and diced
  • ½ C granulated white sugar
  • 3 TBSP powdered corn starch
  • 2 TBSP water

Topping ingredients:

  • ⅔ C quick-cooking oats, uncooked
  • ½ C flour
  • ⅓ C brown sugar, packed
  • ¼ TSP cinnamon, ground
  • ½ C butter, slightly softened  (1 stick)

Instructions:

1. Pre-heat oven to 190.5°C / 375°F. Line baking pan with foil.

2. Prepare the fruit and set it aside.

3. Prepare crust: in mixer beat the butter, icing sugar and vanilla.

Beat until light and fluffy.

4. Add flour and mix until just combined.

5. Use hands to press dough into baking pan, bake 20 min.

6. Cool on rack 5 min.

7. Meanwhile prepare filling: in a large sauce pan, combine sugar, corn starch, and water.

Add fruit. Bring to a boil over Medium heat, reduce heat and simmer for 5 minutes. Stir often.

8. Meanwhile prepare topping: in a medium bowl stir: oats, flour, brown sugar, cinnamon.

9. Cut in butter with pastry blender, and blend until you have coarse crumbs.

10. Spread fruit mixture evenly over crust.

11. Use hands to sprinkle topping over fruit.

12. Cover with tinfoil and pierce with fork. Bake 30 min.

13. Remove tin foil after 30 min, and lower temperature to 160°C / 320°F. Bake for an additional 25 min.

14. Cool completely in pan before slicing.  When ready to serve, lift from pan, peel foil off the bottom.  Slice lengthwise into 6 strips, then crosswise into 6 pieces.

Verdict: My plan to taunt Boyfriend failed miserably! This was partially assembled when I found out he would be home at 3:30, right when it finished cooling. Foiled!

I decided to be kind and let him have some.

These were delicious. The crust reminded me of shortbread, very buttery and soft.  The rhubarb and apples were nice and tart. The only thing I’d change is to add two more stalks of rhubarb.

I will retry the apple-only version at some point and believe that if I use the tinfoil trick it should be fine.

Playlist: Sailor Moon Super S movie

I am now convinced anything with rhubarb will turn out awesome and make me feel like a baking super star. What rhubarb dessert is your favourite?

Charred apple crumb squares

Few desserts really include a synonym for “burnt” in their name, and sadly, this isn’t one of them.  Foiled by my own hubris, burnt apple crumble. :[

This recipe is the last one that I plan to post from Good Housekeeping Brownies: favourite recipes for Blondies, Bars & Brownies, which as always is available on Amazon.com and Amazon.ca.

Good to know before you start: I did this recipe backwards.  You are supposed to cook the apple filling before baking the crust on its own.

It doesn’t matter if the apples brown.

I have read that 4 pounds of apples equals about 8-9 medium sized apples. I used 8 and that was not enough by far.  You’ll see why soon enough.

Time required: 3 hours

Yields: 24 pieces

Cost per square: $1.63

Total cost if you have none of the ingredients: $39.00

Special kitchen implements I used:

  • baking pan: 14½” x 10½”
  • tin foil
  • plastic wrap
  • apple peeler & corer
  • pastry blender

Crumb topping:

  • 1 C flour
  • ½ C butter (1 stick), softened
  • ½ C dark brown sugar, packed
  • 1 TSP ground cinnamon
  • 1 TBSP vanilla extract

Crust:

  • 3 C flour
  • ⅓ C granulated white sugar
  • ¼ TSP salt
  • ¾ C cold butter (one and a half sticks)

Apple filling:

  • 4 lbs of tart apples
  • 4 TBSP butter
  • ¾ C dark seedless raisins
  • ½ C dark brown sugar, packed
  • ¾ TSP ground cinnamon
  • 1 TBSP powdered cornstarch
  • 2 lemons (need 3 TBSP fresh lemon juice)

Instructions:

Step 1 – Prepare topping: in a medium bowl combine all the ingredients with your hands.

I added the vanilla after the first 4 were combined.  Just pick it up and squish it through your hands, working all the ingredients into each other.

Ugh I hate touching stuff with my hands. That is why I fail at gardening.

Squash it into a ball-type shape, cover in plastic wrap, and chill.

Step 2 – Preheat oven to 191°C / 375°F.  Line baking pan with tin foil.  Grease foil.

Step 3 – In a large bowl, mix flour, salt, and white sugar.  Use pastry blender to cut in butter.

Keep doing this tedious task until the mixture resembles fine crumbs.

Step 4 – Press mixture into prepared pan by hand and bake 20 min.  It’s normal for crust to crack.  Meanwhile!

Step 5 – Prepare apple filling; peel and core the apples, and cut each slice into thirds.  In a large skillet on Medium heat, cook: apples, raisins, brown sugar, and cinnamon.

Stir often, this should take 25 min.  It’s done when the apples are tender and most of the liquid has evaporated.

Step 6 – Mix the cornstarch and lemon juice, and stir that into the apple mix to thicken it up.

Step 7 – “Use spoon to spread the filling over hot crust”. Oh dear. How did the apples burn in the one minute it took to add the lemon juice? Oh my God. This is dreadful.

Step 8 – Why don’t I have enough apples!? I tried spreading it evenly, but it became obvious there wasn’t enough filling. I smoothed it back over to the side, figuring the naked part on the end will be a casualty of this experiment.

Step 9 – Take topping out of fridge, break into crumbs (??) and spread onto filling. Hmmmm. I’m betting it is not supposed to look like this.

Step 10 – Bake 40 minutes until topping is golden.

Cool completely in pan (1-2 hours) on wire rack.

Dear God… what kind of horror is this?

Step 11 – To serve, lift dessert out of pan, peel foil off. Cut lengthwise into 4 strips, then cut crosswise into 6 squares if you are feeling adventurous.

Verdict: The topping is burnt, and the filling is very burnt, in a not-so-subtle flavour I like to call “charred”. Who knew a dessert that smelled so good in the making could go so wrong? I had high hopes for this, you know, until it went to hell and all.

I think this definitely has potential, it would probably be really good if it hadn’t burned and if I understood how to crumble the topping to make it look presentable.

The disappointment of slaving over something that smells like apple pie, and ruining it, reminds me of this passage:

“I hope I never smell the smell of apples again!” said Fili. “My tub was full of it. To smell apples everlastingly when you can scarcely move and are cold and sick with hunger is maddening. I could eat anything in the wide world now, for hours on end – but not an apple.” – The Hobbit

Playlist: Sailor Moon Japanese soundtrack