Devil’s food cupcakes with chocolate buttercream

20140726_183953

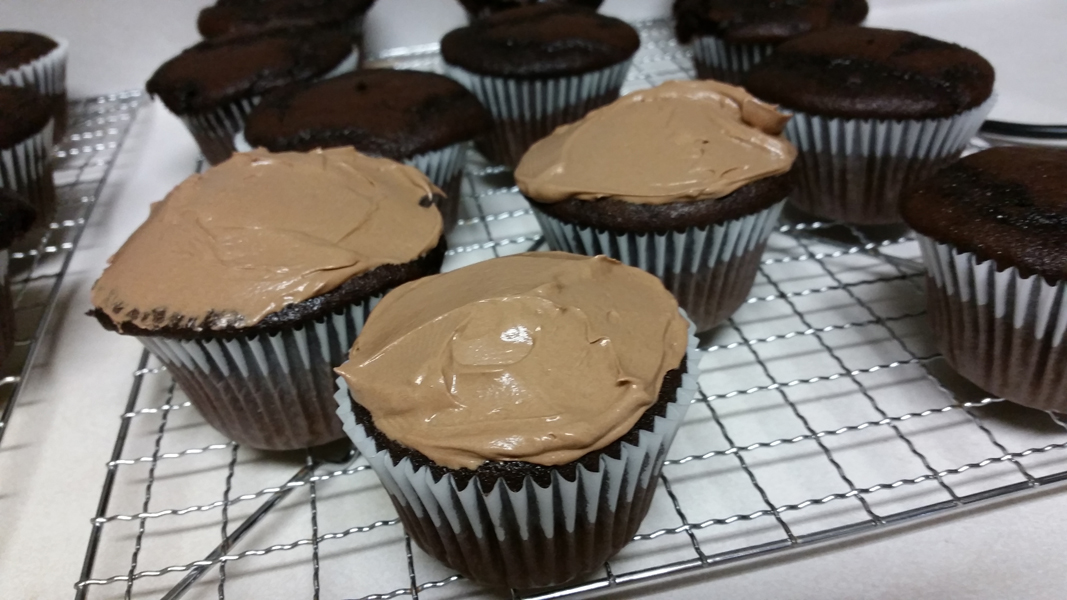
So these were delicious, if not quite as expected. I’ve made these before and went for the double chocolate experience this time. I skipped most of the pictures for this one since I’ve done it previously.

The cake and frosting recipe are included in Good Housekeeping Chocolate!: Favorite Recipes for Cakes, Cookies, Pies, Puddings & Other Sublime Desserts which is available on Amazon.com and Amazon.ca and one day I swear I’m going to test every frosting recipe inside.

As usual, go big or go home. I used Callebaut Belgian chocolate for this.

20140726_160231

Time required: 2 hours

Yields: hopefully 24 cupcakes

Cost per cupcake: $2.16

Total cost if you have none of the ingredients: $42-$52 depending on the quality of vanilla extract and the chocolate

Special kitchen implements I used:

  • KitchenAid mixer
  • incorrectly sized-muffin tin! (don’t do this)

Cake ingredients:

  • 2 C flour
  • 1 C unsweetened cocoa
  • 1½ TSP baking soda
  • ½ TSP salt
  • ½ C unsalted butter (one stick), room temp
  • 1 C golden brown sugar, packed
  • 1 C granulated white sugar
  • 3 eggs, room temp
  • 1½ TSP vanilla extract
  • 1½ C buttermilk  (or add 1 TBSP of vinegar to regular milk, stir and let sit)

Frosting ingredients:

  • 2 C icing sugar
  • 1 C butter, softened (2 sticks)
  • 3 TBSP milk
  • 1 tsp pure vanilla
  • 6 ounces semi-sweet Belgian chocolate, chopped

Cake instructions:

1. Pre-heat oven to 177°C / 350°F. Place cupcake liners in trays.

2. In a medium bowl combine: flour, cocoa, baking soda, and salt. Set aside.

3. In a mixing bowl at low speed, beat: butter, brown sugar, and white sugar, until blended. Increase speed to high: beat 5 min until it’s light and fluffy.

4. Reduce speed to medium and add the eggs one at a time.

5. Beat in vanilla.

6. Add the dry mixture and buttermilk alternating like so: half of the flour, all the buttermilk, and the rest of the flour. After each addition beat until just combined. Scrape the sides a few times and make sure the batter is smooth.

7. Bake about 18 minutes for full-size cupcakes or 14-15 min for minis. A toothpick inserted should come out clean.

20140726_172136

UGH WHY!! Not again. What the hell is this? This is what happens when you use a small muffin tin instead of the right size pan. Ugh.

8. Let cupcakes cool in pan one minute before removing from pan and placing on rack.  Cool before frosting. Judiciously select which ones to use in final photo.

Frosting instructions:

1. On low heat melt the chopped chocolate, stirring occasionally, then set aside to cool 5 min.

20140726_181813

2. Beat together until smooth: icing sugar, butter, milk, vanilla.

20140726_182106

3. Add chocolate and keep beating until well-combined. Beat on High about 2 min.

20140726_183047

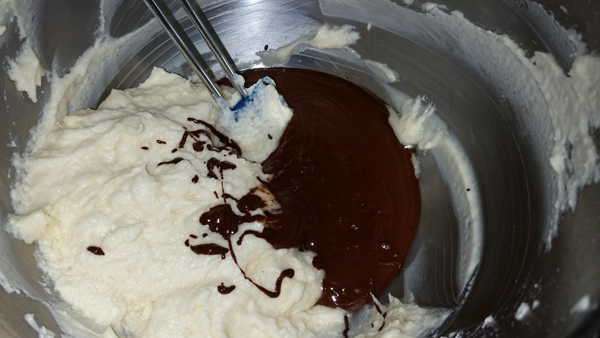
Scrape down the bowl every 30 seconds.

20140726_183116

It lightens up quite a bit.

20140726_183556

Verdict:

I love this devil’s food recipe, it’s delicious. There are lots of ways to frost it and this is my first go at chocolate buttercream. It tasted great. I was surprised how soft this frosting was, it’s not runny, but it’s not suitable for piping. It is delicious however.

I’m not sure what happened to my cupcake pans, must have misplaced them in the move. This muffin tin is too shallow. I was conscious of not over-filling them and they still went kaboom.

I’ve been toying with the idea of reverse-engineering a Joe Louis for awhile and this frosting consistency has convinced me I can do it. Stay tuned.

Playlist:

Type O Negative – Love You to Death


Advertisement

The Devil’s rejects

Sometimes substituting ingredients can lead to rapturous results. Other times, not so much. Like tonight, when I decided to make devil’s chocolate cupcakes, without buttermilk. But looks can be deceiving, will these devil’s wannabes live up to my expectations?

I haven’t baked in … yikes! I hemmed and hawed this afternoon over what I could make, and cupcakes kept coming up. I rummaged through the fridge and found 2% milk and heavy cream. No buttermilk. Think think think. Cupcakes with…heavy cream? This could be a prelude to a heart attack.

I’m game.

I dusted off Nemo and got to work, creaming the butter and sugar together.

Mixed the dry ingredients together.

Added dry and cream to mixing bowl in alternating pours.

Stared at batter in bemused silence. It seems… foamy?

Houston, we don’t have doming. This can’t be good.

Flat tops with two leavening agents? Ugh. Decided to mix up frosting and hope for the best. (Best thing about having two bowls for your mixer is not having to clean the bowl in between stuff. Go Nemo go!)

Sampled frosting and…. woah. That is some sweet, sweet icing. Also much too light in colour. Not quite what I had in mind.

Verdict:

No wonder the devil rejected them, back to the drawing board on this one. It turns out that the only acceptable substitute for buttermilk is milk and vinegar, but even then it’s not nearly as good.

Well, I tried. It didn’t really work out but they were still palatable, just not my best. They were slightly overdone, oddly dense, and with overly sweet frosting. Boyfriend enjoyed them despite those flaws, bless him!

The search for the perfect chocolate buttercream continues. Stay tuned!

Playlist: various Final Fantasy tracks

My Little Pony cupcakes

Is it moon mist ice cream turned into cake? Is it an ode to Jem & the Holograms? Is it a tribute to Moosel and Eleroo? No!! It’s BLUE BELLE!

You may be ignorant unaware of who Blue Belle is. She was the blue and lavender My Little Pony.

I give you… “the Blue Belle”.

Totally by accident.

You may be wondering, “What the hell is that??”

It’s a white velvet cake batter, augmented with blueberry juice, and topped with blueberry frosting, and a few other tweaks. Originally I was planning to make blue velvet batter, but that really isn’t going to work until I get my hands on some concentrated gel colours. I wondered if adding real blueberry juice would darken it. It did not.

Good to know before you start:

My batter was oddly dry today, and the cupcakes overdone.  I baked the first batch for 20 minutes, and the second batch for 19 minutes, and all of them browned. Unsure why.

I ran out of icing sugar and my icing was really watery tonight.

Time required: 1.5 hrs

Yields: 24 medium cupcakes

Cost per cupcake: $2.17

Total cost if you have none of the ingredients: $52.00

Special kitchen implements I used:

  • KitchenAid
  • muffin tin

Cupcake ingredients:

  • 3 egg whites, room temp
  • 3 TBSP of 2% milk
  • ⅓C + 3 TBSP buttermilk (all together, not divided)
  • 1½ TSP vanilla extract
  • 2 C self-rising cake flour
  • 1 C granulated white sugar
  • 2½ TSP baking powder
  • ½ C butter, room temp
  • 4-5 TBSP of juice from a thawed package of frozen blueberries
  • 16 drops blue food colouring

Frosting ingredients:

  • 5 TBSP butter, room temp
  • 3 C icing sugar
  • 1 TBSP lemon juice
  • 1 TBSP milk
  • 2 TBSP thawed blueberry juice

Instructions:

1. Pre-heat oven to 175°C / 347°F. Use rack that is third from the top.

2. Separate the egg whites into a medium bowl, and save the yolks for something else. Stir in the vanilla and the 2% milk. Whisk until just combined and set aside.

3. In your mixer, with a flat beater attachment, add: cake flour, white sugar, and baking powder. Beat on Low for 30 seconds.

4. Add butter and the buttermilk. Beat on Low until combined, and then beat on Medium for 90 seconds.

5. Add the food colouring and blueberry juice. Fabulous!

6. Add half the egg white mixture and continue on Medium speed for 30 seconds.  Add the remaining egg whites, beat another 30 seconds.

7. Spoon into muffin tins.  Bake 19 min or less. Immediately transfer to cooling rack for at least one hour before frosting.

This is the first time in my life I’ve gotten exactly 24 cupcakes. I’m so excited!!

8. Make your frosting and beat until smooth.

Ooh, that’s going to be delish. I can tell.

Verdict:

Not at all what I set out to make, yet totally worthwhile. Despite their bizarre appearance, and the slightly burnt factor, these had a wonderful flavour and I’ll definitely retry after tweaking the recipe a bit.

“I know they look funny but I think they’ll be good. What do you think?” I asked.

“”Hmmm.” said Boyfriend. “They look like Ompa-Loompas, in the negative.I’m game.”

“They most certainly do not look like Ompa-Loompas! They’re… My Little Pony cupcakes!!”

(chew…. chew…)

“What do you think? I find them a bit dry.”

“The icing is really good, very blueberryish. They kind of reminded me of your white velvet cake, but not. They’re… interesting. I liked them.”

Playlist: Final Fantasy VI – Terra’s theme

White velvet cupcakes

Velvet. Silk. Leather. At what point do textile-inspired recipe names become weird? Oh, who cares. I have never eaten white velvet before, and I’ve been curious about it for some time.

I found an amusing white velvet recipe on cookbookmaniac that appealed to me, and I paired it the cream cheese frosting in my Betty Crocker book.

Good to know before you start: This recipe uses cake flour which is milled from soft wheat flour (as opposed to all-purpose flour which is milled from a blend of soft and hard wheats), which results in a finished product with a very tender crumb.  Cake flour also has a lower protein content than all-purpose flour.

You can find regular cake flour and self-rising cake flour, which already contains salt and baking powder. I used self-rising, so I skipped the salt entirely and lowered the amount of baking powder. The original recipe calls for full cream milk and caster sugar which I don’t have, so I substituted with granulated white sugar and 2% milk.

Cream cheese frosting must be refrigerated. If you are like me, and don’t like cold cupcakes, don’t frost them ahead of time. Store the cupcakes at room temperature and frost them as needed.

Time required: 2 hours

Yields: 36 mini cupcakes

Cost per cupcake: $1.17

Total cost if you have none of the ingredients: $42.00

Kitchen implements I used:

  • KitchenAid

Cake ingredients:

  • 3 egg whites, room temp
  • ⅔ C milk
  • 1½ TSP vanilla extract
  • 2 C self-rising cake flour
  • 1 C granulated white sugar
  • 1 TSP baking powder (instead of 2½ TSP)
  • NO SALT (instead of ½ TSP)
  • ½ C butter, room temp

Frosting ingredients:

  • one 8 0z block of cream cheese, room temp
  • 4 TBSP butter, room temp
  • 1 TBSP milk
  • 1 TBSP lemon juice
  • 1 TSP vanilla extract
  • 4 C icing sugar

Instructions:

1. Pre-heat oven to 175°C / 347°F. Use rack that is third from the top.

2. Separate the egg whites into a medium bowl, and save the yolks for something else. Stir in the vanilla and three tablespoons of the milk. Whisk until just combined.

You know, I really wanted to show you a picture of me separating egg whites like a pro, but since nobody was home to be my camera man you’ll just have to use your imagination.

3. In your mixer, with a flat beater attachment, add: cake flour, white sugar, and baking powder. Beat on Low for 30 seconds.

4. Add butter and remaining milk. Beat on Low until combined, and then beat on Medium for 90 seconds.

This is the first time I’ve used the flat beater and it is AWESOME. It is so much easier to beat ingredients with, why did  I use the wire whip for so long??

5. Add half the egg white mixture and continue on Medium speed for 30 seconds.  Add the remaining egg whites, beat another 30 seconds.

6. Spoon into muffin tins.  Bake 14 minutes. Cool in pan for 1 minute, before transferring to cooling rack for at least one hour before frosting.

7. Make your frosting by combining the cream cheese, butter, milk, lemon juice, and vanilla. Beat well, and add the icing sugar one cup at a time. Beat until smooth.

(Edit Aug 17, 8:40am) Got up early to take one more picture.

Verdict: Delicious. White velvet cake is really good. My frosting turned out very runny though, next time will use a little less milk, and more icing sugar. These were a big hit, Boyfriend was quite impressed.

It has an unique texture and comes out of the oven so pale, an interesting change from the cupcakes I’m used to. Really enjoyed these.

No idea why I only got 36 minis instead 48, which is what I usually get from converting a cake recipe to minis.

I was discussing this recipe with Best Friend, who (poor girl) has never eaten any type of velvet cake.  Can you imagine? That’s going to be remedied STAT next time I go home.

Next up: blue velvet!

Playlist: A-ha – Take On Me

Devil’s cupcakes

If being damned meant I could eat devil’s food cake every day then send me straight to hell.

What makes a “classic” devil’s food cake recipe is debatable, but one thing is not open for discussion, and that is the simple fact that devil’s food cake is delicious. Alternately known as the the best cake ever, devil’s food is a rich, moist, airy cake.

I was compelled to make these after several late-night Diablo 2 sessions with Boyfriend. After a few dungeon crawls which culminated in fighting various demons and devils, I woke up the other day with three words on my mind: devil’s food cake. It’s divine inspiration.

These were made from the “classic devil’s food cake” recipe in my beloved Chocolate! book by Good Housekeeping, which is available on Amazon.com and Amazon.ca. I planned to make chocolate buttercream but when it was time to make the frosting I forgot, so these beauties are frosted with luscious vanilla buttercream.

Good to know before you start: although you can substitute buttermilk by adding white vinegar to regular milk, it is worth using real buttermilk for this. I’ve done the substitution a few times, but I find the flavour and texture of cake batter made with real buttermilk is much, much better. I spent $2.69 on a 1L carton.

I used to avoid buying it because I had no idea what to do with the leftover milk, but I will just MAKE MORE CUPCAKES NOM NOM NOM.

Before you open the buttermilk shake it well.

I was experimenting with camera settings for these shots. My apologies if the lightning is off.

Time required: 1.5 hours

Yields: 48 mini cupcakes, 24 regular cupcakes, or three 8″ round cakes

Cost per mini cupcake: $1.08

Total cost if you have none of the ingredients: $42-$52 depending on the quality of vanilla extract

Special kitchen implements I used:

  • KitchenAid mixer!
  • 2 mini cupcake trays

Ingredients:

  • 2 C flour
  • 1 C unsweetened cocoa
  • 1½ TSP baking soda
  • ½ TSP salt
  • ½ C unsalted butter (one stick), room temp
  • 1 C golden brown sugar, packed
  • 1 C granulated white sugar
  • 3 eggs, room temp
  • 1½ TSP vanilla extract
  • 1½ C buttermilk

Instructions:

1. Pre-heat oven to 177°C / 350°F. Place cupcake liners in trays. (For round cakes, grease the pans, line with parchment paper, and dust with cocoa.)

2. In a medium bowl combine: flour, cocoa, baking soda, and salt. Set aside.

3. In a mixing bowl at low speed, beat: butter, brown sugar, and white sugar, until blended. Increase speed to high: beat 5 min until it’s light and fluffy.

4. Reduce speed to medium and add the eggs one at a time.

Sometimes when Boyfriend walks into the kitchen, he will find me already in there, staring at my blue mixer.

“What are you doing?”

“Admiring.”

“Er…okay then.” (as he slowly backs away)

5. Beat in vanilla.

6. Add the dry mixture and buttermilk alternating like so: half of the flour, all the buttermilk, and the rest of the flour. After each addition beat until just combined. Scrape the sides a few times and make sure the batter is smooth.

7. Bake times: 14-15 min for mini cupcakes, at least 20 min for full size cupcakes, 30-35 min for 8″ rounds.

If making the round cakes, place two pans on top rack and one on bottom rack, no pan should be completely on top of another to allow air circulation.

A toothpick inserted should come out nearly clean.

Let cupcakes cool in pan one minute before removing from pan and placing on rack.

Let cakes cool 10 minutes before using thin knife to loosen edges and inverting onto rack.

Cool for at least one hour before frosting.

8. Frost! Oops. Forgot about making chocolate buttercream and made my regular vanilla buttercream for this: cream together 5 TBSP of unsalted butter at room temperature with 3 C of icing sugar. One at a time, mix in 1 TBSP milk, 1 TSP pure vanilla, and 1 TBSP lemon juice. If desired add a few drops of food colouring.

Verdict: Delicious. OMG. Delicious. Love love love. Real buttermilk batter is where it’s at.

Although I like mini cupcakes (because I can argue that eating two is only the equivalent of one), making them is aggravating. Manipulating batter into such a small space is so annoying. I have half a carton of buttermilk left though. Ah hah! I’ll just make full size cupcakes!!

I’ve been looking for an excuse to practice making buttercream roses. Perhaps I failed at making a perfect rose (more of an artists’ interpretation of a white carnation) but whatever! I still make heavenly cupcakes. The humidity is part of the problem, normally my frosting is firmer, but it’s been so humid and it came out slightly runny, which made is easy to pipe but it couldn’t hold a shape well.

I’ll make up another batch in a few days and will definitely go for chocolate buttercream.

What is your favourite cupcake and frosting flavour combination?

Playlist: Depeche Mode

O Canada cupcakes – by Patty!

Nothing says Canada like red, white, and maple syrup. Happy birthday Canada! =)

These cupcakes have a lot in common with red velvet, but they are not red velvet, they are full of real maple goodness instead. I wanted to make something with our official colours, and a flavour that is undeniably Canadian.

Time required: 2 hrs

Yields: 24

Cost per cupcake: $1.75

Total cost if you have none of the ingredients: $42.00

Kitchen implements I used:

  • muffin tin & cupcake liners
  • KitchenAid mixer

Cupcake ingredients:

  • 2¼ C flour
  • 1¼ C granulated white sugar
  • ½ C butter (one stick)
  • 1¼ C milk
  • 1 TBSP cocoa powder
  • 3 TSP baking powder
  • 1 TSP salt
  • 1 TSP pure maple syrup
  • 1 TSP pure vanilla extract
  • 3 eggs
  • red food colouring, I just winged it

Buttercream frosting ingredients:

  • 3 C icing sugar
  • 5½ TBSP butter, room temperature
  • ¼ TSP pure vanilla extract
  • ¼ TSP pure maple syrup
  • 2 TBSP milk
  • 1 TBSP of freshly squeezed lemon juice

Instructions:

CUPCAKES:

1. Pre-heat oven 177°C / 350°F.

2. Combine all ingredients in mixing bowl.

3. Beat on High for 4 minutes, scraping sides constantly.

Once everything is in, add the food colouring.

Totally didn’t bother measuring the red dye.

Thinking, “When it starts to resemble Canadian red I’ll stop.”

Perhaps not the best plan.

Yuck, pink isn’t one of Canada’s colours, this won’t do!!

Nothing says “I love my country” like vulva pink batter…  ah well, maybe a miracle will occur in the oven. (Hah, get it?)

4. Ladle into muffin pan, filling about two-thirds of the way.

5. Bake 20 min, and immediately remove cupcakes from pan and place on cooling rack.

6. Cool at least 1 hr.

FROSTING:
1. In large bowl, cream butter and icing sugar together.
2. Add half of the milk, and mix well.
3. Add vanilla.
4. Add remainder of the milk and lemon juice.
5. Mix until you can no longer feel sugar granules.

After they are frosted, get patriotic and devour!!

Hurrah! They turned out red after all! Miracles do happen.

Verdict: You know, this is the first time I have actually gotten exactly 24 cupcakes, usually I run out before I get to the final one. Yes!!

The colour did darken as they baked. Thank God.

The maple flavour was very subtle, almost to the point I didn’t notice it. Next year I’ll increase the amount of maple syrup to at least one tablespoon.

Boyfriend and I ate some cupcakes as we watched the Canada Day fireworks from our balcony.

He said, “Patty, you make great cupcakes. It’s like vanilla cupcakes, with lemon vanilla frosting.” (unintelligible salivating sound).

Playlist: Final Fantasy OSTs