I made my first wholesale order! These are my boxes for Christmas. I ordered 250 from Chocolat-chocolat in Montreal. 🙂

I made my first wholesale order! These are my boxes for Christmas. I ordered 250 from Chocolat-chocolat in Montreal. 🙂
Making chocolates is a many step process and it’s a relief to have someone I can rely on. When I said that I holler at Spousal Unit to take over the chocolate until I’m done being brilliant, I didn’t mean to imply that I do all the work when the chocolate shoppe is in session. Spousal Unit is my equal partner in making chocolate. A typical season is split like so:
Me:
Spousal Unit:
We do it together:

A lot of chocolate work is waiting. You’re waiting for the chocolate to reach optimal temperature, you’re waiting for the ganache to set, you’re waiting for the moulds to set, you’re waiting, waiting, waiting.
So what do we do with all this downtime between the work?
Play video games and eat take out. It’s difficult to use the kitchen for cooking since any heat or steam will affect the chocolate, and the tempering equipment takes up a lot of room so we’re pretty much eating sandwiches and take out for days. 😉
How long does this take?
Now that we have all the equipment we need, it’s a lot less time, but I still allocate 4 weekends. You never know when bloom might strike. The major hold-up in the past was not having enough moulds; having to pour, wait, wash and dry, and repeat. Now we can pour 60 of each shape and be done with it. Hallelujah!
We do an inventory check in October, and will place our order for chocolate by Halloween if we’re short. Pro-tip: you don’t want to be ordering Belgian chocolate in November unless delays don’t stress you out.
The bulk of the actual work is done in November on weekends, it’s easiest to assign one weekend to working with one type of chocolate and we always do the milk chocolates first because fillings have a shelf life. (Solid milk chocolates and the almonds will be fine for months.) Next up are the caramels. Depending how this goes, it may take an extra weekend.
The cream fillings are tricky and take the longest. I will make the ganache the night before and divide it by 5, adding each flavouring agent and let it chill overnight. If all goes well and it firmed up, we start pouring the chocolate the next morning. This takes at least 2 days since a lot of chocolate is needed. At this point there is practically no room in the fridge.
Once all the semi-sweet chocolates are made, we finish with the dark chocolate and the white chocolate and the Toblerones (ensuring the Toblerones are fresh). Now the fridge is at max capacity and we are dying to ship them and get some space back.
This year I will be shipping them earlier since Via Rail no longer accepts parcels, and Canada Post can be unreliable at best, so you will definitely be enjoying your Christmas chocolates before Christmas.
Today I’m mentally regrouping my thoughts on chocolate; the experiments I’m going to do once the heat stops, my stock of supplies, what to order by mid-November, and what I’m making next Christmas. Yes, I was getting tired of muffin posts too.
I shall show you my chocolate book! While I’m immersed in chocolate this book is never far, and most of the pages are stained with my work. If I have a particularly brilliant thought, I holler at Spousal Unit to come take over the chocolate for a minute while I jot down my ideas.

This page was from the day I was doing course work for my École chocolat class. I had an assignment to temper chocolate using the tabliering method, then the seeding method, and what that lesson taught me is that while knowing how to temper by hand is a solid skill to have, I love having a machine do it for me!
Once I’ve got enough notes on a particular topic, I summarize what I’ve learned. It’s an easy way to give myself a refresher when it’s time to roll my sleeves up; when making matcha ganache you should be generous with the matcha powder or the flavour is weak, to cut the caramel recipe in half for the Christmas chocolates, (actually caramel has an entire page devoted to its complexities), don’t buy the Toblerone in advance or you’re buying last year’s stale stock, how many drops of flavouring oil is needed to get the right flavour to the ganache, things like that.
It’s also where I draw out my ideas for new chocolates and flavour pairings. Rooibos tea-infused ganache? Yes please.
In case of a computer problem, it’s good to have my important information on hand, such as the actual product codes of my preferred chocolate (online invoices don’t always specify and it’s rather critical when trying to source your favourite cacao percentages!), the quantity of each chocolate I actually need, the product codes of the boxes I buy, which merchants have the best prices, their shipping and sale times, the costs of my past orders, everything I need to go forward if my computer explodes.
This year we made the best box of chocolates so far, and created a new flavour. As usual I worked with Callebaut, opted for a less sweet white, but kept the same cocoa solid percentages for the others:
Ran into a lot of trouble with fat bloom, starting with the Toblerone.

I paid it no mind and got to work.
Later I had switched to the Callebaut and got bloom 3 times in a row.

WTF.

I know how to temper. What is going on here? I think it was the heat in my home, we ended up opening all the windows, and after that the problem went away, so I just remelted all the chocolate without fillings or centres.

Ah! Ever so much better! I just love those little ornament shapes.
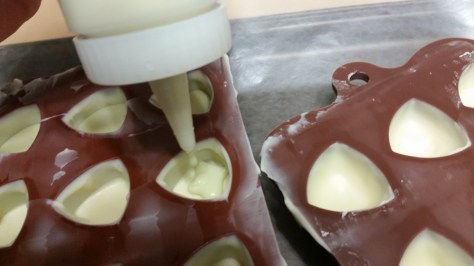
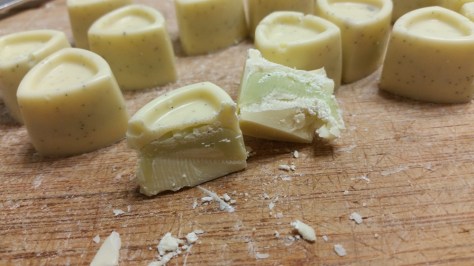
Tried a new flavour this year, white chocolate vanilla bean with matcha ganache. It was good. I have embraced using a squeeze bottle to pipe my fillings now and does it ever work better than a piping bag.
I was quite happy with the peppermints this year. I switched the centre to a milk chocolate peppermint ganache, and it came out very delicious and creamy. Much better than previous years.

After a few nights of tempering and filling like mad, the boxes were all made up and ready for shipping to my family.
I always have such fun making these. Even though sometimes I want to throw all my chocolatiering supplies off the balcony…

So now that I’m back to making chocolate again, and looking after my blog again, what I have planned for the winter of 2016 is mostly flavour experiments and review of new products I’ve tried and courses I’ve taken.
Where to get supplies:

Have just finished Year 4 of making chocolates for Christmas. I’ve learned a lot since I started in 2011 and practice really does improve your skill. This is the quality I could create in the beginning, and this is what I make now.

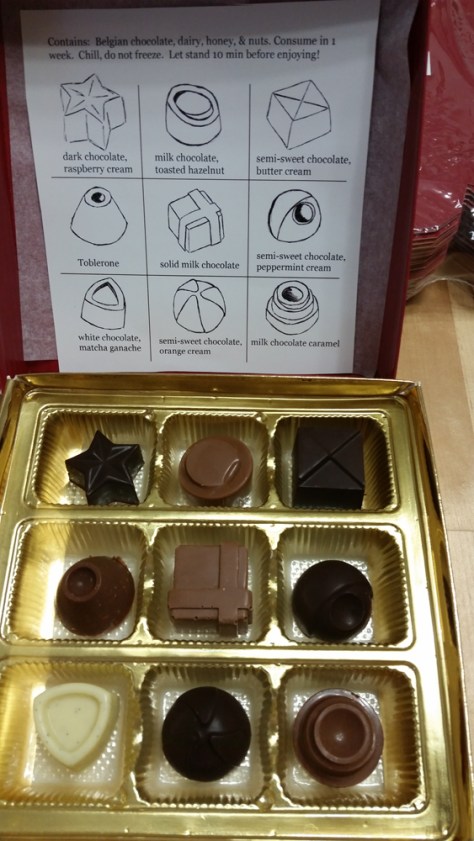
I was really excited about making chocolates again. Well actually, I’m really excited about working with chocolate at any time, but this year was the first year I could make 9 individual shapes, and mastered the fillings I wanted to create; something creamy and soft and delicious. This may be it, I do not foresee making any future changes to the recipe or the box contents.

I like November because it’s time to secure the Belgian chocolate. Social invites are turned down with a hushed, “It’s chocolate-making season” and understanding nods. Chocolate paints the ceiling of my home. The fridge has no room for food. It is the month of having dinner delivered and an excuse to be quite lazy in some ways.
See quarter for scale:

No worries Mom, your box will not contain any dark chocolate.
I used 4 types and for the chocolatiers out there here are the specs:

What started as a modest hobby has grown into a massive time-suck. And tears.

Speaking of new fillings, there they are. They are liquid and delicious, instead of hard and dry. I abandoned icing sugar and evaporated milk, and turned to making ganache; heavy cream, Belgian chocolate, and concentrated oils. The raspberry cream, orange cream, and butter cream are made with white chocolate ganache. The peppermint and peanut butter cream are made from milk chocolate ganache. The caramel is a soft, liquid homemade stuff and I fear it has some mystery addictive quality.

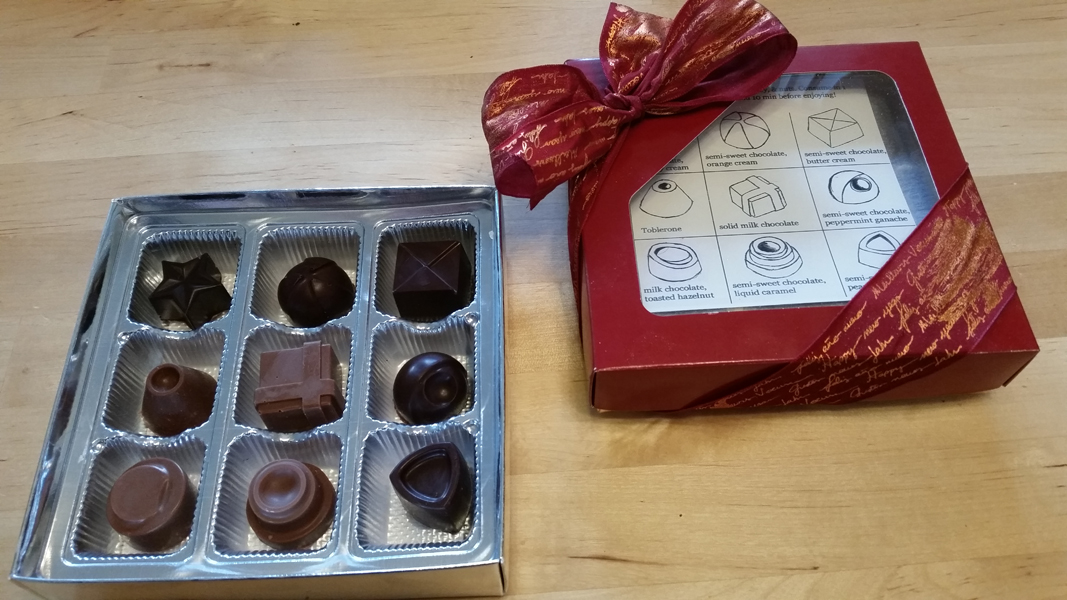
And it was time to re-draw the map again.

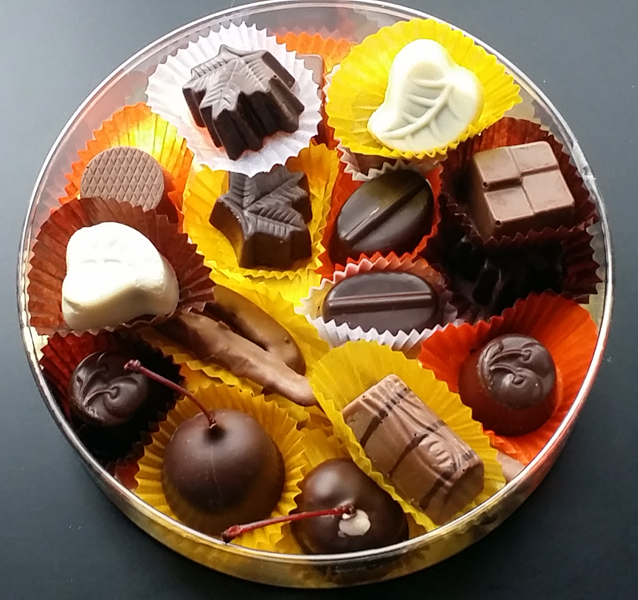
I feel a great sense of satisfaction when they are all laid out.

Where to get supplies:
Everything goes wrong when you try to impress someone. Everything. I made these for someone who loves hazelnuts and I thought “This will be so easy! I’ll be done in half an afternoon.” Um, no. It’s now 3 days since I started.
The power went out while my chocolate was mid-tempered and I had to start over. I ran out of chocolate, overfilled half of them, have an entire tray that didn’t set, destroyed the perfect box I had selected while trying to assemble it, and everything smells like hazelnuts, which I can assure you is no longer a pleasant aroma.

Moving on. This box is entirely milk chocolate. Around the edge we have roasted hazelnut pieces. The ones in the centre with the smaller ring are caramilks, and the wider ones are hazelnut butter – see the one in the 6pm position (which is similar to natural peanut butter; runny, smells like Toffee Fee), and I’m so impressed with myself I’m considering a name change to Archimedes.
Before getting started I made some more caramel which I won’t bore you with since we’ve suffered through 6 caramel posts together. Then I toasted the hazelnuts following the method on The Healthy Foodie. Pre-heat the oven to 350°F and line the tray with parchment paper. Roast 8 min, shake the tray around, and roast another 8 min, and bam, done.

As soon as you take them out of the oven, place them in a clean dish towel, and jumble them around to loosen the shells.
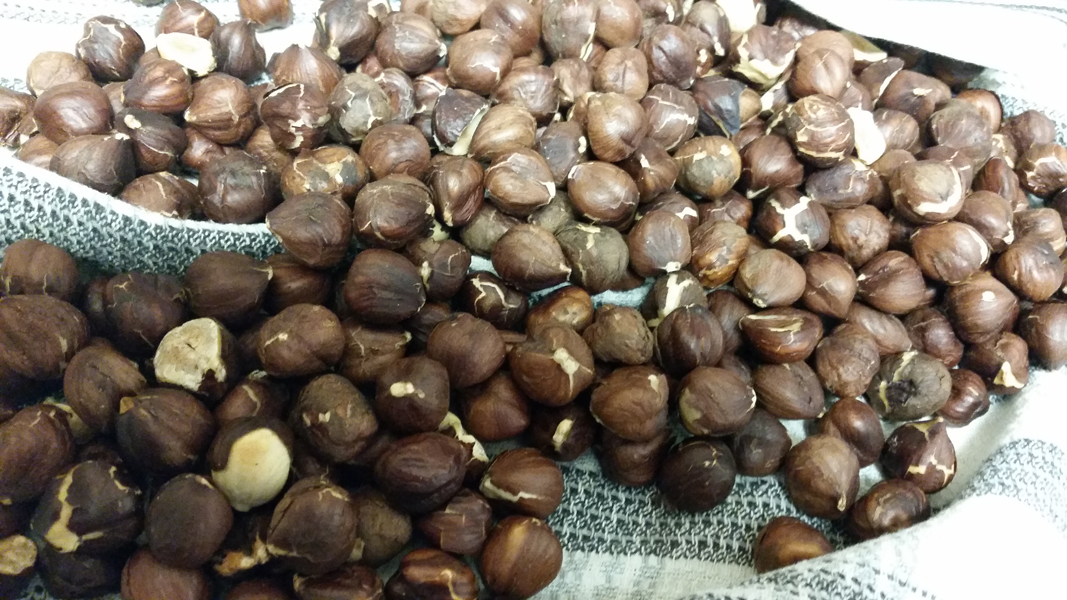
This took longer than expected. Way longer. It was really boring.

Eventually you’ll get them to look like this.

Process the hell out of them.

Stop and stir periodically, it will turn into this.
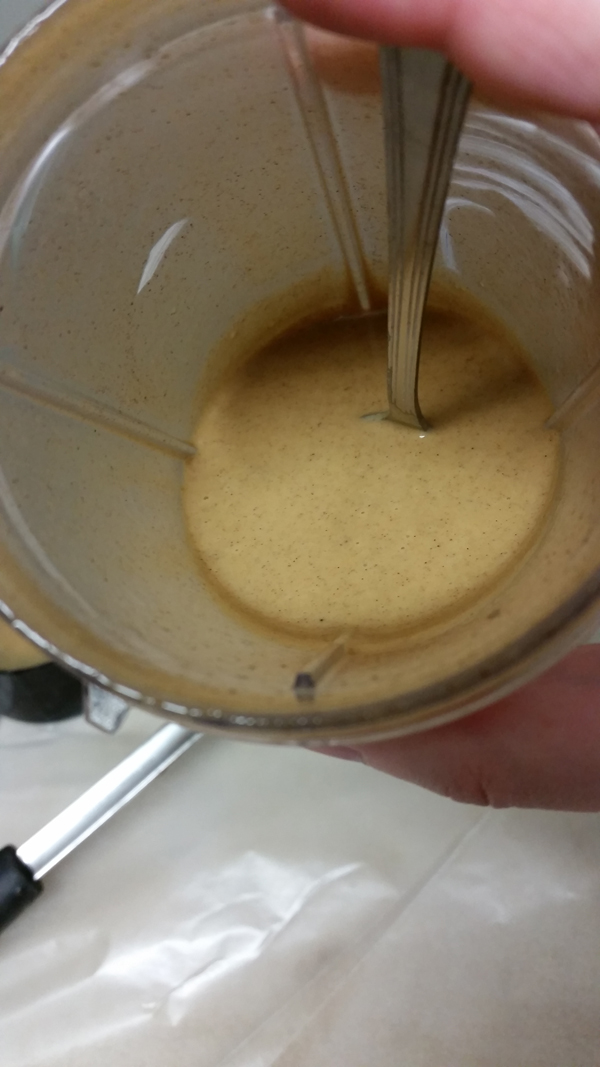
I didn’t realize the contents would start to steam. I AM PROMETHEUS!
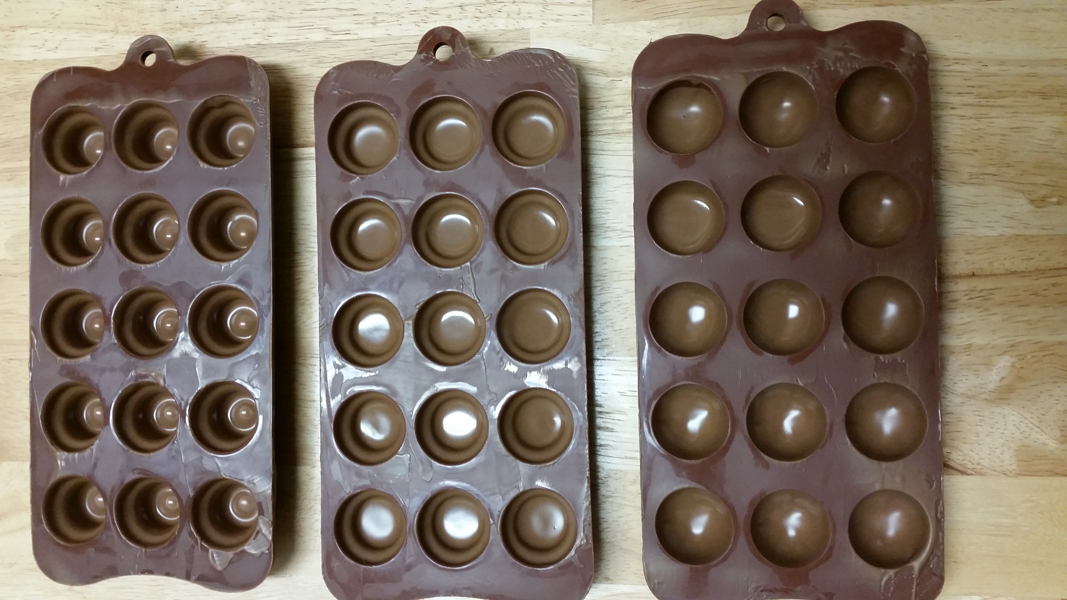
Meanwhile, temper your milk chocolate. (Wasn’t enough chocolate, had to re-do 3 times.)

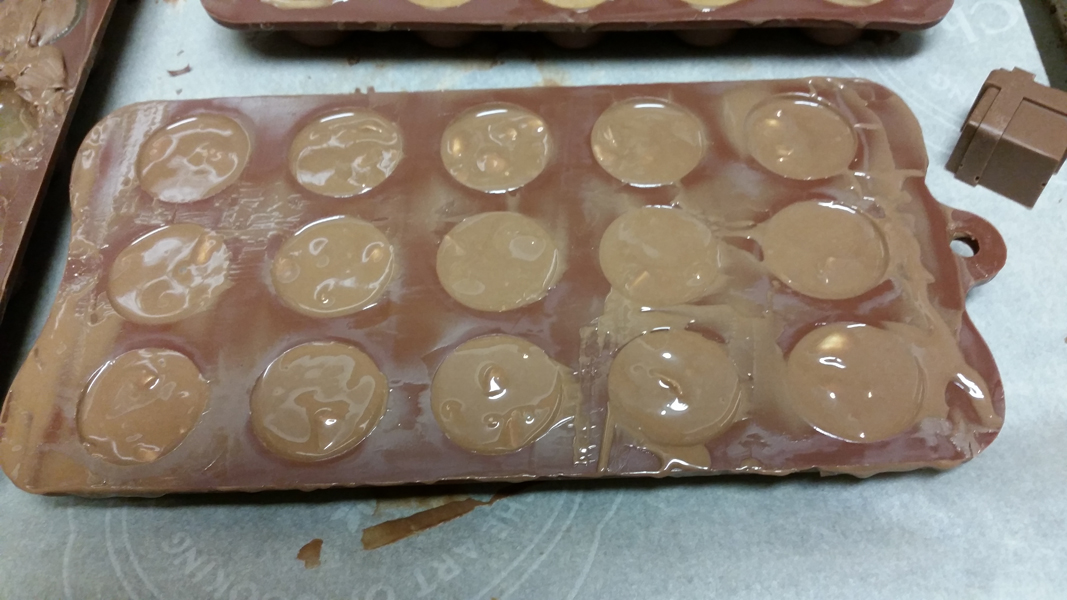
And coat your chocolate moulds. I always enjoy this part.
After the outer shell sets, it’s time to fill the moulds.
And don’t do this. These are filled way too high.
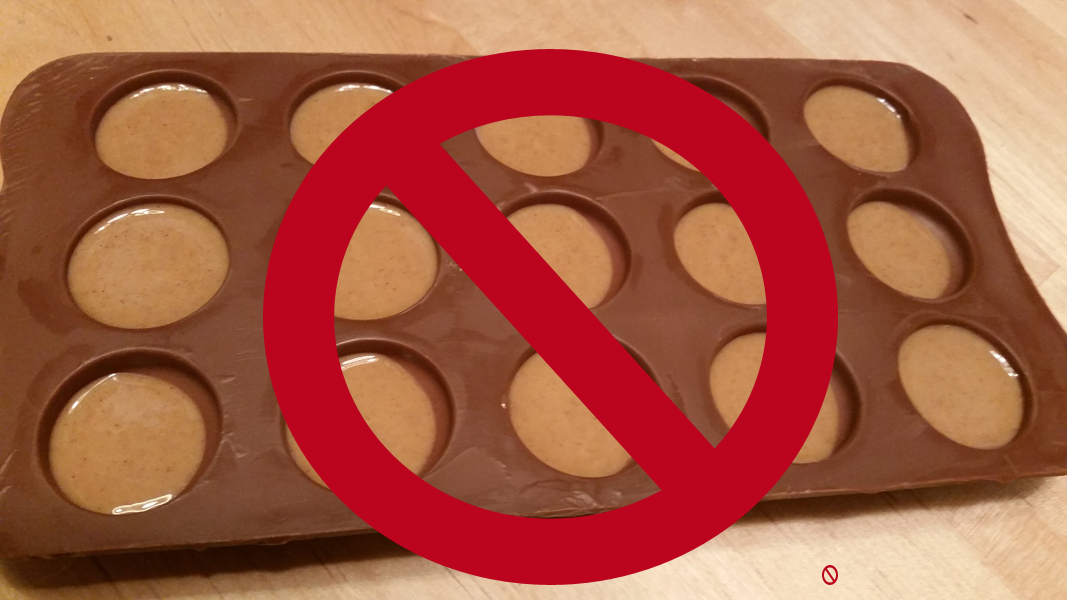
In retrospect I’m glad I discovered this now before it was the weekend of Trials & Tribulations. I ruined this entire tray. When I tried to seal the first one I realized my error, the chocolate was pushing the filling up and out and made a mess. I tried to save the tray by taking a tiny spoon and removing some of the hazelnut butter, but it didn’t work out very well, so these are still sitting in my fridge pissing me off.
Onto prettier things. Here are the hazelnut pieces.
Finally! Something came out exactly as planned. I fed some to Boyfriend Unit since I cannot judge if something with nuts is good or bad. He says it’s good.

I boxed them up. In a week or so I’ll find out if hazelnut butter goes rancid.
Pray you don’t die. ^^

This week I attended the Pure Chocolate Workshop at McCall’s School of Cake Decoration with Boyfriend Unit. I was hoping to learn more about making good creamy fillings for my chocolates. I rank my knowledge level close to intermediate, I know how to temper by hand, I dabble in recipe crafting, but so far my creations lack a certain “oomph”. I was really excited to learn from a professional. And what I made after I got home, well… you’ll see.
Cost: $75 per person
Course length: 3 hours
What did we learn:
If you’re in the GTA, McCall’s is on Bloor St West between Kipling and Islington, we walked up from Kipling Station. This course is offered once per season. I’ve never been to McCall’s before, and the inside is a lot bigger than you can tell from the street view. There is a retail shop in the front and a teaching kitchen in the back. It was filled with all sorts of glorious machines and tools that I wanted to cart home.

Our instructor was Kay, who has 30+ years industry experience. She was very knowledgable, and funny. She spent some time talking about different brands of fine chocolate, the conching and tempering process. I have tempered on stove top via double boiler, and in the microwave, and with a professional tempering machine. I have never tabled chocolate on a marble slab before and that is the method we learned.

^ the box of everything we made in the course
I’m glad I got to try tabling chocolate, but never again! We screwed up the milk chocolate twice before she intervened. How embarrassing. We got to work with polycarbonate moulds, and learned some different techniques to get pretty designs on the chocolate.
I learned a lot, and had a great time. I’d recommend this course to anybody who wants to learn more about working with chocolate.
What I made when I got home:
When she showed us how to coat a mould, everybody said “Ooooh” at the same time, and I decided to try it out on my silicone moulds.
After you temper some chocolate, pour it into your mould until it overflows. Don’t worry about being neat or even. Now whack it on the counter to remove air bubbles and ensure the entire cavity is filled.
You turn it upside down so all the chocolate drips out onto the parchment paper (see top right) and use a palette scrape to pull the excess away.Turn it and shake it a bit to get an even coating, and don’t throw the excess away, once it sets, it is easily peeled off the parchment paper and you save it to re-temper.) You end up with moulds coated in chocolate with hollow centres.

This will set in under 20 minutes, and then IT IS TIME.
Pipe in the homemade caramel sauce!
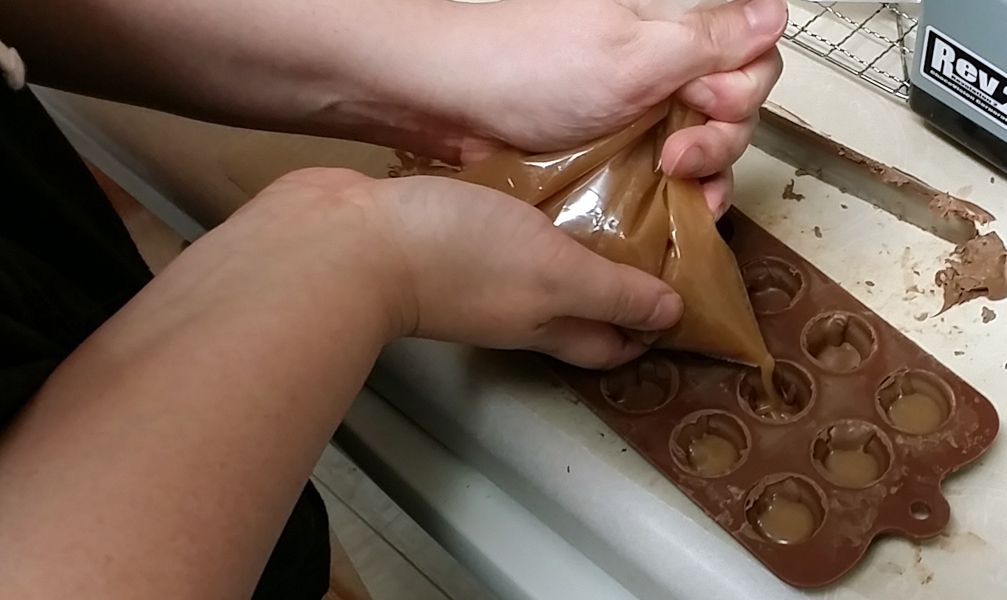
Tap to settle it, and top up with more tempered chocolate. Again scrape away the excess.
And in about half an hour, you have this!

Tah-dah!

I mean, just look at it!

Glorious! This is so much better than the hard caramels I’ve made before. I am so excited to send this to my family in December.
“Boyfriend Unit? We’re invited to D’s birthday party. What does he like?”
“Meat.”
“Surely he likes other things than meat. What is he interested in?”
“Meat.”
“You’re a lot of help in gift planning. OK; wanna make him chocolate bacon, a big box of it?”
“If we make that I want to EAT IT.”
“Well you can’t. It’s a gift. You’re cooking the bacon.”

(Because dear reader, I don’t cook bacon. I don’t clean ovens either.)
“Wuah you didn’t clean the stove, I will have to photoshop it!!”

“Look. perfectly tempered chocolate!”
“What time is his party starting?”
“Uh, 7pm? 7:30pm? Lemme check… SHIT.”
“What??”
“It started at 5.”
“We don’t have enough time to temper the white chocolate.”

“Or the milk chocolate.”

“That’s ok, I can totally temper chocolate on the fly, watch this.”
(later)
“Happy birthday D! Here!”
“EVERYBODY BACK UP, IT’S MINE.”
(later)
“I’d say that was a success, wouldn’t you?”
So, my plan was to pipe Toblerone ganache into truffle shells, and dip them into perfectly tempered semi-sweet Belgian chocolate. I was envisioning something like a Lindt chocolate. After all, I had done this successfully before under the guidance of Hobby Victim and I was confident I could produce something worth keeping.

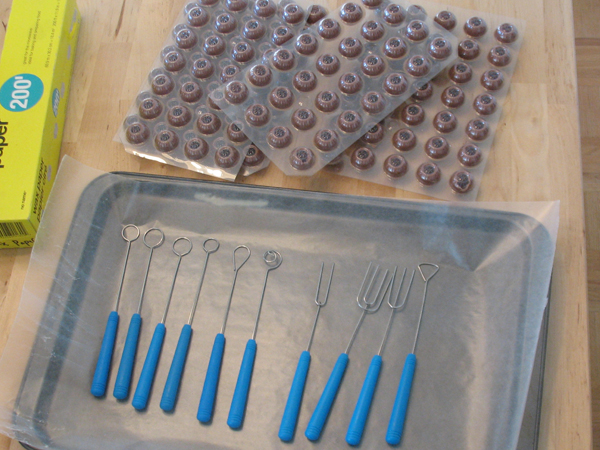
Do you have any idea how annoying it is to pipe ganache? Seriously? It sucks. It starts out simply enough. Take some truffle shells and dipping tools.
Wrangle the ganache into a piping bag like a champion.
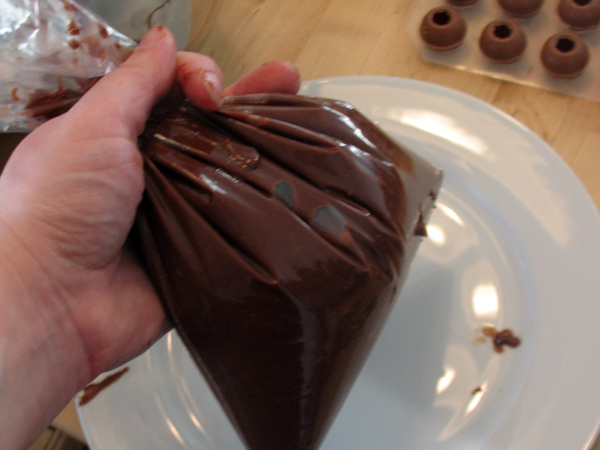
Plan to snip a tiny corner off, and overdo it. “Pipe” ganache into the shells.

And by pipe I mean try to at least get some of the god damn stuff into the shell. At one point the chocolate shot out of the bag and got *everywhere*. On the 3rd tray I got fed up and stopped.

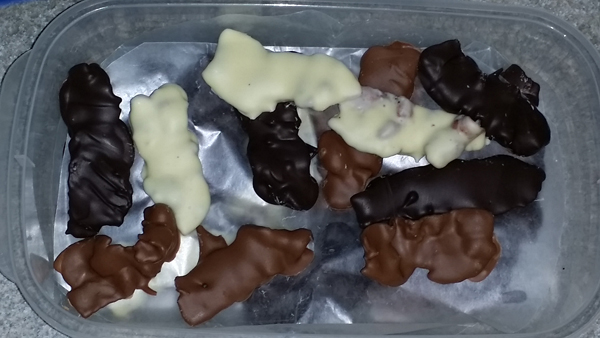
Now, dipping the first one looks so neat and contained. A perfect little truffle waiting to be enrobed in Belgian chocolate.

However, all good things come to an end and after you’ve filled about half the tray, dripping chocolate starts to get everywhere. But after enough of them are dipped, a sense of pride starts to build. Smile at what you have wrought.

After all, the tiny imperfections are the charm of homemade chocolates! They tasted pretty good, but the fillings hardened the next day, so I’m going to put some more experimentation into how to get a Lindt-like centre. Need a little more time at the drawing board for these but overall a success.

Playlist: Celldweller
Ugh. On Sunday I spent 2.5 hours making a perfectly emulsified ganache for an experiment. I let it chill overnight, and it solidified. I am so steamed.
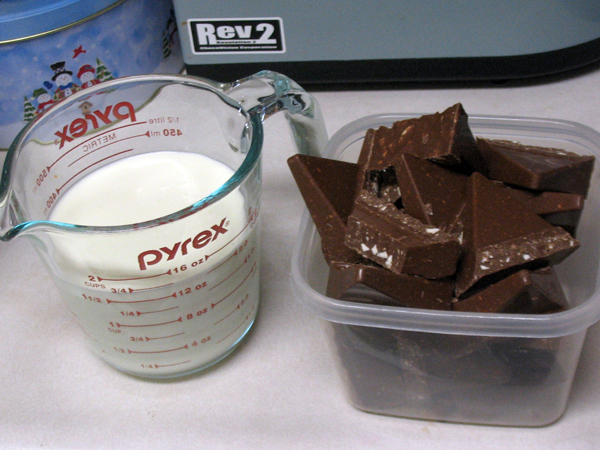
Ganache is typically equal parts scalded cream to chopped chocolate, in this case Toblerone. To achieve a proper ganache that doesn’t crack or separate, you need to emulsify it. Emulsification is the process of combining two or more liquids, which normally don’t combine, into one. (Basically you stir and rest, stir and rest, chill, pass Go, collect two hundred dollars.) It was all going so well…
I poured the heated cream onto the chocolate and let it sit for bit, and then stirred every 15 minutes, for 2 hours.

The hell with stirring by hand. I’ll let Nemo do the work for me. After all that is what I have a stand mixer for, who wants to stand there the entire time? I have video games to play.

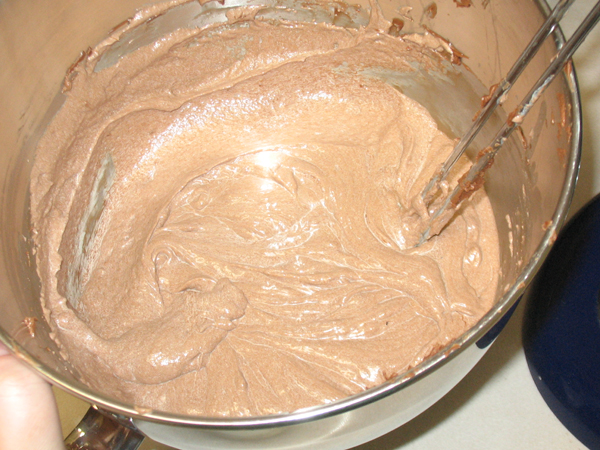
After 2 hours, it had lightened considerably, and had a smooth texture. All okay so far.
So I covered it with saran, and stupidly forgot to press it down to the surface, so the surface hardened.
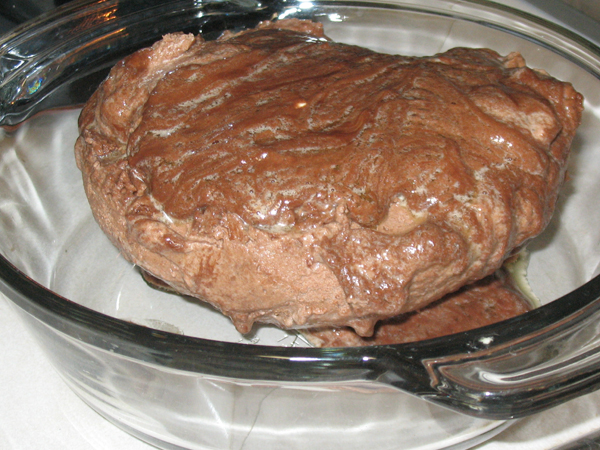
I intended to use it on Monday but I was busy. I took it out of the fridge today, and lo and behold.
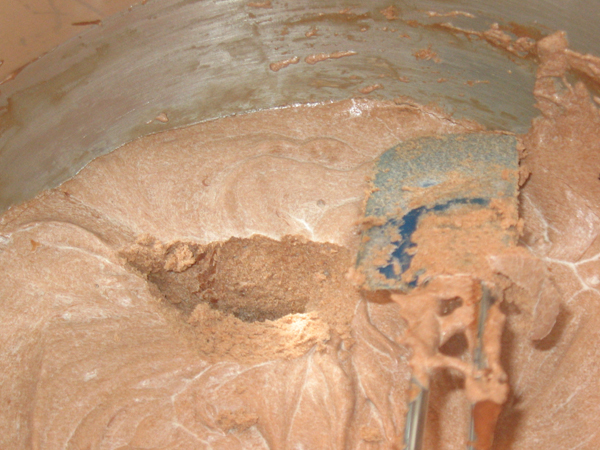
What. Is. This? I tried to save it by reheating but the fat started to separate. Wuah! This is no good.

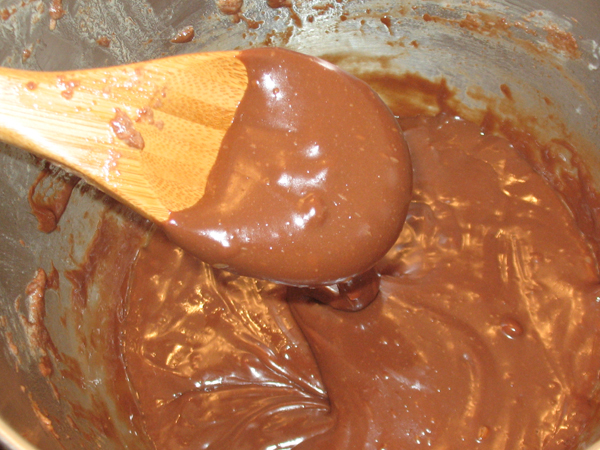
I figured it might be salvageable if I could stir heated cream into it, and miracle of miracles, it seemed to recover.
Alright, we’re cooking with gas now. As to what I made this for, well, just stay right there and find out. Next year.
