Christmas chocolates 2014

20141226_101719

Have just finished Year 4 of making chocolates for Christmas. I’ve learned a lot since I started in 2011 and practice really does improve your skill. This is the quality I could create in the beginning, and this is what I make now.

20141226_101741

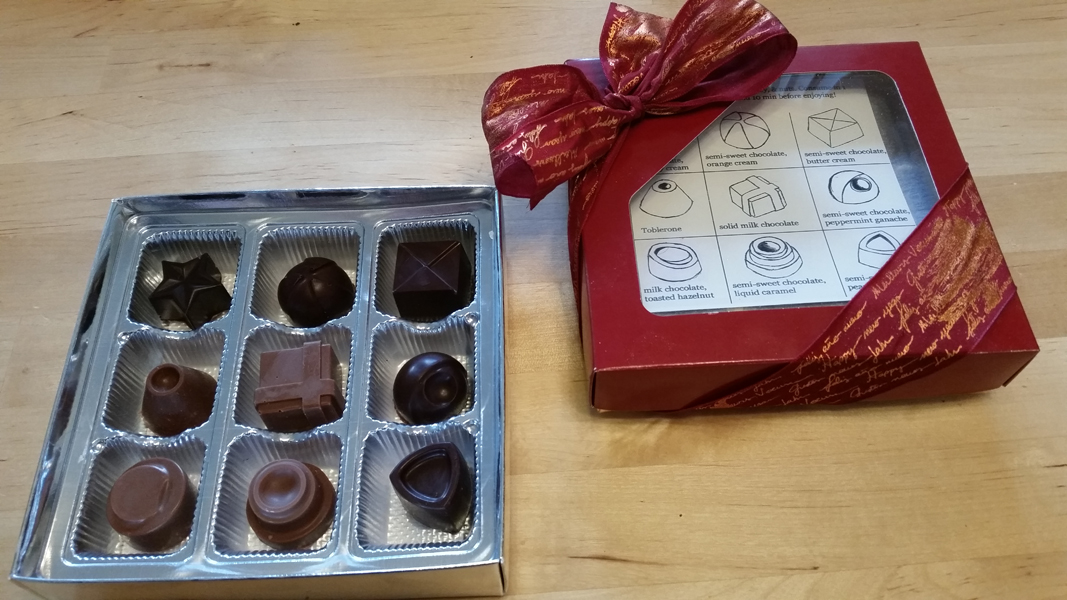
I was really excited about making chocolates again. Well actually, I’m really excited about working with chocolate at any time, but this year was the first year I could make 9 individual shapes, and mastered the fillings I wanted to create; something creamy and soft and delicious. This may be it, I do not foresee making any future changes to the recipe or the box contents.

20141226_101754

I like November because it’s time to secure the Belgian chocolate. Social invites are turned down with a hushed, “It’s chocolate-making season” and understanding nods. Chocolate paints the ceiling of my home. The fridge has no room for food. It is the month of having dinner delivered and an excuse to be quite lazy in some ways.

See quarter for scale:

20141129_155925

No worries Mom, your box will not contain any dark chocolate.

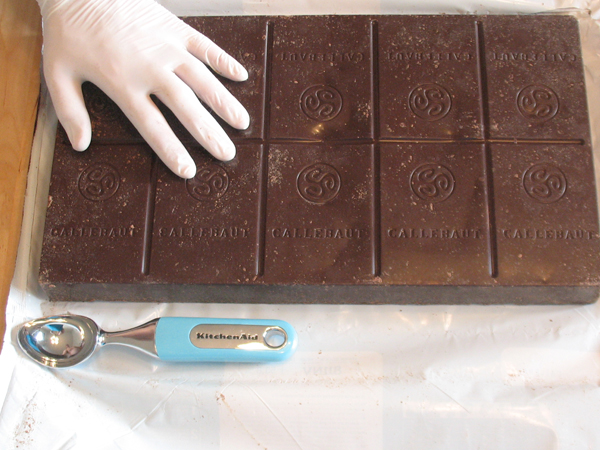
I used 4 types and for the chocolatiers out there here are the specs:

  • milk chocolate 823NV, 33.6% cocoa solids, 21.8 milk solids
  • dark (semi-sweet) 811NV, 54.5% cocoa solids
  • dark 70-30-38NV, 70.5% cocoa solids
  • white W2NV, 28% cocoa solids, 23% milk solids

20141129_160250

What started as a modest hobby has grown into a massive time-suck. And tears.

20141215_191218

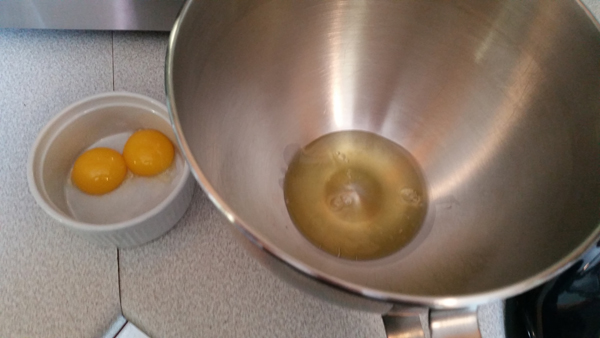
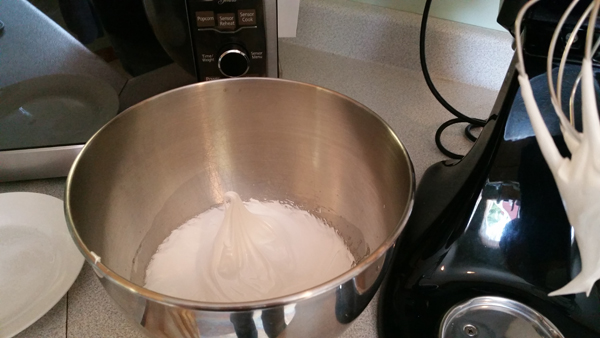
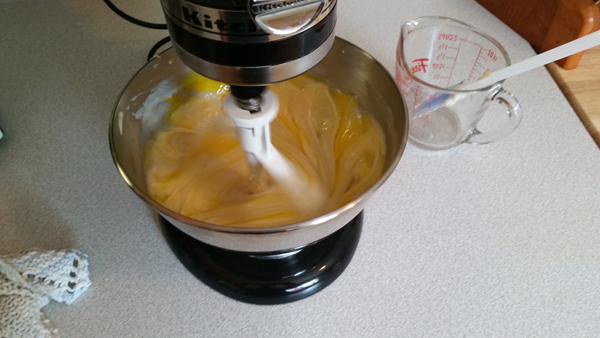
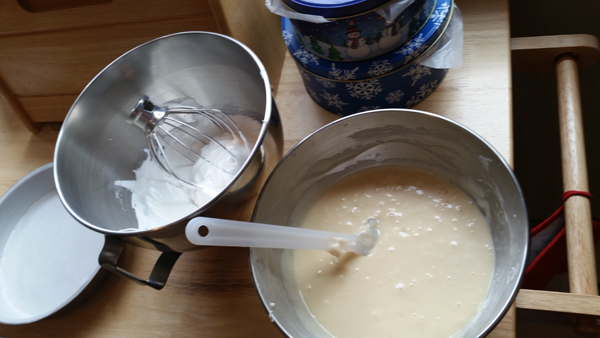
Speaking of new fillings, there they are. They are liquid and delicious, instead of hard and dry. I abandoned icing sugar and evaporated milk, and turned to making ganache; heavy cream, Belgian chocolate, and concentrated oils. The raspberry cream, orange cream, and butter cream are made with white chocolate ganache. The peppermint and peanut butter cream are made from milk chocolate ganache. The caramel is a soft, liquid homemade stuff and I fear it has some mystery addictive quality.

20141215_112850

And it was time to re-draw the map again.

map600

I feel a great sense of satisfaction when they are all laid out.

20141215_184429

Where to get supplies:

Advertisement

Washington Pie

20140719_191909

I made Washington Pie for my mother’s birthday, which is a frosted yellow cake with a jam filling (shares traits with Boston cream pie). My Nanny used to make it and it’s been a long time since we’ve had it. I figured nostalgia would gloss over any technical errors on my part. This was served partially raw and uh, note the ratio of frosting to cake in the centre is not same on the outside edge? More on that later.

20140719_131130

This recipe comes the red and white Better Homes & Gardens cookbook, but I’m not sure which edition, ours doesn’t have it but Mom’s did.

Working in a different kitchen is always weird. I got to use the Onyx Black KitchenAid, which is just as reliable as my precious Nemo (if not quite as beautiful). I’m not used to this oven and that may have contributed to one of the problems with this cake.

Time required: 2 hours

Yields: 12 slices

Total cost if you have none of the ingredients: $45

Cost per slice: $3.75

Kitchen implements I used:

  • KitchenAid mixer
  • two 9″ round pans

Ingredients:

  • 2 egg whites
  • ½ C white sugar
  • 2¼ C cake flour
  • 1 C white sugar
  • 3 tsp baking powder
  • 1 tsp salt
  • ⅓ C vegetable oil
  • 1 C milk
  • 1½ tsp vanilla
  • 2 egg yolks
  • 5 TBSP pure strawberry or raspberry jam

Instructions:

1. Pre-heat oven to 176°C / 350°F. Grease and flour two 9″ rounds.

2. Separate the eggs, put the whites into the mixing bowl and put the yolks into a small bowl for later.

20140719_132449

Beat the whites until soft peaks form (when you remove the beater they’ll sink down).

20140719_134235

3. Gradually add ½ C sugar, beating until very stiff peaks form (you remove the beater and see little mountains of foam that stay upright).

20140719_134457


4. Combine dry ingredients in a separate bowl. Having a second mixing bowl saves you a lot of time.

20140719_134552

5. Add: vegetable oil, vanilla, and half the milk to the dry ingredients. Beat 1 min on Medium, scrap sides 3 times. (If I had a DeLorean, I’d have used the bowl with higher sides, since this led to a face full of wet cake and that is as vile as it sounds.)

20140719_135000

6. Add remaining milk and yolks. Beat 1 min, scrape sides 3 times.

20140719_135433

I always enjoy watching one of these in action. I realize they all do exactly the same thing but I will just happily observe for awhile.

20140719_135858

7. Unless you made a colossal error you should have two bowls like so:

20140719_140213

Gently fold the egg white mixture into 2nd bowl, turn the bowl and use a down, up, over motion

20140719_140455

You don’t want to stir it like crazy.

20140719_140523

You want it to look like this.

20140719_140731

8. Divide batter into pans, bake 25 min.

20140719_140955

9. Ask Spousal Unit to remove the cake from the oven and test. Believe that toothpick test was successful. Cool in pan 10 min before removing from pan and transferring to wire rack. Well damn. That’s not supposed to happen.

“Did you test the middle?”

“Yup, it came out clean.”

“Why is the middle raw then?”

“I don’t know.”

20140719_152451

Throw back in for another 5 min and pray.

10. Cool one hour.

11. Speed to birthday party. Position one cake so that the rounded side is facing down and you have a flat surface. That was the plan anyway. This cake has no true flat surface.

20140719_170536

12. Place a few tablespoons of jam in a glass bowl and microwave 40 seconds, spread warm jam over the flat cake surface.

13. Place the second cake on top (again round side down) so you have a flat surface to frost. What the hell went wrong here??

14. Cram frost with vanilla buttercream. I didn’t get a picture of the completed cake but the frosting hid the majority of the gaps. This picture is not the most appetizing but it was good. The centre of the cake was… not ideal, but the outer edge was bang on. See how much frosting is in the centre as opposed to the edge? Oh well. Good thing I love buttercream frosting.

20140719_191909

Verdict:

Never trust someone else to take your cake out of the oven. That’s what I learned from this experience. At least Mom was happy and that’s what counts. Next time I’ll try lining the pans with parchment paper.

Playlist:

Buckethead – White Wash

Great Aunt Lucy’s tea biscuits

IMG_3253

I love tea biscuits. Most everyone in my family does. Perhaps it’s genetic. It’s dreadfully cold here and I thought Sunday would be improved greatly if we had a slow-cooked dinner with tea biscuits. Prior to rolling up my sleeves, I called Mom to inquire about some of the finer points of biscuit-making since this was new territory for me.

“Now hunni, it’s a very wet batter. And if it doesn’t work out, don’t get discouraged.”

“That sounds ominous. Are these really tricky?”

(insert pause)

“No… just… don’t get discouraged, that’s all.”

With that fateful prediction in mind I got to work.

IMG_3229

Time required: 1  hour

Yields: 9  (supposed to be 12)

Total cost if you have none of the ingredients: $24

Cost per biscuit: $2

Kitchen implements I used:

  • Nemo the KitchenAid
  • baking trays lined with parchment paper

Ingredients:

  • 2 C flour
  • 1 TBSP white sugar
  • 4 tsp baking powder
  • ½ tsp salt
  • ½ C white shortening
  • 1 egg
  • 1 C milk

Instructions:

1. Pre-heat oven to 400° F / 204°C and line baking sheets with parchment paper.

2. Combine the dry stuff. Now, if you have never run a stand mixer with only dry ingredients: DON’T. I forgot this crucial information.

3. Beat in the shortening until coarse crumbs form.

IMG_3230

4. Add beaten egg and milk, stir in with a fork.

IMG_3231

5. Turn batter onto floured surface. Get caught in the act of making mildly sorcerous hand gestures. WARNING. WARNING. Do not set wax paper on the surface. Put the flour right onto the cutting board or the counter top. Or you will be sorry.

IMG_3234

Puzzle over next part of the instructions.

6. Knead 20 times. Knead?

“Boyfriend, what does knead mean here? What do I do?”

“Um… it’s what the cat does when he sits on your lap, just try that.”

“Okay then!”

IMG_3246

7. Cut out biscuits with a roundish shape. I didn’t want another dish to clean so I didn’t do that, and tore off pieces by hand, and plopped them onto the trays.

8. Bake 10-14 minutes. I checked at 10, not done. Gave it 2 more minutes, 2 more, 2 more, and at 16 they finally had that golden edge.

IMG_3252

9. Remove from oven and immediately take off tray and transfer to cooling rack. Wait 5 min before eating.

IMG_3255

Very nice with a cup of tea. Or with dinner.

IMG_3260

Verdict: Success!  Thank you Aunt Lucy.

Playlist: Vampire Hunter D, OST

“The charm of homemade chocolates!”

That phrase is code for “something went wrong”.

IMG_3172

The first time I poured chocolate into molds, they had lots of air bubbles. I complained to my sister who wisely explained it’s like Ed Norton’s glassware in Fight Club, the little imperfections show it was hand-crafted and it’s just the charm of homemade chocolates. So now every time something untoward happens while I’m chocolatiering, you will hear an indignant curse from me, followed by a soothing assurance from Boyfriend Unit, “It’s the charm of homemade chocolates, don’t worry.”

And what goes wrong when you are making chocolates, pray tell? Air bubbles, cracks, bloom (cloudy spots), smudges, melting, seizing, fillings not centered, fillings exploded,  misprint on map, et cet. But I no longer care. Because I know, when people open the box…

IMG_3177

… and eat one, they are all “OMFG”. And that makes me smile.

IMG_3171

We make a 9 piece box, with one dark chocolate, three milk chocolates, and five semi-sweet chocolates. This year Boyfriend Unit experimented with a sea salt dark chocolate since he hates raspberry cream. He really liked the result.

Using a full-sized block of chocolate was a new experience. This is a 5 kilo or 11 pound block of Barry Callebaut Belgian chocolate, classified as a well-balanced bitter cocoa taste, 53.8% cocoa solids. This is the base of all my semi-sweet chocolates.

IMG_3150

I was so excited to open this!

IMG_3154

Just look at that! That is a lot of chocolate.

IMG_3157

My mother asked recently about my weekend plans.

“Making chocolate.”

“Oh hunni? Could you maybe send less dark chocolate this year?”

“Mom, there is one dark chocolate per box!”

“Oh hunni, that’s too much! I don’t like dark chocolate.”

“Ok Mom. No dark chocolate in yours.”

Stay tuned for how this was made and where to get supplies.

Blueberry muffins

IMG_2785

I love blueberry muffins. My mom makes amazing blueberry muffins, and hers are the standard to which every other muffin falls short. She uses the recipe of her good friend.

I grew up within a short drive of the Wild Blueberry Capital of Canada, and blueberries are the official fruit of my home province. Represent, bitches.

oxford

There is a large blueberry field behind my dad’s cottage, so I have eaten a lot of blueberries in my life. In fact blueberries are such a big deal where I grew up, we have town festivals to celebrate them. Imagine. Everybody turns out just to pimp one particular fruit. When I was little, we’d dress in blue shirts and stand on marked spots to form a big human blueberry and they’d take aerial photos.

IMG_2760

Time required: 1 hr

Yields: 14

Total cost if you have none of the ingredients: $28

Cost per muffin: $2

Kitchen implements I used:

  • muffin tin + large muffin liners

Ingredients:

  • 2 C flour
  • ½ C granulated white sugar
  • ½ tsp salt
  • 3½ tsp baking powder
  • 1 C milk
  • ⅓ C vegetable oil
  • 1 egg
  • 1 C blueberries

Instructions:

1. Pre-heat open to 400°F / 204°C and put muffin liners in tray.

2. Combine the dry ingredients in a large bowl.

3. Measure out the milk and oil into a liquid measuring cup.

IMG_2762

4. Beat egg until it’s foamy, then add to liquid.

IMG_2763

5. Add wet to dry, stirring until just combined. The batter will have a slight pull to it.

IMG_2772

6. Fold in the blueberries. Hopefully you have Canadian berries, but if not I guess you’ll have to make do with your inferior fruit. Frozen berries bleed colour but who cares because the bluer the merrier.

IMG_2773

7. Spoon batter into prepared tray.

IMG_2774

Leave some room for expansion.

IMG_2775

8. Bake 18-20 minutes and move to wire rack.

IMG_2780

9. After cooling, store in a sealed container. Take one with your tea and call me in the morning.

IMG_2790

Verdict: Delicious!  The texture improved over night.

I did try one last night after they were freshly made, and found it a bit disappointing. The bottom of the muffin stuck to the liner.  I called Mom, who suggested bake them for 15 minutes, leave them in tray for 2 minutes, then transfer to wire rack.

But when I had one this morning, it was bang on and the liner peeled off without sticking. So I think I’ll reduce baking time by 2 minutes next time and see how it goes.

Playlist: Final Fantasy VI – Another World of Beasts

Gingerbread top loaf

There are times in life when one hits the jack pot, and I am reminded of this  whenever I open to door to Mom’s house and the warm, sharp scent of a ginger loaf wafts out. This smell alerts a primal area of my brain that soon I will be enjoying tea, a warm piece of ginger loaf, juicy gossip, and fending off questions about Boyfriend.

Alas for me, I do not get to visit Mom’s house often. Time gives perspective and city living certainly has some amazing advantages, but now that I’ve been Away for 4.5 years, I’ve realized that there are some things I will never find up here, such as homemade goods. <sad face>

Luckily I just spent 2 weeks visiting home; and aside from the simple pleasures of getting to know my new niece and listening to Grandpa’s stories, I enjoyed numerous tasty treats!! I’ve been back in the city for a few days, and this weekend I decided the first thing I would bake would be Mom’s gingerbread loaf.

Oh, how innocently it began!

Good to know before you start: if you are feeling congested this is a great dish to make, it clears out your sinuses like you wouldn’t believe

Time required: 2.5 hours (30 min prep, 40 min baking, then cool)

Yields: 16 pieces or more

Total cost if you have none of the ingredients: $26.00

Kitchen implements I used:

  • pastry blender
  • baking pan 9″ x 9″

Ingredients:

  • ½ C shortening
  • ½ C granulated white sugar
  • 1 egg, room temp
  • 1 C molasses
  • 1 C boiling water
  • 2¼ C flour
  • 1½ TSP baking soda
  • 1 TSP salt
  • 1 TSP ginger, ground
  • 1 TSP cinnamon, ground
  • ½ TSP cloves, ground

Step 1 – pre-heat oven 177°C / 350°F. Boil water in the kettle.

Step 2 – grease and flour a 9″ x 9″ pan. Hmm. Something seems odd.

Step 3 – in a small bowl combine: flour, baking soda, salt, ginger, cinnamon, and cloves.

I used a wire whisk to blend the dry ingredients, and before I measured the molasses, I sprayed a light coat of Pam into the measuring cup. (Works like a charm when you’re dealing with sticky ingredients like this or peanut butter.)

Step 4- in a large bowl, cream shortening, sugar, and egg, until fluffy.

In retrospect I’m not sure if a pastry blender was the best idea for this, it was a bit lumpy.

Step 5 – add molasses to wet mixture and beat in well.

Step 6- stir in boiling water.

Step 7 – add dry mixture to wet.

Step 8 – pour mixture into baking pan, bake 45 min. Remove loaf from pan.

Step 9 – cool on rack for at least one hour. This is the moment everything fell apart. Much cursing was done.

I examined the part that remained in the pan. It wasn’t burnt, just stuck. I used a spatula to remove it, and tried setting it in place, which was a bad idea.

So I took the bottom part back off, hence “top loaf”. And you know, it smelled right, and it looked right (until it came out of the pan). That’s when I realized I used the wrong size pan.

Verdict: What a nightmare. The top side of the loaf was slightly overdone, it had a faint crispness that should not have been there, when ginger loaf is done correctly it’s got the same consistency of banana bread. I assume this was caused by the dough being spread too thin by the length of the pan.

Boyfriend and his friend tested it, and said it was good, but I know I can do better. I was so discouraged, this is the 4th cake/loaf-type thing I’ve made in recent months that fell apart, all that effort and care gone to waste.  Maybe I’ll try this again tomorrow in the proper pan.