Patty’s pumpkin cream cheese muffins – round 1

I decided to reverse-engineer a pumpkin cream cheese muffin after the underwhelming experience of buying one from StarBucks. This is my first attempt at making pumpkin muffins, and I made them the morning after seeing Nine Inch Nails live, which really has nothing to do with making muffins, but there you go. The muffins were edible, but have room for improvement. Trent Reznor, I am happy to report, does not require any improvement.

(Update Oct 19: round 2 is much better)

IMG_2841

I was surprised to see that the ingredient cost of this made this the most expensive thing I have ever baked, even steeper than the the Bailey’s chocolate cheesecake. Yikes.

IMG_2808

Time required: 1 hour

Yields: 14

Total cost if you have none of the ingredients: $79 if iced, $54 if plain

Cost per muffin: $5.64 if iced, $3.85 if plain

Kitchen implements I used:

  • Nemo the KitchenAid
  • muffin tin + large liners

Muffin ingredients:

  • 1½ C flour
  • 1 tsp ground cinnamon
  • ½ tsp ground nutmeg
  • ½ tsp ground ginger
  • ½ tsp fine sea salt
  • ½ tsp baking soda
  • ¼ tsp ground cloves
  • ¼ tsp pumpkin pie spice
  • ¼ tsp all spice
  • 2 eggs
  • 1 C packed brown sugar
  • pods from half of a vanilla bean, split and scraped
  • 2 TBSP vegetable oil
  • 2 C of pure pumpkin
  • a sprinkle of turbinado sugar

Frosting ingredients:

  • 1 block of cream cheese, softened
  • 4 TBSP butter, softened
  • 1 TBSP milk
  • 1 TBSP lemon juice
  • 1 tsp vanilla
  • 4 C icing sugar

Instructions:

1. Pre-heat oven to 350°F / 176°C and put muffin liners into pan.

2. Combine in a bowl: flour and spices.

IMG_2810

3. In mixer; cream the eggs and sugar until smooth.

IMG_2812

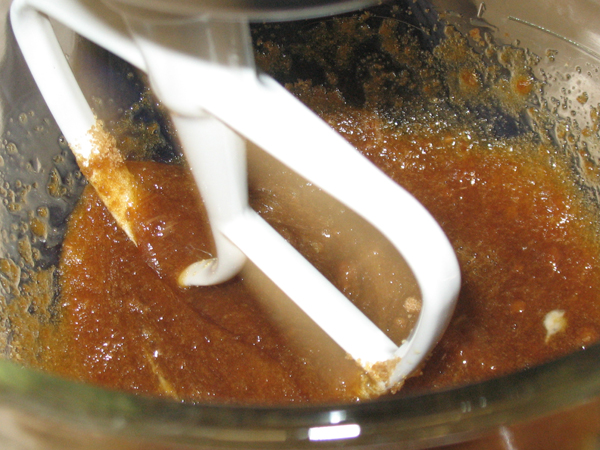
4. Mix in canned pumpkin, vegetable oil, and vanilla bean pods. (Reserve the shell for something else).

IMG_2814

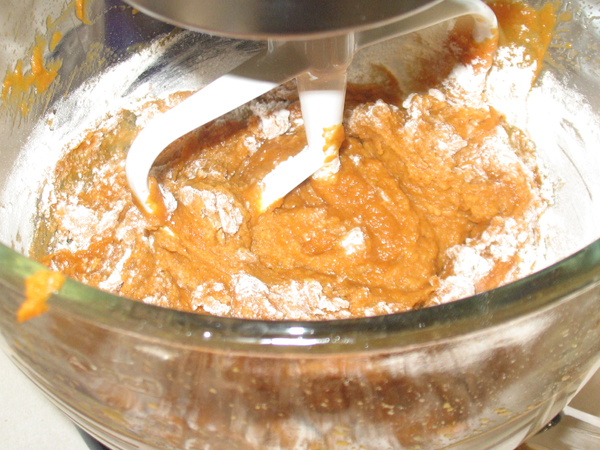
5. Gradually add flour mixture to wet, and don’t overbeat.

IMG_2815

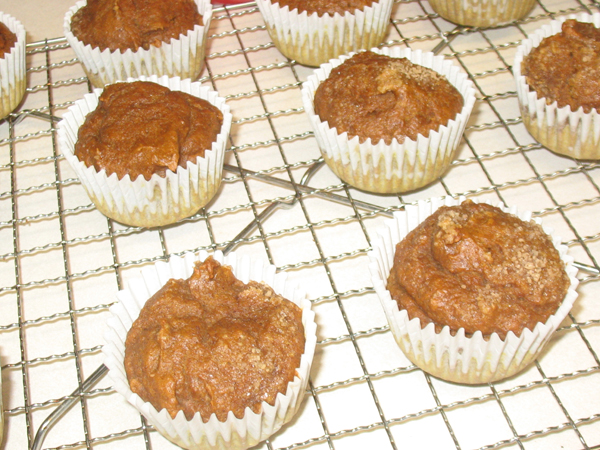
6. Spoon into tray, and dust with turbinado sugar.

IMG_2818

7. Bake 25 min. (Checked at 20 and but still too springy.)

8. Cool in pan 5 min before transferring to rack.

IMG_2821

9. Make the icing by combining everything in one bowl. This is precise science, people.

IMG_2819

10. Use a knife to score a circle around the muffin tops and press the knife down, then lift up, and pry out the top. You will have a little muffin cone lid. Slice off the bottom part until you have a thin top remaining. Now stuff that bad boy with cream cheese and replace the top.

IMG_2824

Verdict: They were good, but the muffin texture really changed overnight, they seem overly moist today. I tried one without icing, and the pumpkin was a bit too strong. Then again cream cheese icing is also a very strong flavour, so… hard to say. I sent my friend home with one but forgot to ice it. Oops. Overall I was pleased with how it turned out, and I think for round 2 I’ll add a few more spices, and cut back on the pumpkin and see how that goes.

Playlist: Nine Inch Nails – Terrible Lie

Advertisement

“Give it to us raw, Precious!”

My latest attempt at banana bread resulted in something that fooled the senses at first. It smelled done, it felt done, and the toothpick test (in 5 places) indicated it was cooked through, so I served it.

IMG_2753

The first slice was fine.  The second slice was fine. Sometime later, I noticed it was a bit… juicy. I dissected the loaf and the centre was jiggly. It was so raw, I became rather disgusted and put the camera down. It couldn’t, shouldn’t, be photo-documented any further. I confided to my bestie about what happened.

IMG_2759

“That’s amazing. You and loaves of anything don’t mix.”

It’s true! My ginger loaf and banana breads always come out of the oven screwed up.  Maybe I need more practice. In the Year of Pie and the Trials and Tribulations of Fudge, it didn’t take too long to get it right. I just made it all the time for awhile (my guts are recoiling in memory) until I got it right.

So; practice. The worst part of making banana bread is letting the bananas ripen.  There is a fine line between over-ripe fruit and putrefied fruit, turn your back for a few hours and suddenly instead of squashing mushy bananas, you are splitting the skin with a knife and watching the clear fluid burst out like a floater fished from the river. Zombie fruit on the counter isn’t my idea of a good time. Experiments in cellular degeneration gone awry.

Oh well. Time to get back to The Rotting Bread.

Patty’s apple strudel explosion

If a pastry explodes in the oven, does it make a sound? More importantly, does it still taste good?

IMG_1985

I researched how to make traditional strudel pastry but it sounds like a nightmare so, not today. I trawled the entire grocery store looking for phyllo pastry and discovered it’s kept near the frozen berries. This is my first strudel and I’m pleased with the results, however next time I’ll add raisins and reduce the lemon juice.

Shout-out to Boyfriend for being my camera man.

IMG_1980

Time required: 1.5 hours

Yields: 6 pieces

Total cost if you have none of the ingredients: $24

Cost per piece: $4

Kitchen implements I used:

  • large baking sheet
  • parchment paper

Ingredients:

  • 3 apples
  • 3 TBSP golden brown sugar
  • 2 TBSP water
  • ½ tsp ground cinnamon
  • ⅛ tsp ground nutmeg
  • 2 TBSP powdered corn starch
  • ¼ C lemon juice
  • 4 sheets of phyllo pastry
  • 2 TBSP melted butter
  • 3 tsp finely ground bread crumbs

Instructions:

1. Pre-heat oven to 350°F / 176°C. Line baking sheet with parchment paper and dust with flour.

2. Peel, core, and mince the apples. Toss them in a sauce pan with the water, brown sugar, cinnamon, and nutmeg. Bring to a simmer and cook on Med-Low for 10 min, stirring often.

IMG_1923

3. Combine corn starch and lemon juice, whisk until smooth, then add to cooked apple mixture and simmer for 1 more minute before removing from heat.

IMG_1922

We do not want juicy strudel.

IMG_1936

4. Place one piece of phyllo on the baking tray. Brush with butter, and sprinkle one teaspoon of breadcrumbs. Don’t stress about making this even, doesn’t really matter.

IMG_1925

Do this two more times, then add fourth and final layer (do not add butter or crumbs to top layer).

IMG_1930

5. Spoon the filling down one side vertically, leaving room at the edges.

IMG_1944

Give camera man 2 thumbs up.

IMG_1949

6. Use the parchment paper to support the pastry as you lift it, you’re trying to tuck it over and under the apple filling, and then carefully roll it over like so. Once you’ve got the first turn, peel the parchment paper back towards you.

IMG_1950

IMG_1951

Keep turning it, and between turns try to smooth it with your hands to an even shape.

IMG_1952

This was a little nerve-wracking, worried about tearing it.

IMG_1958

Roll it up 3-4 times until it’s at the edge.

IMG_1961

7. Brush butter inside the open edge then flip it so the seam is on the bottom. Tuck the ends in.

8. Dust with a cinnamon sugar mix.

IMG_1974

9. Bake 20-25 min until golden brown.

10. Cool on rack at least 5 min before serving. Mein gott! What is this?

IMG_1981

Verdict:

You want to get judged harshly? Tell people in advance you are using phyllo instead of making the pastry yourself. 

Response from best friend: “0_0 That is really shocking.”

This was fairly simple to make. Aside from the explosion, it turned out great. I may have had a tantrum when I saw that, but I cut it in thirds first, and got 4 nicely sliced pieces, and 2 messy pieces. Cutting through the strudel after it’s baked it harder than I anticipated.

Playlist: Eric Carmen – Hungry Eyes

Ninjabread men

IMG_1781

CHUCK NORRIS! These ninjas are cut out for action!

My friend M (actually I have two friends named M, but this one is the boy) gave me a very cool gift last year and I have been waiting for December to use it. It’s a set of 3 ninja cookie cutters. M has a penchant for gifting me with ninja-related presents and the cookie cutters were just SO AWESOME.

IMG_1763

Ingredients:

  •  ⅔ C shortening
  • ½ C brown sugar, packed
  • 2 TSP ginger, ground
  • 1 TSP cinnamon
  • ¼ TSP cloves, ground
  • pinch of salt
  • 1 egg
  • ¾ C molasses
  • 3 C flour
  • 1 TSP baking soda
  • ½ TSP baking powder

Instructions:

1. Moving like the wind, pre-heat your oven to 190°C / 375°F.

2. Quietly cream together the shortening, sugar, spices, and salt.

3. Beat in egg, to death. Add molasses and blend into the night.

IMG_1765

4. Sift together flour, baking soda, and baking powder. Add dry mixture to the wet with deadly accuracy. Cream together as if your life depends on it.

IMG_1766

5. Roll the dough to ⅛ thickness, as even and smooth as the deadliest katana. Your hands move like a whisper, cutting the dark shapes into the dough.

IMG_1769

6. Release the ninjas. Transfer them to a baking sheet that has been greased with lightning or lined with parchment paper.

IMG_1770

7. Bake 6-7 min. Cool on rack. (Here is Boyfriend taking them out of the oven for me.)

IMG_1773

Oh noes! The ninjas are burnt. Let’s try another round.

IMG_1771

8. Frost with traditional ninja accessories. (I used my basic butter cream and divided the bowl of frosting in thirds. One part I left plain, and the other two I added highly concentrated no-taste black and no-taste red pigment. To achieve a darker black, I added cocoa to that bowl because it’s a lot easier to get black frosting if you start with chocolate frosting.)

IMG_1776

I didn’t use the red dye yet, I’m going to let it sit overnight to darken. Stay tuned for more ninjas later this weekend.

IMG_1781

Go ninja go!

IMG_1776

Verdict:

Making these was a lot of fun. The first few ninjabread that I rolled did not turn out so well. As I was transferring them to the cookie sheet, I squished them. They ended up misshapen and burnt.

For the second batch I got Boyfriend Unit to hold a piece of parchment paper tightly against the cookie pan, and I  plopped the dough right on to that, and rolled it out, cut the shapes, and then just peeled the excess away so the ninjas did not have to be moved. It worked much better.

The ninjas tasted pretty nice. I’ve never made gingerbreads before, they are tricky to work with. I have new respect for my sister J’s skills.

Playlist: Placebo – Running Up That Hill

Banana bread ver 2.0

I’m typing on the bus on a road that is under construction. Please excuse typos. Made more banana bread last night, using shortening instead of butter to see if the loaf would be dark. Added chocolate chips to one loaf.

Got up early to blog before work. Slept in til last minute, ergo I blog as I commute.

The paler loaf was baked in a glass pan. Boyfriend pointed that out, since I was puzzled by the colour disparity.

Best Friend suggested chocolate chips, which added interesting texture. Both taste very good.

Might pick up one dark pan to see if I can achieve the colour I want next time.

Banana bread in disguise

If it’s shaped like banana bread, and it smells like banana bread, but looks nothing like banana bread, is it banana bread? That is the question.

Banana bread is one of those. You know what I mean. Everybody and their granny can make it with their eyes closed, yet when I try, things just don’t happen the way they should. My first loaf was half-raw, my second was a brick. Third time was not a charm, I brought a bag of bananas to Hobby Victim’s house, and I don’t remember what happened but we didn’t end up making banana bread. The bag of ripe bananas lay forgotten on the counter, until her daughter discovered a putrid mystery mess. (I am still embarrassed.)

My failure to make a perfect tea bread came up with Best Friend the other week.

“I’m making banana bread soon, hopefully. My banana loaf never work out.”

Any loaf you make never works out.”

“Touché!”

Okay, I thought. Obviously my attempts to re-create family recipes isn’t working, so what do the pros do? I found this recipe in KitchenAid 3 cookbooks in 1: pies & tarts, cakes & cupcakes; breads which is available on Amazon.com and while it seemed pretty straight forward, I’m still not sure I have real banana bread.

Time required: 2 hours

Yields: 8-10

Total cost if you have none of the ingredients: $30.00

Cost per slice: $3.00

Kitchen implements I used:

  • Nemo the KitchenAid
  • flour sifter
  • metal loaf pan
  • tinfoil

You may be wondering why there are no bananas in this picture. Well. They uh… seemed over-ripe, almost to the point of “Should these be tossed out or are they still okay?” and I decided they looked too scary for the shot.

Ingredients:

  • 6 TBSP unsalted butter, softened
  • ⅓ C brown sugar, packed
  • ⅓ C granulated white sugar
  • 2 eggs
  • 3-4 bananas, ripe
  • ½ TSP vanilla
  • 1½ C flour
  • 2½ TSP baking powder
  • ¼ TSP salt

Instructions:

1. Pre-heat oven to 176°C / 350°F. Line pan with tinfoil and grease.

2. Cream butter and sugars in mixer until light and fluffy.

3. Add eggs one at a time, then add bananas and vanilla. You’re supposed to mash the bananas first, but uh… mine had reached the point of cellular degeneration where mashing was no longer required.

4. In a bowl sift flour, baking powder, and salt.

5. Add gradually to wet mix and mix until just combined.

6. Spoon batter in pan and bake 50 min.

7. Remove from pan and set on wire rack, cool in pan for 1 hour. Toothpick test indicated doneness.

8. Remove foil and slice.

Hmm. Is this normal?

Verdict:

“Do you think it’s done?”

“I don’t know. Let’s eat some.”

“Why is it so light? It’s supposed to be dark brown… ”

“It tastes good, that’s all I care about.”

Playlist: The Servant – Cells

White velvet cupcakes

Velvet. Silk. Leather. At what point do textile-inspired recipe names become weird? Oh, who cares. I have never eaten white velvet before, and I’ve been curious about it for some time.

I found an amusing white velvet recipe on cookbookmaniac that appealed to me, and I paired it the cream cheese frosting in my Betty Crocker book.

Good to know before you start: This recipe uses cake flour which is milled from soft wheat flour (as opposed to all-purpose flour which is milled from a blend of soft and hard wheats), which results in a finished product with a very tender crumb.  Cake flour also has a lower protein content than all-purpose flour.

You can find regular cake flour and self-rising cake flour, which already contains salt and baking powder. I used self-rising, so I skipped the salt entirely and lowered the amount of baking powder. The original recipe calls for full cream milk and caster sugar which I don’t have, so I substituted with granulated white sugar and 2% milk.

Cream cheese frosting must be refrigerated. If you are like me, and don’t like cold cupcakes, don’t frost them ahead of time. Store the cupcakes at room temperature and frost them as needed.

Time required: 2 hours

Yields: 36 mini cupcakes

Cost per cupcake: $1.17

Total cost if you have none of the ingredients: $42.00

Kitchen implements I used:

  • KitchenAid

Cake ingredients:

  • 3 egg whites, room temp
  • ⅔ C milk
  • 1½ TSP vanilla extract
  • 2 C self-rising cake flour
  • 1 C granulated white sugar
  • 1 TSP baking powder (instead of 2½ TSP)
  • NO SALT (instead of ½ TSP)
  • ½ C butter, room temp

Frosting ingredients:

  • one 8 0z block of cream cheese, room temp
  • 4 TBSP butter, room temp
  • 1 TBSP milk
  • 1 TBSP lemon juice
  • 1 TSP vanilla extract
  • 4 C icing sugar

Instructions:

1. Pre-heat oven to 175°C / 347°F. Use rack that is third from the top.

2. Separate the egg whites into a medium bowl, and save the yolks for something else. Stir in the vanilla and three tablespoons of the milk. Whisk until just combined.

You know, I really wanted to show you a picture of me separating egg whites like a pro, but since nobody was home to be my camera man you’ll just have to use your imagination.

3. In your mixer, with a flat beater attachment, add: cake flour, white sugar, and baking powder. Beat on Low for 30 seconds.

4. Add butter and remaining milk. Beat on Low until combined, and then beat on Medium for 90 seconds.

This is the first time I’ve used the flat beater and it is AWESOME. It is so much easier to beat ingredients with, why did  I use the wire whip for so long??

5. Add half the egg white mixture and continue on Medium speed for 30 seconds.  Add the remaining egg whites, beat another 30 seconds.

6. Spoon into muffin tins.  Bake 14 minutes. Cool in pan for 1 minute, before transferring to cooling rack for at least one hour before frosting.

7. Make your frosting by combining the cream cheese, butter, milk, lemon juice, and vanilla. Beat well, and add the icing sugar one cup at a time. Beat until smooth.

(Edit Aug 17, 8:40am) Got up early to take one more picture.

Verdict: Delicious. White velvet cake is really good. My frosting turned out very runny though, next time will use a little less milk, and more icing sugar. These were a big hit, Boyfriend was quite impressed.

It has an unique texture and comes out of the oven so pale, an interesting change from the cupcakes I’m used to. Really enjoyed these.

No idea why I only got 36 minis instead 48, which is what I usually get from converting a cake recipe to minis.

I was discussing this recipe with Best Friend, who (poor girl) has never eaten any type of velvet cake.  Can you imagine? That’s going to be remedied STAT next time I go home.

Next up: blue velvet!

Playlist: A-ha – Take On Me

Patty’s peach tarts

There is only one way to celebrate Labyrinth Day on June 13, and that is by watching the movie and eating peaches!! I wanted to make a peach pastry fit for a goblin king, delicious enough to make you forget everything. But when Boyfriend brings home the wrong ingredients and the whipped cream turns into butter, will he survive long enough to taste a tart?

If you are not aware, Labyrinth Day falls on June 13 because the movie was released in June 1986, and Jareth’s clock has 13 hours. The importance of peaches should be obvious!

The only person as mad for Labyrinth as I am is Best Friend, so she was the #1 choice to discuss my dessert plans. We looked at lots of recipes, and saw some really interesting peachy things, and in the end I decided to make tarts, topped with either fresh whipped cream, or vanilla frozen yogurt. I already had heavy cream, and made up a pie crust in the afternoon.

I asked Boyfriend to pick up 10 peaches and a container of frozen yogurt, and figured I could make up my mind between whipped cream and frozen yogurt later. He returned with ten pieces of fruit, which upon closer inspection, were not what I requested.

“These aren’t peaches,” I said.

“Yes they are.”

“The skins are smooth. These are nectarines.” I picked one up.

“No, they’re peaches! They were in the peach section.” he insisted.

“Being in the peach section doesn’t mean they are peaches, darling. Didn’t you notice they’re not fuzzy?”

“It doesn’t matter anyway.” he said. “These were the  last ten peaches they had so I got them all for you.”

I examined the fruit more closely.

“No. You got the last six peaches and four nectarines, is what you got.”

“Too late now.”

What to do? Six peaches wasn’t enough, and the store was closed. Peaches and nectarines have similar characteristics, and (I hoped) complimentary flavours, so I decided to use both.

Time required: 2.5 hours

Yields: 2 tarts

Cost per pastry: $15.00

Total cost if you have none of the ingredients: $30.00

Kitchen implements I used:

  • 2 shallow, fluted ramequins
  • 1 cookie sheet (to catch overflow)
  • deep skillet

Tart ingredients:

  • 6 peaches
  • 2 nectarines
  • 4 TBSP butter (half a stick)
  • 1 cinnamon stick
  • ⅛ TSP cinnamon
  • smidgen of cloves
  • nip of nutmeg
  • ¼ C dark brown sugar, packed

Instructions:

Step 1 – Prepare a pie crust and refrigerate it. (I’ve mentioned this before but if you can’t make pie crust I can’t help you, I can barely help myself.)

Step 2 – Prepare the fruits: peel, core, and slice them. They will collapse during baking so don’t slice them too small.

Step 3 – In a large skillet, melt the butter and add the fruits. Once the butter has melted, increase heat until the fruit juice gets bubbly. Or you could be lazy like me and add the butter and fruits at the same time, bwahaha!

Step 4 – Once it’s bubbling, add: cinnamon stick, ground cinnamon, cloves, nutmeg, and brown sugar.  Once everything is mixed in and the sugar has melted, reduce heat, and simmer for at least 15 minutes, stirring occasionally.

I have no shame in admitting that the sole reason I opted to include a smidgen and a nip was to show off my cute mini spoons! They measure: pinch, dash, smidgen, and nip.

Step 5 – Cut pastry to size and place into ramequins. Set ramequins on cookie tray. Save the remaining pastry for another use and refrigerate.

Step 6  – Discard cinnamon stick, and ladle fruit mixture into crust.

Step 7 – Bake 30 minutes, and cool on wire rack at least 20 min.

Top with whipped cream or frozen yogurt, or enjoy just the way they are.

Verdict:

Um, speaking of whipped cream… while the tarts were cooling, I made up whipped cream – except I got immersed in a book and walked away from the mixer. When I checked in on it later, my whipped cream had turned into butter.

Things were still okay because I knew we had frozen yogurt in the freezer as back-up and the tarts smelled really good. My jovial mood lasted until I opened the freezer, and then I got pissed.

“Oh darling! What’s this?”

“It’s vanilla frozen yogurt.”

“Really? Because the label says ‘vanilla with chocolate chunks and caramel’.”

“It was in the vanilla section!” he protested.

“Do you even read labels?”

In the end, I had a lack of peaches, ruined whipped cream, and the wrong flavour of frozen yogurt. Not a great start! We both glowered at each other. But it was a stupid thing to be angry over, so I told Boyfriend to eat his tart. And actually… they were really good!

Not quite what I planned, but still very tasty.  I’d make two small changes next time; halve the butter, and double the fruit.

This morning while I was writing up this post, Boyfriend – armed with Wikipedia – lectured me on the nature of peaches and nectarines.

“A nectarine is a peach. It’s a mutated peach, but it’s a peach!” he says smugly.

“Great, mutated fruit! That still doesn’t change the fact that I asked for peaches and you brought home nectarines and the wrong frozen yogurt.”

“It’s not a big deal. It’s nothing.” he said.

“Nothing? Nothing? Nothing tra-la-la!?!”

Playlist: Phantasy Star III soundtrack

Patty’s blackberry cream puffs

A flaky pastry bursting with freshly made whipped cream and tart blackberries is a wonderful way to start your morning.

It’s a good thing I love blackberries because I still have quite a lot of them. Last night I was musing over what to make with them, using ingredients I already had in the cupboard, as I was chatting with Best Friend.

Our conversation reminded me of the day in high school that Best Friend made éclairs on a whim (the first and only time she made them), and they were perfect. This led to inspiration, since a cream puff and an éclair are the same pastry, just shaped differently, and I thought the cavernous insides of a cream puff would be the perfect place to use some berries. Voilà!

My relationship with pastry is wary at best so I used a recipe from Better Homes and Gardens New Cookbook, which is available on Amazon.ca. It’s a good hardcover with a ring binding, lots of pictures and useful tips.

Time required: 1.5 hours

Yields: 12 pastries

Cost per pastry: $2.17

Total cost if you have none of the ingredients: $26.00

Kitchen implements I used:

  • beaters and mixing bowl
  • cookie pan
  • parchment paper

getting started

Pastry ingredients:

  • 1 C water
  • ½ C butter (one stick)
  • ½ TSP salt
  • 1 C flour
  • 4 eggs

Filling ingredients:

  • 1 C heavy cream (whipping cream)
  • 2 TBSP icing sugar
  • ½ TSP vanilla
  • 2 TBSP granulated white sugar (set aside)
  • 2-3 containers of blackberries (set aside)

Good to know before you start:
Place the mixing  bowl and beaters in the fridge now to chill them for the whipped cream – some people will say you don’t need to do this but I find it helps to make a fluffy cream

Don’t stuff the pastry with the filling until ready to serve, to prevent sogginess

Instructions:

Step 1 – preheat oven to 205°C / 400°F.  Line cookie pan with parchment paper (oops, forgot to do that).

Step 2 – measure out flour and set aside.

Step 3 – in a sauce pan, combine water, butter, and salt. Heat to boiling.

Step 4 – as soon as it boils, add all the flour (don’t let it sit boiling away or it will start evaporating). Stir vigorously until dough forms a ball, and remove from heat.

Step 5 – let mixture stand on counter for 10 minutes. Then beat in eggs, one at a time.

Step 6 – drop 12 heaping spoonfuls of dough onto cookie sheet…. hmmmm, something is amiss!  Oh well no matter.

Step 7 – bake 30 minutes and tops should be golden brown. Remove from heat and transfer pastry to wire rack. Cool at least 40 min. (Wishing I had remembered to use parchment paper because they did stick to the pan a little.)

Step 8 – meanwhile in chilled bowl with beaters on Medium; beat heavy cream, icing sugar, and vanilla until soft peaks form.  Some people recommend you wait until the cream is beaten to add the sugar and vanilla but I wanted to get back to my Assassin’s Creed game.

Whipped cream is so easy to make, I’ll never understand why people buy it in stores when the homemade stuff is so much better.

Step 9 – wash and drain the berries.  If the berries are tart sprinkle sugar onto them and toss.

Step 10 – once pastry is cooled, use sharp knife to cut a seam near bottom of pastry, and if you look inside you’ll see it’s fairly hollow.

Step 11 – stuff those bad boys with as much whipped cream and berries as desired!! In this one, the cap of the pastry is filled to capacity. XD

Verdict: Delicious! A perfect addition to afternoon tea or to round off a meal. I suspect this will be equally tasty with blueberries or raspberries, or whatever else you fancy, or drizzled with chocolate ganache. If you have never made this type of pastry before you might be surprised by how few ingredients are required, and how quick and easy it is to make.

Playlist: Meat Loaf