No bite brownies

So these happened and they don’t taste good. What’s annoying is they smell like chocolate pudding and they ought to taste good, but they’re foul. This was my first time baking with Carbquik and protein powder. Learning curve!

20160603_162246

I’m trying to make a low-fat, low-carb treat that’s acceptable to people on phase 1 of the Dr. Poon Metabolic lifestyle and I’m going back to the drawing board. When a brownie tastes bad fresh out of the oven you’re doomed.

Advertisement

Milk chocolates – all done


What was it like to use a professional chocolate tempering machine? Fabulous. Amazing. Spectacular. Am running out of adjectives. It works so well and it’s so fast. (Product review will be posted after Christmas.)

IMG_3137

So basically my our tempering machine works even better than I had imagined.  Yesterday Boyfriend and I made 66 solid milk chocolates (above), and 51 toasted almond milk chocolates (below). Look at that beautiful gloss!

IMG_3136

Today we are going to make the Toberlone pieces, and then the milk chocolate is all done, next weekend is for the more labour-intensive filled chocolates. And the peppermint bark. Huzzah!

IMG-20131207-01301

“Why do you have to name it?!?”

“I just do. And its name is Bernard. Deal with it.”

Blueberry muffins

IMG_2785

I love blueberry muffins. My mom makes amazing blueberry muffins, and hers are the standard to which every other muffin falls short. She uses the recipe of her good friend.

I grew up within a short drive of the Wild Blueberry Capital of Canada, and blueberries are the official fruit of my home province. Represent, bitches.

oxford

There is a large blueberry field behind my dad’s cottage, so I have eaten a lot of blueberries in my life. In fact blueberries are such a big deal where I grew up, we have town festivals to celebrate them. Imagine. Everybody turns out just to pimp one particular fruit. When I was little, we’d dress in blue shirts and stand on marked spots to form a big human blueberry and they’d take aerial photos.

IMG_2760

Time required: 1 hr

Yields: 14

Total cost if you have none of the ingredients: $28

Cost per muffin: $2

Kitchen implements I used:

  • muffin tin + large muffin liners

Ingredients:

  • 2 C flour
  • ½ C granulated white sugar
  • ½ tsp salt
  • 3½ tsp baking powder
  • 1 C milk
  • ⅓ C vegetable oil
  • 1 egg
  • 1 C blueberries

Instructions:

1. Pre-heat open to 400°F / 204°C and put muffin liners in tray.

2. Combine the dry ingredients in a large bowl.

3. Measure out the milk and oil into a liquid measuring cup.

IMG_2762

4. Beat egg until it’s foamy, then add to liquid.

IMG_2763

5. Add wet to dry, stirring until just combined. The batter will have a slight pull to it.

IMG_2772

6. Fold in the blueberries. Hopefully you have Canadian berries, but if not I guess you’ll have to make do with your inferior fruit. Frozen berries bleed colour but who cares because the bluer the merrier.

IMG_2773

7. Spoon batter into prepared tray.

IMG_2774

Leave some room for expansion.

IMG_2775

8. Bake 18-20 minutes and move to wire rack.

IMG_2780

9. After cooling, store in a sealed container. Take one with your tea and call me in the morning.

IMG_2790

Verdict: Delicious!  The texture improved over night.

I did try one last night after they were freshly made, and found it a bit disappointing. The bottom of the muffin stuck to the liner.  I called Mom, who suggested bake them for 15 minutes, leave them in tray for 2 minutes, then transfer to wire rack.

But when I had one this morning, it was bang on and the liner peeled off without sticking. So I think I’ll reduce baking time by 2 minutes next time and see how it goes.

Playlist: Final Fantasy VI – Another World of Beasts

Penuche fudge round 5

Pictureless post is pictureless. There are two completed desserts from last week that won’t be featured on my blog because I forgot to take pictures. Oops.

Last week I wrote about my 4th batch of penuche which was successful, and my 5th batch which was setting. I forgot to take pictures of the 5th batch later that day, because I was too busy eating pieces since it turned out!! I was so excited, it was delicious, and more importantly; it set.

Stopping for photos was the last thing on my mind. It had that gorgeous penuche taste, such an intriguing flavour. It was not as firm as I would like, and I need to master the beating and pouring process, but I’m getting closer. ^^

I became fudge-fatigued and ran out of dark brown sugar, so a break was needed.

The other dessert I wanted to post but forgot was the apple crisp that Boyfriend made for Thanksgiving, which was delicious. I am going to push him to make another one soon and if he cooperates I’ll have something to post.

It’s possible I have the energy to bake something today. You’ll have to wait and see.

Devil’s cupcakes

If being damned meant I could eat devil’s food cake every day then send me straight to hell.

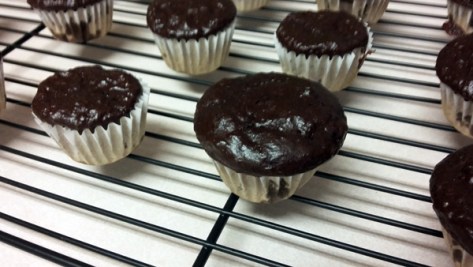
What makes a “classic” devil’s food cake recipe is debatable, but one thing is not open for discussion, and that is the simple fact that devil’s food cake is delicious. Alternately known as the the best cake ever, devil’s food is a rich, moist, airy cake.

I was compelled to make these after several late-night Diablo 2 sessions with Boyfriend. After a few dungeon crawls which culminated in fighting various demons and devils, I woke up the other day with three words on my mind: devil’s food cake. It’s divine inspiration.

These were made from the “classic devil’s food cake” recipe in my beloved Chocolate! book by Good Housekeeping, which is available on Amazon.com and Amazon.ca. I planned to make chocolate buttercream but when it was time to make the frosting I forgot, so these beauties are frosted with luscious vanilla buttercream.

Good to know before you start: although you can substitute buttermilk by adding white vinegar to regular milk, it is worth using real buttermilk for this. I’ve done the substitution a few times, but I find the flavour and texture of cake batter made with real buttermilk is much, much better. I spent $2.69 on a 1L carton.

I used to avoid buying it because I had no idea what to do with the leftover milk, but I will just MAKE MORE CUPCAKES NOM NOM NOM.

Before you open the buttermilk shake it well.

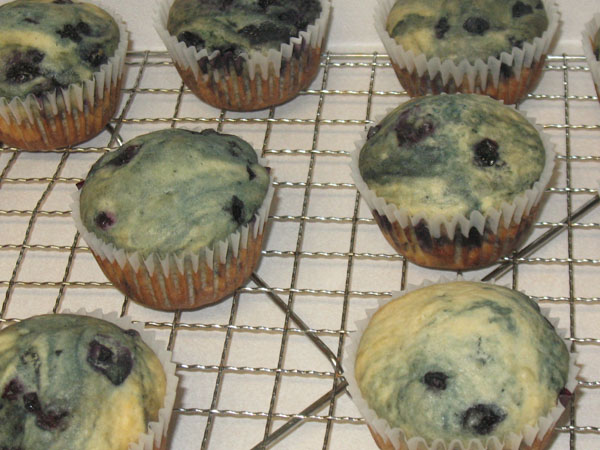
I was experimenting with camera settings for these shots. My apologies if the lightning is off.

Time required: 1.5 hours

Yields: 48 mini cupcakes, 24 regular cupcakes, or three 8″ round cakes

Cost per mini cupcake: $1.08

Total cost if you have none of the ingredients: $42-$52 depending on the quality of vanilla extract

Special kitchen implements I used:

  • KitchenAid mixer!
  • 2 mini cupcake trays

Ingredients:

  • 2 C flour
  • 1 C unsweetened cocoa
  • 1½ TSP baking soda
  • ½ TSP salt
  • ½ C unsalted butter (one stick), room temp
  • 1 C golden brown sugar, packed
  • 1 C granulated white sugar
  • 3 eggs, room temp
  • 1½ TSP vanilla extract
  • 1½ C buttermilk

Instructions:

1. Pre-heat oven to 177°C / 350°F. Place cupcake liners in trays. (For round cakes, grease the pans, line with parchment paper, and dust with cocoa.)

2. In a medium bowl combine: flour, cocoa, baking soda, and salt. Set aside.

3. In a mixing bowl at low speed, beat: butter, brown sugar, and white sugar, until blended. Increase speed to high: beat 5 min until it’s light and fluffy.

4. Reduce speed to medium and add the eggs one at a time.

Sometimes when Boyfriend walks into the kitchen, he will find me already in there, staring at my blue mixer.

“What are you doing?”

“Admiring.”

“Er…okay then.” (as he slowly backs away)

5. Beat in vanilla.

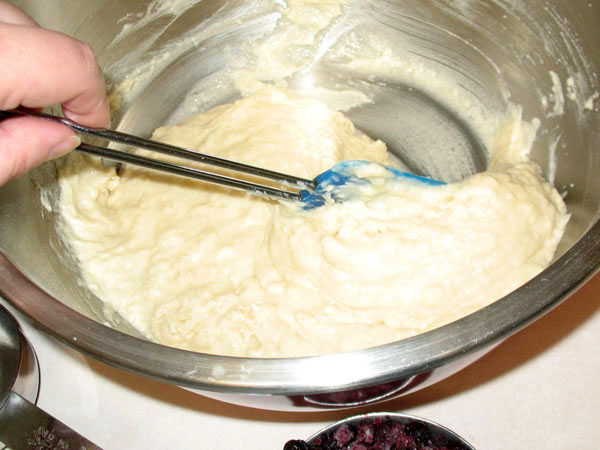
6. Add the dry mixture and buttermilk alternating like so: half of the flour, all the buttermilk, and the rest of the flour. After each addition beat until just combined. Scrape the sides a few times and make sure the batter is smooth.

7. Bake times: 14-15 min for mini cupcakes, at least 20 min for full size cupcakes, 30-35 min for 8″ rounds.

If making the round cakes, place two pans on top rack and one on bottom rack, no pan should be completely on top of another to allow air circulation.

A toothpick inserted should come out nearly clean.

Let cupcakes cool in pan one minute before removing from pan and placing on rack.

Let cakes cool 10 minutes before using thin knife to loosen edges and inverting onto rack.

Cool for at least one hour before frosting.

8. Frost! Oops. Forgot about making chocolate buttercream and made my regular vanilla buttercream for this: cream together 5 TBSP of unsalted butter at room temperature with 3 C of icing sugar. One at a time, mix in 1 TBSP milk, 1 TSP pure vanilla, and 1 TBSP lemon juice. If desired add a few drops of food colouring.

Verdict: Delicious. OMG. Delicious. Love love love. Real buttermilk batter is where it’s at.

Although I like mini cupcakes (because I can argue that eating two is only the equivalent of one), making them is aggravating. Manipulating batter into such a small space is so annoying. I have half a carton of buttermilk left though. Ah hah! I’ll just make full size cupcakes!!

I’ve been looking for an excuse to practice making buttercream roses. Perhaps I failed at making a perfect rose (more of an artists’ interpretation of a white carnation) but whatever! I still make heavenly cupcakes. The humidity is part of the problem, normally my frosting is firmer, but it’s been so humid and it came out slightly runny, which made is easy to pipe but it couldn’t hold a shape well.

I’ll make up another batch in a few days and will definitely go for chocolate buttercream.

What is your favourite cupcake and frosting flavour combination?

Playlist: Depeche Mode