“Give it to us raw, Precious!”

My latest attempt at banana bread resulted in something that fooled the senses at first. It smelled done, it felt done, and the toothpick test (in 5 places) indicated it was cooked through, so I served it.

IMG_2753

The first slice was fine.  The second slice was fine. Sometime later, I noticed it was a bit… juicy. I dissected the loaf and the centre was jiggly. It was so raw, I became rather disgusted and put the camera down. It couldn’t, shouldn’t, be photo-documented any further. I confided to my bestie about what happened.

IMG_2759

“That’s amazing. You and loaves of anything don’t mix.”

It’s true! My ginger loaf and banana breads always come out of the oven screwed up.  Maybe I need more practice. In the Year of Pie and the Trials and Tribulations of Fudge, it didn’t take too long to get it right. I just made it all the time for awhile (my guts are recoiling in memory) until I got it right.

So; practice. The worst part of making banana bread is letting the bananas ripen.  There is a fine line between over-ripe fruit and putrefied fruit, turn your back for a few hours and suddenly instead of squashing mushy bananas, you are splitting the skin with a knife and watching the clear fluid burst out like a floater fished from the river. Zombie fruit on the counter isn’t my idea of a good time. Experiments in cellular degeneration gone awry.

Oh well. Time to get back to The Rotting Bread.

Advertisement

Banana bread in disguise

If it’s shaped like banana bread, and it smells like banana bread, but looks nothing like banana bread, is it banana bread? That is the question.

Banana bread is one of those. You know what I mean. Everybody and their granny can make it with their eyes closed, yet when I try, things just don’t happen the way they should. My first loaf was half-raw, my second was a brick. Third time was not a charm, I brought a bag of bananas to Hobby Victim’s house, and I don’t remember what happened but we didn’t end up making banana bread. The bag of ripe bananas lay forgotten on the counter, until her daughter discovered a putrid mystery mess. (I am still embarrassed.)

My failure to make a perfect tea bread came up with Best Friend the other week.

“I’m making banana bread soon, hopefully. My banana loaf never work out.”

Any loaf you make never works out.”

“Touché!”

Okay, I thought. Obviously my attempts to re-create family recipes isn’t working, so what do the pros do? I found this recipe in KitchenAid 3 cookbooks in 1: pies & tarts, cakes & cupcakes; breads which is available on Amazon.com and while it seemed pretty straight forward, I’m still not sure I have real banana bread.

Time required: 2 hours

Yields: 8-10

Total cost if you have none of the ingredients: $30.00

Cost per slice: $3.00

Kitchen implements I used:

  • Nemo the KitchenAid
  • flour sifter
  • metal loaf pan
  • tinfoil

You may be wondering why there are no bananas in this picture. Well. They uh… seemed over-ripe, almost to the point of “Should these be tossed out or are they still okay?” and I decided they looked too scary for the shot.

Ingredients:

  • 6 TBSP unsalted butter, softened
  • ⅓ C brown sugar, packed
  • ⅓ C granulated white sugar
  • 2 eggs
  • 3-4 bananas, ripe
  • ½ TSP vanilla
  • 1½ C flour
  • 2½ TSP baking powder
  • ¼ TSP salt

Instructions:

1. Pre-heat oven to 176°C / 350°F. Line pan with tinfoil and grease.

2. Cream butter and sugars in mixer until light and fluffy.

3. Add eggs one at a time, then add bananas and vanilla. You’re supposed to mash the bananas first, but uh… mine had reached the point of cellular degeneration where mashing was no longer required.

4. In a bowl sift flour, baking powder, and salt.

5. Add gradually to wet mix and mix until just combined.

6. Spoon batter in pan and bake 50 min.

7. Remove from pan and set on wire rack, cool in pan for 1 hour. Toothpick test indicated doneness.

8. Remove foil and slice.

Hmm. Is this normal?

Verdict:

“Do you think it’s done?”

“I don’t know. Let’s eat some.”

“Why is it so light? It’s supposed to be dark brown… ”

“It tastes good, that’s all I care about.”

Playlist: The Servant – Cells

Blueberry poppy seed cake

Initially I planned to make a tea bread with a light lemon frosting, but Boyfriend persuaded me to skip the frosting and try blueberry cake as-is. Hmm. Will it be good?

This recipe also comes from KitchenAid 3 cookbooks in 1: pies & tarts, cakes & cupcakes; breads, which is available on Amazon.com which has turned out to a good find so far.

Time required: 1 hour

Yields: 10-12 pieces

Cost per portion: $4.25

Total cost if you have none of the ingredients: $51.00

Special kitchen implements I used:

  • Nemo the KitchenAid
  • pastry blender
  • round 9″ pan
  • tin foil

Ingredients:

  • 1½ C flour
  • ½ C granulated white sugar
  • 1 TSP baking powder
  • ½ TSP baking soda
  • ¼ TSP salt
  • ¼ C butter, cold (half a stick)
  • 1 TBSP poppy seeds
  • ¾ C buttermilk
  • 1 egg
  • 1 TSP vanilla
  • 1 TSP lemon juice
  • 1 C blueberries, washed and dried

Instructions:

1. Pre-heat oven to 176.6°C / 350°F. Line baking pan with foil, and grease.

2. In a large bowl, combine: flour, sugar, baking powder, baking soda, and salt.

3. Use pastry blender to cut in butter until coarse crumbs form.

4. Mix in poppy seeds.

5. In mixer, whisk eggs, vanilla, buttermilk, and lemon juice.

6. Add wet mixture to dry, until just combined.

7. Place half of the batter into prepared pan, then sprinkle berries into batter.

8. Drop remaining batter onto the berries, and attempt to spread evenly. Leave some berries uncovered.

9. Bake 33 min.  Cool in pan for 2 min after baking, then use tinfoil to lift from pan.

10. Use mad ninja skills to remove tinfoil, and cool at least 15 min before slicing.

Verdict:

“That smells really good.”

“Thanks. I’ve never made it before.”

“I don’t think I’m going to share any of this at work.”

“Why not?”

“It’s MINE.”

“Well technically babe, it’s mine. But you can have some.”

Now I have almost a litre of buttermilk in the fridge and no idea what else to do with it, so I predict cupcakes are in the near future.

Playlist: Florence + The Machine

Patty’s blackberry lemon loaf

I remember the first time I ate blackberries. I was in the woods with Dad exploring rural Nova Scotia in the summer, and he pointed out the blackberry cane and said they were good to eat. My first impression was “most delicious marvelous”.

I bought some blackberries the other day and wondered what I could make.

Getting started:

Time required: 3 hours (40 min prep, 1 hr baking, 1 hr cooling)

Yields: one loaf

Total cost if you have none of the ingredients: $32.00

Kitchen implements I used: loaf pan 8″ x 4″

Ingredients:

  • 2 C flour
  • 1 TSP baking powder
  • ½ TSP baking soda
  • ½ TSP salt
  • ½ C to ¾ C sugar (less for sweet berries, more for tart)
  • 1 large egg
  • 1 TSP vanilla
  • 3 TBSP vegetable oil
  • ½ C milk
  • 2 lemons (squeeze ¼ C lemon juice)
  • 1½ C blackberries, washed and drained

Step 1 – preheat oven to 177°C / 350°F.  Lightly grease and flour loaf pan.

Step 2 – using large bowl, whisk together: flour, baking powder, baking soda, salt.  Divide this in half.

Step 3 – using medium bowl, whisk together: sugar, egg, vanilla, and vegetable oil.

Oops, forgot the vegetable oil.

Step 4 – stir half of the dry mix into the wet.

Step 5 – stir in milk and lemon juice. Added the forgotten vegetable oil.

Step 6 – stir remaining dry mix into wet.

Step 7 – fold in berries.  Don’t over stir the batter now or the berries will bleed (unless you want purple streaks through the loaf, if so go crazy)

Step 8 – spoon batter into pan, use spatula to flatten it out

Step 9 – bake 40-50 minutes, when loaf is done toothpick comes out clean (I baked this for 55 min and found the top a bit overdone). Run a knife along the edges of the loaf to loosen from the pan.

Step 10 – let loaf sit in pan for 10 minutes before removing from pan, then cool one hour before slicing. Oh bloody hell not again!!

Sigh. This is now the 5th time my cake-like creation has cracked in twain. On the other hand, I did get a really interesting picture that I wouldn’t have gotten otherwise.

I’m getting really tired of this!!

Verdict: it tasted lovely but looked hideous. I’m at a loss as to why this keeps happening. Next time I’ll reduce baking time by 10 minutes, but I’m not sure what to do to prevent the splitting. <sad face>

Gingerbread top loaf

There are times in life when one hits the jack pot, and I am reminded of this  whenever I open to door to Mom’s house and the warm, sharp scent of a ginger loaf wafts out. This smell alerts a primal area of my brain that soon I will be enjoying tea, a warm piece of ginger loaf, juicy gossip, and fending off questions about Boyfriend.

Alas for me, I do not get to visit Mom’s house often. Time gives perspective and city living certainly has some amazing advantages, but now that I’ve been Away for 4.5 years, I’ve realized that there are some things I will never find up here, such as homemade goods. <sad face>

Luckily I just spent 2 weeks visiting home; and aside from the simple pleasures of getting to know my new niece and listening to Grandpa’s stories, I enjoyed numerous tasty treats!! I’ve been back in the city for a few days, and this weekend I decided the first thing I would bake would be Mom’s gingerbread loaf.

Oh, how innocently it began!

Good to know before you start: if you are feeling congested this is a great dish to make, it clears out your sinuses like you wouldn’t believe

Time required: 2.5 hours (30 min prep, 40 min baking, then cool)

Yields: 16 pieces or more

Total cost if you have none of the ingredients: $26.00

Kitchen implements I used:

  • pastry blender
  • baking pan 9″ x 9″

Ingredients:

  • ½ C shortening
  • ½ C granulated white sugar
  • 1 egg, room temp
  • 1 C molasses
  • 1 C boiling water
  • 2¼ C flour
  • 1½ TSP baking soda
  • 1 TSP salt
  • 1 TSP ginger, ground
  • 1 TSP cinnamon, ground
  • ½ TSP cloves, ground

Step 1 – pre-heat oven 177°C / 350°F. Boil water in the kettle.

Step 2 – grease and flour a 9″ x 9″ pan. Hmm. Something seems odd.

Step 3 – in a small bowl combine: flour, baking soda, salt, ginger, cinnamon, and cloves.

I used a wire whisk to blend the dry ingredients, and before I measured the molasses, I sprayed a light coat of Pam into the measuring cup. (Works like a charm when you’re dealing with sticky ingredients like this or peanut butter.)

Step 4- in a large bowl, cream shortening, sugar, and egg, until fluffy.

In retrospect I’m not sure if a pastry blender was the best idea for this, it was a bit lumpy.

Step 5 – add molasses to wet mixture and beat in well.

Step 6- stir in boiling water.

Step 7 – add dry mixture to wet.

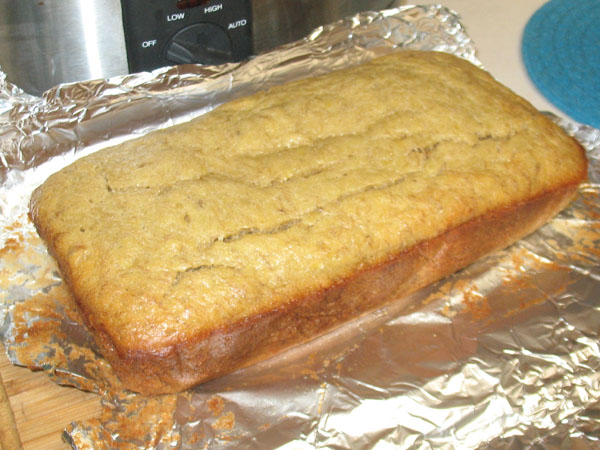
Step 8 – pour mixture into baking pan, bake 45 min. Remove loaf from pan.

Step 9 – cool on rack for at least one hour. This is the moment everything fell apart. Much cursing was done.

I examined the part that remained in the pan. It wasn’t burnt, just stuck. I used a spatula to remove it, and tried setting it in place, which was a bad idea.

So I took the bottom part back off, hence “top loaf”. And you know, it smelled right, and it looked right (until it came out of the pan). That’s when I realized I used the wrong size pan.

Verdict: What a nightmare. The top side of the loaf was slightly overdone, it had a faint crispness that should not have been there, when ginger loaf is done correctly it’s got the same consistency of banana bread. I assume this was caused by the dough being spread too thin by the length of the pan.

Boyfriend and his friend tested it, and said it was good, but I know I can do better. I was so discouraged, this is the 4th cake/loaf-type thing I’ve made in recent months that fell apart, all that effort and care gone to waste.  Maybe I’ll try this again tomorrow in the proper pan.