Pumpkin muffins – round 2

IMG_3106

After being slightly underwhelmed by my first attempt at making pumpkin muffins, I went back to the drawing board.  I made some changes to the ingredient proportions and baking time:

  • 2½ C of flour (instead of 1½ C)
  • 1 tsp ground cinnamon
  • 1 tsp ground cardamom (didn’t have this last time)
  • ½ tsp ground nutmeg
  • ½ tsp ground ginger
  • ½ tsp salt
  • ½ tsp baking soda
  • ¼ tsp ground cloves
  • ¼ tsp pumpkin pie spice
  • ¼ tsp all spice
  • 2 eggs
  • 1 C packed golden brown sugar (instead of dark brown sugar)
  • pods from half of a vanilla bean, split and scraped
  • 2 TBSP vegetable oil
  • 1 C of pure pumpkin (instead of 2 C)
  • a sprinkle of turbinado sugar

IMG_3086

The batter was really dry. I was a bit worried they wouldn’t settle into the muffin cups but I think they look cute.

IMG_3091

These were baked 18 minutes (the original ones were in for 25). In retrospect 18 minutes was not quite enough, I’ll try 20 next time.

They were cooled in the pan 1 minute before being transferred to the rack.

Now this is the fun part. Use a cupcake corer (thank you M!) and stuff them with cream cheese frosting.

IMG_3092
Woah this thing works way better than a knife.

IMG_3094

And voila!

IMG_3106

Verdict: Hmm. I liked this much more than round 1. Boyfriend-Unit loved them. I think there is still room for improvement however, so next time I’ll up the pumpkin ratio a bit, and decrease the cardamom.

Playlist: Katatonia – Into the White

Advertisement

Patty’s pumpkin cream cheese muffins – round 1

I decided to reverse-engineer a pumpkin cream cheese muffin after the underwhelming experience of buying one from StarBucks. This is my first attempt at making pumpkin muffins, and I made them the morning after seeing Nine Inch Nails live, which really has nothing to do with making muffins, but there you go. The muffins were edible, but have room for improvement. Trent Reznor, I am happy to report, does not require any improvement.

(Update Oct 19: round 2 is much better)

IMG_2841

I was surprised to see that the ingredient cost of this made this the most expensive thing I have ever baked, even steeper than the the Bailey’s chocolate cheesecake. Yikes.

IMG_2808

Time required: 1 hour

Yields: 14

Total cost if you have none of the ingredients: $79 if iced, $54 if plain

Cost per muffin: $5.64 if iced, $3.85 if plain

Kitchen implements I used:

  • Nemo the KitchenAid
  • muffin tin + large liners

Muffin ingredients:

  • 1½ C flour
  • 1 tsp ground cinnamon
  • ½ tsp ground nutmeg
  • ½ tsp ground ginger
  • ½ tsp fine sea salt
  • ½ tsp baking soda
  • ¼ tsp ground cloves
  • ¼ tsp pumpkin pie spice
  • ¼ tsp all spice
  • 2 eggs
  • 1 C packed brown sugar
  • pods from half of a vanilla bean, split and scraped
  • 2 TBSP vegetable oil
  • 2 C of pure pumpkin
  • a sprinkle of turbinado sugar

Frosting ingredients:

  • 1 block of cream cheese, softened
  • 4 TBSP butter, softened
  • 1 TBSP milk
  • 1 TBSP lemon juice
  • 1 tsp vanilla
  • 4 C icing sugar

Instructions:

1. Pre-heat oven to 350°F / 176°C and put muffin liners into pan.

2. Combine in a bowl: flour and spices.

IMG_2810

3. In mixer; cream the eggs and sugar until smooth.

IMG_2812

4. Mix in canned pumpkin, vegetable oil, and vanilla bean pods. (Reserve the shell for something else).

IMG_2814

5. Gradually add flour mixture to wet, and don’t overbeat.

IMG_2815

6. Spoon into tray, and dust with turbinado sugar.

IMG_2818

7. Bake 25 min. (Checked at 20 and but still too springy.)

8. Cool in pan 5 min before transferring to rack.

IMG_2821

9. Make the icing by combining everything in one bowl. This is precise science, people.

IMG_2819

10. Use a knife to score a circle around the muffin tops and press the knife down, then lift up, and pry out the top. You will have a little muffin cone lid. Slice off the bottom part until you have a thin top remaining. Now stuff that bad boy with cream cheese and replace the top.

IMG_2824

Verdict: They were good, but the muffin texture really changed overnight, they seem overly moist today. I tried one without icing, and the pumpkin was a bit too strong. Then again cream cheese icing is also a very strong flavour, so… hard to say. I sent my friend home with one but forgot to ice it. Oops. Overall I was pleased with how it turned out, and I think for round 2 I’ll add a few more spices, and cut back on the pumpkin and see how that goes.

Playlist: Nine Inch Nails – Terrible Lie

Ninjabread men

IMG_1781

CHUCK NORRIS! These ninjas are cut out for action!

My friend M (actually I have two friends named M, but this one is the boy) gave me a very cool gift last year and I have been waiting for December to use it. It’s a set of 3 ninja cookie cutters. M has a penchant for gifting me with ninja-related presents and the cookie cutters were just SO AWESOME.

IMG_1763

Ingredients:

  •  ⅔ C shortening
  • ½ C brown sugar, packed
  • 2 TSP ginger, ground
  • 1 TSP cinnamon
  • ¼ TSP cloves, ground
  • pinch of salt
  • 1 egg
  • ¾ C molasses
  • 3 C flour
  • 1 TSP baking soda
  • ½ TSP baking powder

Instructions:

1. Moving like the wind, pre-heat your oven to 190°C / 375°F.

2. Quietly cream together the shortening, sugar, spices, and salt.

3. Beat in egg, to death. Add molasses and blend into the night.

IMG_1765

4. Sift together flour, baking soda, and baking powder. Add dry mixture to the wet with deadly accuracy. Cream together as if your life depends on it.

IMG_1766

5. Roll the dough to ⅛ thickness, as even and smooth as the deadliest katana. Your hands move like a whisper, cutting the dark shapes into the dough.

IMG_1769

6. Release the ninjas. Transfer them to a baking sheet that has been greased with lightning or lined with parchment paper.

IMG_1770

7. Bake 6-7 min. Cool on rack. (Here is Boyfriend taking them out of the oven for me.)

IMG_1773

Oh noes! The ninjas are burnt. Let’s try another round.

IMG_1771

8. Frost with traditional ninja accessories. (I used my basic butter cream and divided the bowl of frosting in thirds. One part I left plain, and the other two I added highly concentrated no-taste black and no-taste red pigment. To achieve a darker black, I added cocoa to that bowl because it’s a lot easier to get black frosting if you start with chocolate frosting.)

IMG_1776

I didn’t use the red dye yet, I’m going to let it sit overnight to darken. Stay tuned for more ninjas later this weekend.

IMG_1781

Go ninja go!

IMG_1776

Verdict:

Making these was a lot of fun. The first few ninjabread that I rolled did not turn out so well. As I was transferring them to the cookie sheet, I squished them. They ended up misshapen and burnt.

For the second batch I got Boyfriend Unit to hold a piece of parchment paper tightly against the cookie pan, and I  plopped the dough right on to that, and rolled it out, cut the shapes, and then just peeled the excess away so the ninjas did not have to be moved. It worked much better.

The ninjas tasted pretty nice. I’ve never made gingerbreads before, they are tricky to work with. I have new respect for my sister J’s skills.

Playlist: Placebo – Running Up That Hill

Patty’s pumpkin crème brûlée

Yes. I’m afraid it’s true. I have dangerous news: it is possible to make crème brûlée even more glorious.

I’ll be frank, I am tired of the trials and tribulations of fudge.  I needed a day of distance. Today is Thanksgiving, and Boyfriend and I are heading to Hobby Victim’s house for dinner. We each made a dessert. Mine was my favourite custard, tweaked with an inspiration from The Globe and Mail. I took my existing recipe, and tinkered with the proportions for the spices, and used real vanilla bean.

Toronto look out: something delicious this way comes!

Good to know before you start:

As I mentioned previously, custard should be made the day before because it needs to chill overnight. Before you serve it, remove from the fridge for 20 minutes, then caramelize the sugar, then chill for another 10 minutes before eating – we want cold custard and glassy sugar, not hot.

To achieve the silky texture that crème brûlée is famous for, it is imperative to use a mesh strainer. Double-straining into ramequins in a pain in the ass but so worth it.

You’re also going to need a fire-proof surface and kitchen torch. Don’t have a torch? Check out my guide about making your own. It’s way better than using the stove broiler. People, this is crème brûlée for Thanksgiving. Go big or go home.

Time required: 2 days (1 hr prep and bake, 1 hour cooling, chill overnight)

Yields: 12

Cost per portion: $3.00

Total cost if you have none of the ingredients: $36.00

Special kitchen implements I used:

  • mesh strainer
  • 12 ramequins
  • 2 baking pans: 9″ x 13″
  • 2 dish towels you don’t mind getting wet
  • fire-proof surface (ie: marble slab)
  • awesome kitchen torch

Ingredients:

  • 4 C heavy cream, room temperature
  • 1 vanilla bean
  • 1 TSP ground nutmeg
  • 1 TSP ground ginger
  • 1 C canned pumpkin (not pumpkin pie filling)
  • ⅔ C granulated white sugar
  • ¼ TSP salt
  • 10 egg yolks, room temperature
  • 12 TSP turbinado sugar (save until final stage, 1 TSP per portion)

Instructions:

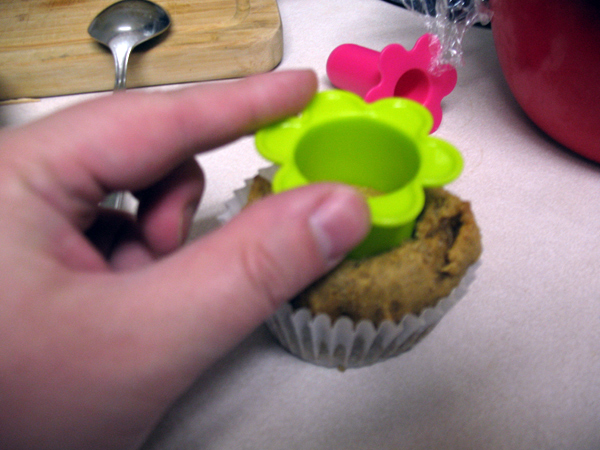
1. Pre-heat oven to 325°F / 162°C, using centre rack. Fill kettle with water and simmer for later. Fold dish towels so they sit nicely in the baking pans, and add ramequins, like so:

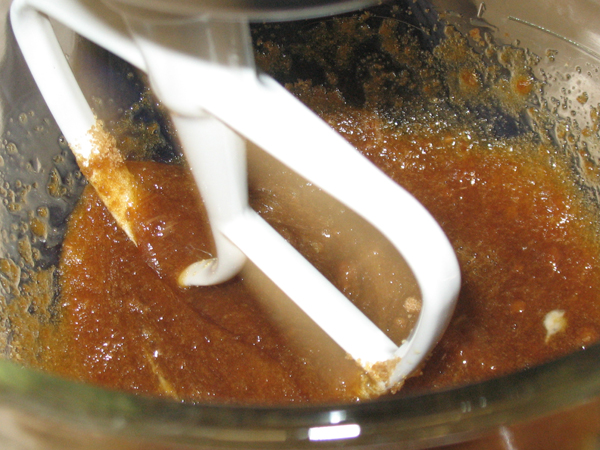
2. Pour heavy cream into a sauce pan, then split and scrape vanilla bean, and add to cream (including shell and pods). I do this at the very beginning and let the vanilla infuse into the cream while the cream comes up to room temp.

3. Add nutmeg and ginger to cream, then scald cream on medium heat. A skim will form, that’s normal. Once bubbles form at the edge, remove from heat.

4. Pour cream through strainer into a medium-size bowl.

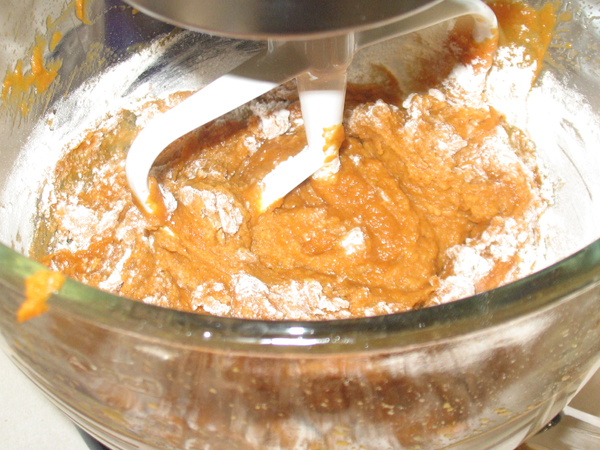
5. Stir pumpkin into hot cream, let stand 5 minutes.

6. Meanwhile, in a medium bowl, mix sugar and salt.

7. Separate the yolks from the egg whites, gently whisk yolks into sugar mixture until just combined. (Save the whites for something else.)

Tip: try to crack the shell halfway between the top and the bottom of the shell. It’s easier to separate the yolks if you have two fairly equal sized shells to work with.

8. Use a ladle to temper the hot cream into the egg mixture; adding one third at a time, stirring it in. Don’t rush this, you don’t want scrambled eggs.

We are almost ready to divvy up the mixture into the ramequins.

9. Place a small strainer over a ramequin. Use ladle to reach the bottom of the bowl where all the vanilla bean pods have sunk, and ladle some mixture through the strainer. Do this for each one to ensure every portion gets a generous amount of vanilla pods.

After that, ladle out the mixture evenly, and strain each time.

Double-straining is very important because you’ll notice that on each pour, the strainer will get clogged with skim on every pour and you don’t want that gunk in your custard.

10. Place both pans in the oven and create a bain marie using the hot water from the kettle.

11. Bake 35 minutes until the edges of the custard are set. Test for doneness by shaking, the centre should wobble like Jell-o. If the whole surface shakes give it 3-5 more minutes. If nothing shakes it’s overdone.

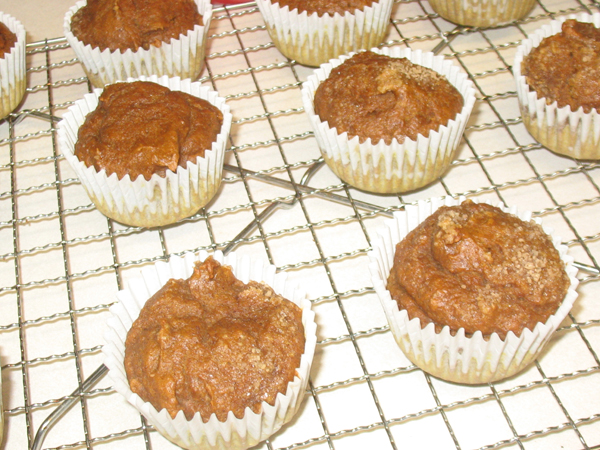
12. Remove from oven and use an egg-flipper type spatula to lift the ramequins out of the dish, and place on wire rack to cool for one hour.

13. Cover each cup with plastic wrap and refrigerate overnight.

14. Set ramequin on counter for 20 mintes to stand. Then remove plastic, and gently blot the surface with paper towel to remove condensation.

15. Sprinkle one teaspoon of turbinado sugar, cover the edges first and work towards the centre, then tilt and tap the ramequin to spread the sugar evenly.

16. Place ramequin on fire-proof surface and use your mad torching skillz.

The key to doing this properly is don’t let the flame get too close, and always keep it in motion. It takes around 3 minutes to melt the sugar properly into a nice glassy surface.

17. Chill for 10 minutes, then devour.

Verdict:

Patty: <setting up camera> “You can have first bite.”

Boyfriend: “Really?” <grabs spoon>

Patty: <taking photos and looking down> “Well?”

Boyfriend: “Oh my God!!”

Patty: “Is it good?”

Boyfriend: “No. It’s awful. You don’t want any.”

Patty: “Give me that spoon… ooohh, nice.”

Boyfriend: “This is amazing. I love the after taste, the nutmeg, it’s totally there. It kind of reminders me of egg nog, just a little. It’s so good.”

Playlist: David Bowie – Ziggy Stardust

What dessert are you celebrating Thanksgiving with?

Pumpkin brownies

Autumn is the best time of year. Good things happen when the leaves turn; including my birthday, Halloween, and the ripening of that most wondrous squash: the pumpkin.

As soon as I saw this recipe on the Globe & Mail today I had to try it.

Good to know before you start: This recipe needs pure pumpkin, which is not pumpkin pie filling. Look for a label that says either “100% pure pumpkin” or “pumpkin purée”, and  it should not contain any herbs or spices.

Time required: 3 hours

Yields: about 30 pieces

Cost per slice: $1.83

Total cost if you have none of the ingredients: $55.00

Special kitchen implements I used:

  • baking pan: 9″ x 13″
  • parchment paper
  • digital scale
  • Oster blender
  • KitchenAid mixer

Ingredients:

BASE

  • 2 C flour
  • ½ C icing sugar
  • 1 C unsalted butter, (cold and cubed)
  • 1 TSP fine sea salt

FILLING

  • 3 eggs
  • 482 grams canned pumpkin (one 14 oz can)
  • ¾ C dark brown sugar, packed
  • ⅓ C corn syrup
  • ½ C heavy cream
  • 2 TSP freshly squeezed lemon juice
  • 1 TSP pure vanilla extract
  • 1 TSP ground cinnamon
  • ½ TSP allspice
  • ½ TSP ground ginger
  • ¼ TSP fine sea salt

TOPPING

  • 2 TBSP butter, softened
  • 2 TBSP (28.6 grams) cream cheese, softened
  • ½ C icing sugar
  • 1 TBSP milk

Instructions:

1.Pre-heat oven to 177°C / 350°F. Line baking pan with parchment paper.

2. In a large bowl mix: flour, icing sugar, butter and salt. I used a pastry blender, then switched to doing it by hand. The mixture should be crumbly, don’t form it into a ball.

3. Pat into pan.

4. Bake 25 min, and place on cooling rack.

5. Beat eggs in blender.

6. Weigh out the amount of pumpkin you need and add to egg. Don’t forget to adjust for the weight of the container.

7. Then add: brown sugar, corn syrup, heavy cream, lemon juice, vanilla, cinnamon, allspice, ginger and salt. Blend until well mixed, scrape sides, then blend a little longer.

Did you know brown sugar could float? Neither did I.

8. Pour liquid over base and bake for 40 min, then place on cooling rack.

9. Meanwhile make your frosting. Beat butter and cream cheese until fluffy. Beat in icing sugar and milk.

10. The recipe suggested drizzling the frosting over the pan, which I tried, but the amount of icing nearly covered the entire surface anyway so I spread it evenly instead.

11. Chill at least 2 hours, and cut into squares.

Verdict:

In this town, we call home, everyone hail to the pumpkin song!

These were really good. Boyfriend says, “They are awesome baby. I could eat the whole pan.”

Playlist: The Nightmare Before Christmas soundtrack

Pennsylvania-Dutch brownies

More of a spice cake than a brownie, made with molasses and a subtle chocolate flavour. 

This recipe is also from Good Housekeeping Brownies: favourite recipes for Blondies, Bars & Brownies, which is available on Amazon.com and Amazon.ca.

Time required: 3 hrs (1 hour prep + 2 hour cooling)

Yields: 30 pieces

Cost per brownie: $1.10

Total cost if you have none of the ingredients: $33.00

Special kitchen implements I used:

  • baking pan: 9 x 13″
  • tinfoil

Ingredients:

  • 4 TBSP butter, room temp
  • 1 ounce unsweetened chocolate
  • ¼ C molasses
  • 2 eggs, room temp
  • 1½ C flour
  • 1 C + 2 TSP granulated white sugar (used in separate stages)
  • 1 TSP + ⅛ TSP ground cinnamon (used in separate stages)
  • 1 TSP ground ginger
  • ½ TSP ground cloves
  • ½TSP baking soda
  • ½ TSP salt

Instructions:

Step 1 – Preheat oven to 190°C / 357°F.  Line the baking pan with foil, and grease foil.

Step 2 – In a sauce pan on Low, melt chocolate and butter.  (Um, I wasn’t really thinking this through and used a small bowl in the microwave instead.  Since you will later add the dry ingredients to the chocolate, you may want to use a larger bowl.)

Step 3 – Stir in molasses, then eggs, one at time.

Step 4 – Combine in a bowl: flour, 1 C sugar, 1 TSP cinnamon, ginger, cloves, baking soda, and salt.

Step 5 – Stir the dry mixture into the wet.  I moved the wet mixture into a large bowl, then added the dry mix, one third at a time. (At this point I wondered if the batter consistency was off because of the unorthodox way I prepared it.)

Step 6 – “pour” batter into prepared pan. Humph. More like scoop and smoosh. Slightly concerned now, batter very thick, sitting in pan unevenly, does not reach all sides of the pan.

Step 7 – Bake 15-17 minutes.  Brownies are done when a toothpick inserted 1 inch from the edges comes out cleanly.

Step 8 – While this is baking, in a small bowl combine 2 TSP white sugar and ⅛ cinnamon.  As soon as pan is removed from oven, sprinkle sugar mix on top, then cool on rack (in pan) 2 hours.

Hmmm.  Is it supposed to look like this?  Is the bottom right corner supposed to be overloaded with sugar?  Will the rest be bitter?  We’ll see!

Step 9 – Peel off tinfoil, slice lengthwise in 3 strips, slice crosswise in 5 strips, then cut each piece diagonally.

I made a green tea latte and sampled a brownie.

Verdict: Hmmm.  These weren’t bad, but not what I expected either. Then again, since I’ve never eaten Pennsylvania-Dutch anything, maybe my expectations were skewed. I found that the molasses overpowered the taste of the chocolate though.

I was surprised to see the price of the spices is what pushed the total cost so high, but I suppose that makes sense considering spices have been such a hot commodity (hah, get it?) for thousands of years. Guess some things never change.

Playlist: Final Fantasy soundtracks

Gingerbread top loaf

There are times in life when one hits the jack pot, and I am reminded of this  whenever I open to door to Mom’s house and the warm, sharp scent of a ginger loaf wafts out. This smell alerts a primal area of my brain that soon I will be enjoying tea, a warm piece of ginger loaf, juicy gossip, and fending off questions about Boyfriend.

Alas for me, I do not get to visit Mom’s house often. Time gives perspective and city living certainly has some amazing advantages, but now that I’ve been Away for 4.5 years, I’ve realized that there are some things I will never find up here, such as homemade goods. <sad face>

Luckily I just spent 2 weeks visiting home; and aside from the simple pleasures of getting to know my new niece and listening to Grandpa’s stories, I enjoyed numerous tasty treats!! I’ve been back in the city for a few days, and this weekend I decided the first thing I would bake would be Mom’s gingerbread loaf.

Oh, how innocently it began!

Good to know before you start: if you are feeling congested this is a great dish to make, it clears out your sinuses like you wouldn’t believe

Time required: 2.5 hours (30 min prep, 40 min baking, then cool)

Yields: 16 pieces or more

Total cost if you have none of the ingredients: $26.00

Kitchen implements I used:

  • pastry blender
  • baking pan 9″ x 9″

Ingredients:

  • ½ C shortening
  • ½ C granulated white sugar
  • 1 egg, room temp
  • 1 C molasses
  • 1 C boiling water
  • 2¼ C flour
  • 1½ TSP baking soda
  • 1 TSP salt
  • 1 TSP ginger, ground
  • 1 TSP cinnamon, ground
  • ½ TSP cloves, ground

Step 1 – pre-heat oven 177°C / 350°F. Boil water in the kettle.

Step 2 – grease and flour a 9″ x 9″ pan. Hmm. Something seems odd.

Step 3 – in a small bowl combine: flour, baking soda, salt, ginger, cinnamon, and cloves.

I used a wire whisk to blend the dry ingredients, and before I measured the molasses, I sprayed a light coat of Pam into the measuring cup. (Works like a charm when you’re dealing with sticky ingredients like this or peanut butter.)

Step 4- in a large bowl, cream shortening, sugar, and egg, until fluffy.

In retrospect I’m not sure if a pastry blender was the best idea for this, it was a bit lumpy.

Step 5 – add molasses to wet mixture and beat in well.

Step 6- stir in boiling water.

Step 7 – add dry mixture to wet.

Step 8 – pour mixture into baking pan, bake 45 min. Remove loaf from pan.

Step 9 – cool on rack for at least one hour. This is the moment everything fell apart. Much cursing was done.

I examined the part that remained in the pan. It wasn’t burnt, just stuck. I used a spatula to remove it, and tried setting it in place, which was a bad idea.

So I took the bottom part back off, hence “top loaf”. And you know, it smelled right, and it looked right (until it came out of the pan). That’s when I realized I used the wrong size pan.

Verdict: What a nightmare. The top side of the loaf was slightly overdone, it had a faint crispness that should not have been there, when ginger loaf is done correctly it’s got the same consistency of banana bread. I assume this was caused by the dough being spread too thin by the length of the pan.

Boyfriend and his friend tested it, and said it was good, but I know I can do better. I was so discouraged, this is the 4th cake/loaf-type thing I’ve made in recent months that fell apart, all that effort and care gone to waste.  Maybe I’ll try this again tomorrow in the proper pan.