Milk chocolates – all done


What was it like to use a professional chocolate tempering machine? Fabulous. Amazing. Spectacular. Am running out of adjectives. It works so well and it’s so fast. (Product review will be posted after Christmas.)

IMG_3137

So basically my our tempering machine works even better than I had imagined.  Yesterday Boyfriend and I made 66 solid milk chocolates (above), and 51 toasted almond milk chocolates (below). Look at that beautiful gloss!

IMG_3136

Today we are going to make the Toberlone pieces, and then the milk chocolate is all done, next weekend is for the more labour-intensive filled chocolates. And the peppermint bark. Huzzah!

IMG-20131207-01301

“Why do you have to name it?!?”

“I just do. And its name is Bernard. Deal with it.”

Advertisement

Christmas chocolates ver 2.0


‘Twas the night before Christmas, and up in the city,
We made lots of chocolate, but not in a jiffy
The boxes were packed and sent on the train,
In hopes that my peeps would enjoy them again.

IMG_1752

What is better than chocolate? If you guessed “not very much” you would be right, and if you guessed “homemade chocolates” you’re be righter. More right? Whatever.

I have just finished eating a chocolate, which we made last week as Christmas gifts for family and friends. Last year we had lots of pretty boxes. I sort of forgot to order more boxes and we ran out this time. Luckily Boyfriend channeled MacGyver and made me some DIY boxes.

IMG_1746

I was really excited to make chocolates again this year because we got all the extra chocolate moulds I wanted, and had two of each shape, which makes it a lot easier to do.  Here is the map.

map-revised

Tried two new flavours this year: milk chocolate and toasted almond, and semi-sweet chocolate caramel chews. Said bye-bye to the dulche de leche and chocolate ganache.

I am so over the idea of Toblerone ganache. It never works out. “Toblerone goo” would be more apt. Never again! I’m just melting solid Toblerone bars from now on.

IMG_1751

I really love making chocolates. Just looking at them fills me with joy. I have a few more boxes to give to some friends. 😉

IMG_1747

I also made my peppermint bark. Le yum.

IMG_0170

What type of chocolate is your favourite?


Lemon tarts at Le Papillon!

Ah, lemons. Today I hit up the St. Lawrence Market with Hobby Victim. I was looking for some pure vanilla extract by the Saffron Imports Co. (my supply is dangerously low but alas, none was to be found).

After checking out the lower level of the market, we took a stroll to find a nice restaurant for lunch. We stopped at Le Papillon.

I’ve walked by Le Papillon many times but never ventured inside. We both ordered the Crêpe du Marché, which is a galette containing St-Laurent bacon, cooked apples, and cheddar cheese. The apples had a flavour I cannot identify, but it was quite tasty.

Choosing dessert was so hard. I just could not make up my mind, but after several agonizing minutes we narrowed it down.

Hobby Victim ordered the Gâteau au Chocolat, and I ordered the Tarte au Citron (French lemon pie).

How was it? From the first bite, as I felt that elusive afterglow feeling creeping over me, my taste buds sang. I could not stop smiling. It was truly delicious. So tart, so good.

Whoever does the desserts at Le Papillon is an artist of the highest calibre.

I know what I’m going to learn to make on the weekend.

Christmas chocolate boxes

This year Boyfriend and I made boxes of chocolate as Christmas presents, to go along with the tins of peppermint bark. This idea had been percolating for a few months. After the first batch of chocolates turned out so well, I asked Boyfriend if he wanted join me in making chocolates together. He thought this was a good plan, so we spent a few evenings drinking cocoa and playing video games as we worked out the details.

There were three problems with this plan:

  1. How do you make fillings for chocolates that won’t spoil? Mousse was out.
  2. How do you make coloured fillings when somebody has an anaphylaxis reaction to food colouring?
  3. Would the chocolates survive being transported from Toronto to the east coast on the VIA train?

First, we did some stealth research on family preferences, and started brainstorming what flavours to make, and how to make them. Neither of us had made chocolate fillings before, but how hard could it be? We decided that Boyfriend would make the fillings and I would temper the chocolate, and by the magic of team work, they would come together into one glorious confection. Oh, hubris.

Second, we ordered supplies: silicon moulds, flavouring oils, boxes, ribbon, and photo-quality paper. After coming up with a rough estimate of how much chocolate was required, I hit up the farmer’s market and purchased seven kilograms of Belgian chocolate; milk, dark, semi-sweet, and white.

Third, after the boxes arrived, they had to be assembled. This was a lot harder than it sounds. Boyfriend saved the day since I had no idea what to do. Once the boxes were ready, I designed a label and he affixed it to the box.

Fourth, we made a map! We had 6 different mould shapes, but each box was meant to hold 9 chocolates, so there would be some repeats. The map went under multiple revisions before I settled on this:

Fifth, practice run! Filling chocolates was brand-new territory, I wanted to experiment to get the technique down. I tempered a batch of chocolate and we got to work.

To make the fillings, Boyfriend mixed up icing sugar, butter, and evaporated milk in Nemo the KitchenAid, and then divided into 4 bowls, which he flavoured accordingly with: orange cream, peppermint, and raspberry. To get the buttercream, he kept one bowl aside without any extra flavouring ingredients.

The peanut butter filling was chilled, rolled into balls, then placed in the freezer.

Boyfriend making peanut butter balls

For the other filled ones, I made a simple ganache, by pouring scalded cream over milk chocolate, and over Toblerone pieces.

Once the chocolate was tempered, I poured a little chocolate into the bottom of the moulds, he put the filling in, and I topped it up with more chocolate. We shook the moulds to settle the chocolate, and back into the fridge.

After the test chocolates set, we put half in the fridge, and left the rest on the counter, to see how they held up at room temperature. After a week the chilled ones were fine, the others has degraded a bit, so that was good to know.

What about dying the fillings? Peppermint patties are white anyway, but how can you make pink, orange, and yellow, without using food colouring? We added a dash of pure beet juice to the raspberry which worked like a charm, soft pink was achieved. (Experiments with other vegetable juices to colour the orange and butter cream failed.)

Six, it was time to make the first batch of real chocolates. Armed with what we learned from the test trial, we made a batch of chocolates for Boyfriend’s family. Everything turned out wonderfully, aside from the Toblerone ganache which collapsed.  However, it was the tastiest one.

After spending the weekend with his family, we came home and went to work on round 2 for my family – which would be shipped on the VIA train. Back to the drawing board on the Toblerones, and decided to skip the ganache this time, and just melt and mould solid Tolberone, which held up much better.

The brown triangle in the top left corner is the label, which I have blurred out, but it says the name of our chocolate company, so to speak.

Verdict:

Collaborating with Boyfriend was a lot of fun. Aside from the tears and the tantrum at the train station (which is a long boring story), I had a great time! His family really enjoyed the chocolates, and hopefully my family likes them too. ^^

The lovely ribbon I was so excited about? Completely forgot to use it until today. The map was a little bit off. We had planned to use the tiered square for 3 flavours, but ended up with 4 in that shape, and the milk chocolate ganache and the dulce de leche were reversed. Oops.

I think my idea for Toblerone ganache is still a sound premise, but I’m going to have to keep tinkering. Placing the ganache fillings into the chocolate was really tricky, the fillings oozed out a bit, I’m not sure if adding more liquid to the ganache would help or not.

For next year, I’ll make sure I have at least 2 copies of each mould so we can make 30 per flavour at a time. I’ll also start a few days earlier, got a bit distracted and left some things to the last minute.

Where to get supplies:

Both online orders arrived promptly, and had been packed with care. I’ll order from both companies again.

Vanilla review

I’m going to talk about vanilla. Partly to educate you, and partly (okay mostly), because I love the sound of my own voice. Narcissistic baker is narcissistic.

One of the most valuable spices in the world, with outrageous pricing, vanilla adds that je ne sais quoi to your baked goods. A good artist needs good tools, and the quality of your vanilla can be tasted in the finished product. Arranged from left to right in order of my favourites:

  • Bourbon-Madagascar vanilla beans, by Rodelle
  • pure Tahitian vanilla extract 120 mL, by Vanilla, Saffron Imports
  • pure vanilla paste, 60 mL, by Saffron Imports
  • pure Madagascar vanilla extract 59 mL, by McCormick Gourmet Organic
  • pure vanilla extract 46 mL, by Club House
  • artificial vanilla extract 235 mL or 1L, by No Name

What is vanilla?

The tiny vials of vanilla extract found in stores are a flavouring derived from orchids of the genus Vanilla, a vine native to Central America.  It takes around 3 years before a vine bears fruit, and the beans take 9-10 months to ripen.  Beans are picked before they ripen.

The beans are cured in 4 steps: killing, sweating, slow-drying, and conditioning. Afterwards they are sorted by grade, commercial value is determined by the length of the bean, the highest quality are over 15cm in length, and as the beans get shorter, their worth drops.

Vanilla is classified by cultivar: Madagascar, Bourbon-Madagascar, Tahitian, Mexican,  and West Indian are the major ones I know of.

Review & price comparison

Before you buy a vanilla product check the label. Organic and pure may not mean what you think they mean. A good vanilla will not contain added sugars, caramel colouring, synthetic vanillin (a byproduct of the pulp industry), or corn syrup.
 

Product: Bourbon-Madagascar vanilla beans, by Rodelle
Price: 10 beans for $11.99 at Moncton Costco, (2 tubes of 5, or $1.20 per bean), purchased winter 2011
Review: My sister sent these to me in the mail. These are the best beans I have found so far. The label reads Kirkland Signature (Costco house brand), and also Rodelle, who is a supplier of premium vanilla. The label does not specify the cultivar but Rodelle’s website says “the majority” of their products are Bourbon-Madagascar beans. I’ve noticed that Tahitian beans are thinner and shorter than Madagascar, and these Rodelle beans are long and plump, so I am willing to bet they are from Madagascar.
 

Product: Bourbon-Madagascar vanilla beans, by Tosca
Price: 2 beans at Loblaws / Superstore for $7.99 (in 1 tube, or $4.00 per bean), purchased Jan 2011
Review: These were decent. Tosca products are imported by National Importers and you will get a much better deal buying one case (24 beans, 2 per tube) for $59.88 which is $2.50 per bean from the supplier instead of the store. The beans were okay length, a little on the thin side, with a pleasant flavour and aroma. Tosca sells premium (grade A) beans from Papua New Guinea, but the packaging does not classify the cultivar. However, their extract is made from Bourbon-Madagascar so I assume the beans are too.
 

Product: “organic” vanilla beans and Tahitian vanilla beans, supplier unknown
Price: approx. $6.00 for one organic bean, $2.00 for one Tahitian, at Domino’s Foods, St. Lawrence Market, purchased Nov 2010
Review: I have mixed feelings on these. I was excited when I bought them because I love buying stuff at the market, and they were priced better than the grocery store. The Tahitians were really skinny. The organics were a bit plumper. They both dried out quickly. I recall that my impression after using them for the first time was that considering how long it takes to get down to the market, and the cost of the beans, it’s not really worth it for me.
 

Product: pure organic Madagascar vanilla beans, by Sun Rise Brand
Price: 2 beans for $5.99 at No Frills, summer 2011
Review: Haven’t tried these. Noticed the bottom of the gold label says puresaffron@rogers.com and that seems weird.
 

Product: 120 mL of pure Tahitian vanilla extract by Vanilla, Saffron Imports
Label: vanilla bean extractives, alcohol 35%, water, no sugar
Price: $11.99 at Domino’s Foods, St. Lawrence Market, purchased Nov 2010
Review: Don’t be fooled by the plain packaging. This is amazing. Out of all the extracts I have tried, this has the best flavour and is well-worth the money. Unfortunately they will only ship products to Canada if there is no alcohol, and this contains alcohol, so you’ll have to find a re-seller which gets pricey. :[
 

Product: pure vanilla paste, 60 mL by Vanilla, Saffron Imports
Label: contains vanilla beans
Price: $6.99 at Domino’s Foods, St. Lawrence Market, purchased Nov 2010
Review: Flavourful and interesting product, a nice change from using a liquid extract. Difficult to extract from the bottle, the paste is thick.


Product: pure Madagascar vanilla extract 59 mL, by McCormick Gourmet Organic
Label: water, organic alcohol, extractives of organic vanilla beans, organic corn syrup
Price: $8.38 at Toronto Wal-mart, purchased Aug 2010
Review: I am a little confused, what is organic alcohol? What is so “pure” about adding corn syrup to vanilla? Their product info says this is “the highest quality” and I have to disagree. The flavour was not to my liking.
 

Product: pure vanilla extract 46 mL, by Club House
Contains: water, alcohol, sugar, vanilla bean extractives
Price: $3.94 at Toronto Wal-mart (also at $3.93 at No Frills), purchased Aug 2011
Review: This is okay but I wouldn’t buy it again.
 

Product: artificial vanilla extract 235 mL and 1L, by No Name
Contains: water, alchohol, caramel colour, artificial flavour
Price: $2.89 for 235 mL at No Frills ($3.49 at Loblaws), and 1L for $6.99 at No Frills, summer 2011
Review: I only use this stuff when I make cookies. My inner snob did not want to admit that.
 

Conclusion:

The beans are cheapest at Costco, $1.20 per bean to get a package of 10 is pretty awesome. Very nice quality. Hopefully you have a relative with a membership that you can harass.

I would love to find a cheaper source for the extracts from the Vanilla, Saffron Imports company.  Hey there, you guys at Vanilla, Saffron! If you have any extra 32 oz. bottles I would be happy to take them off your hands.

I’m not sure why my favourite extract is Tahitian when my favourite beans are Madagascaran.

What is your favourite vanilla product?

Playlist: Beethoven – Moonlight Sonata

A dessert of ice and fire

Warm cake made from Belgian chocolate, with a hot centre that erupts onto the plate, cooled with frozen yogurt. Say hello to my first lava cake!

On my way home yesterday, I ran into Boyfriend on the subway. This might not seem like a big event, since we live together, but I love serendipity. I commemorated that happy chance with a dessert that’s hot and cold, decadent and sweet.

I found a recipe for “molten chocolate cakes” in Chocolate! favourite recipes for cakes, cookies, pies, puddings & other sublime desserts by Good Housekeeping, which is available on Amazon.com and Amazon.ca.

Good to know before you start: You don’t have to cook them all at once, the batter can be refrigerated or frozen, to bake as needed – oops, wish I realized this myself!

Chocolate will seize if it comes into contact with moisture, so always make sure the pans and utensils are dry, and use low heat without a cover to prevent condensation

Time required: 1 hr

Yields: 8 cakes

Cost per portion: $3.50

Total cost if you have none of the ingredients: $28.00 or higher

Special kitchen implements I used:

  • electric beaters
  • 8 ramequins
  • baking pans large enough to hold the ramequins
  • kitchen scale

Ingredients:

  • 4 oz of semi-sweet Belgian chocolate (equivalent to 4 squares)
  • ½ C butter (1 stick), room temp
  • ¼ C heavy cream
  • ½ TSP vanilla extract
  • ¼ C granulated white sugar
  • ¼ C flour
  • 4 eggs, room temp (need 2 full eggs + 2 egg yolks)

Step 1 – preheat oven to 204°C / 400°F. Grease and sugar ramequins, and place them into baking pan(s).

Step 2 – use a serrated blade to chop the chocolate. I’m glad I used the premium stuff, because Callebaut Belgian chocolate is delicious. I get mine from Domino’s in the St. Lawrence Market.

It’s easier if you cut the chocolate from an angle.

Including the weight of the container I needed 5.3 oz, so weigh it out and set it aside.

Step 3 – take 2 of the 4 eggs, and separate the yolk from the white. Return whites to fridge.

Step 4 – using a mixer on High speed for 10 minutes, beat: sugar, 2 eggs, and 2 egg yolks. Stir down the sides a few times, and it will get thicker and lemon-coloured.

Step 5 – (I did this while the mixer was going.)

In a sauce pan on Low, melt: butter, heavy cream, and chocolate.

Stir the chocolate constantly until the mixture is smooth. Chocolate has a very low melting temperature, and it will scorch if you let it get too hot.

Step 6 – remove from heat and stir in vanilla.

Step 7 – gently whisk in the flour, until just combined

Step 8 – fold the egg mixture into the chocolate, adding one third at a time.

Mmm, the way it looked  reminded me of chocolate cheesecake ice cream, which I haven’t had since I was a kid. WANT NOW.

It took quite awhile for the batter to reach a uniform colour.

Step 9 – ladle the batter into the ramequins, and bake for 8-9 minutes.

Check for doneness by shaking the pan, the edges of the cakes should be set but the centres should jiggle.

Step 10 – cool on rack for 3 min, in pan

Step 11 – remove ramequins from baking pan, run thin blade around the edges of each cake to loosen it from the ramequin; then immediately turn them upside down onto a plate and serve

I was a little surprised how flat they look. I was expecting more volume, but since there is no leavening agent it makes sense. I added some vanilla frozen yogurt.

Verdict: Yum. I’m quite pleased. They were delicious and visually interesting. Boyfriend really liked them too, and said “Oh wow, this is good, this is really good.”  I snuck one into his lunch as a surprise when he gets to work. Am waiting to hear how it tasted after being microwaved. :/

Before last night, I had never eaten lava cakes, so I’m glad that situation has been rectified.

Patty’s Belgian chocolate Irish Cream cheesecake

Let your senses guide you to this decadent chocolate cheesecake, made from Belgian chocolate and Baileys Irish Cream, on a crust of crushed chocolate cookies. One little slice goes a very long way.

Recipe, instructions, and pictures below. Click on pictures to enlarge.

Time required: 2 days (overnight chilling)

Yields: one 7″ cheesecake, with 16 portions

Cost per slice: $2.75

Total cost if you have none the required ingredients: $61.00

This post is to commemorate my first cheesecake.  I had 2 goals: create my own recipe, and make a cake without cracks. Lofty goals indeed!

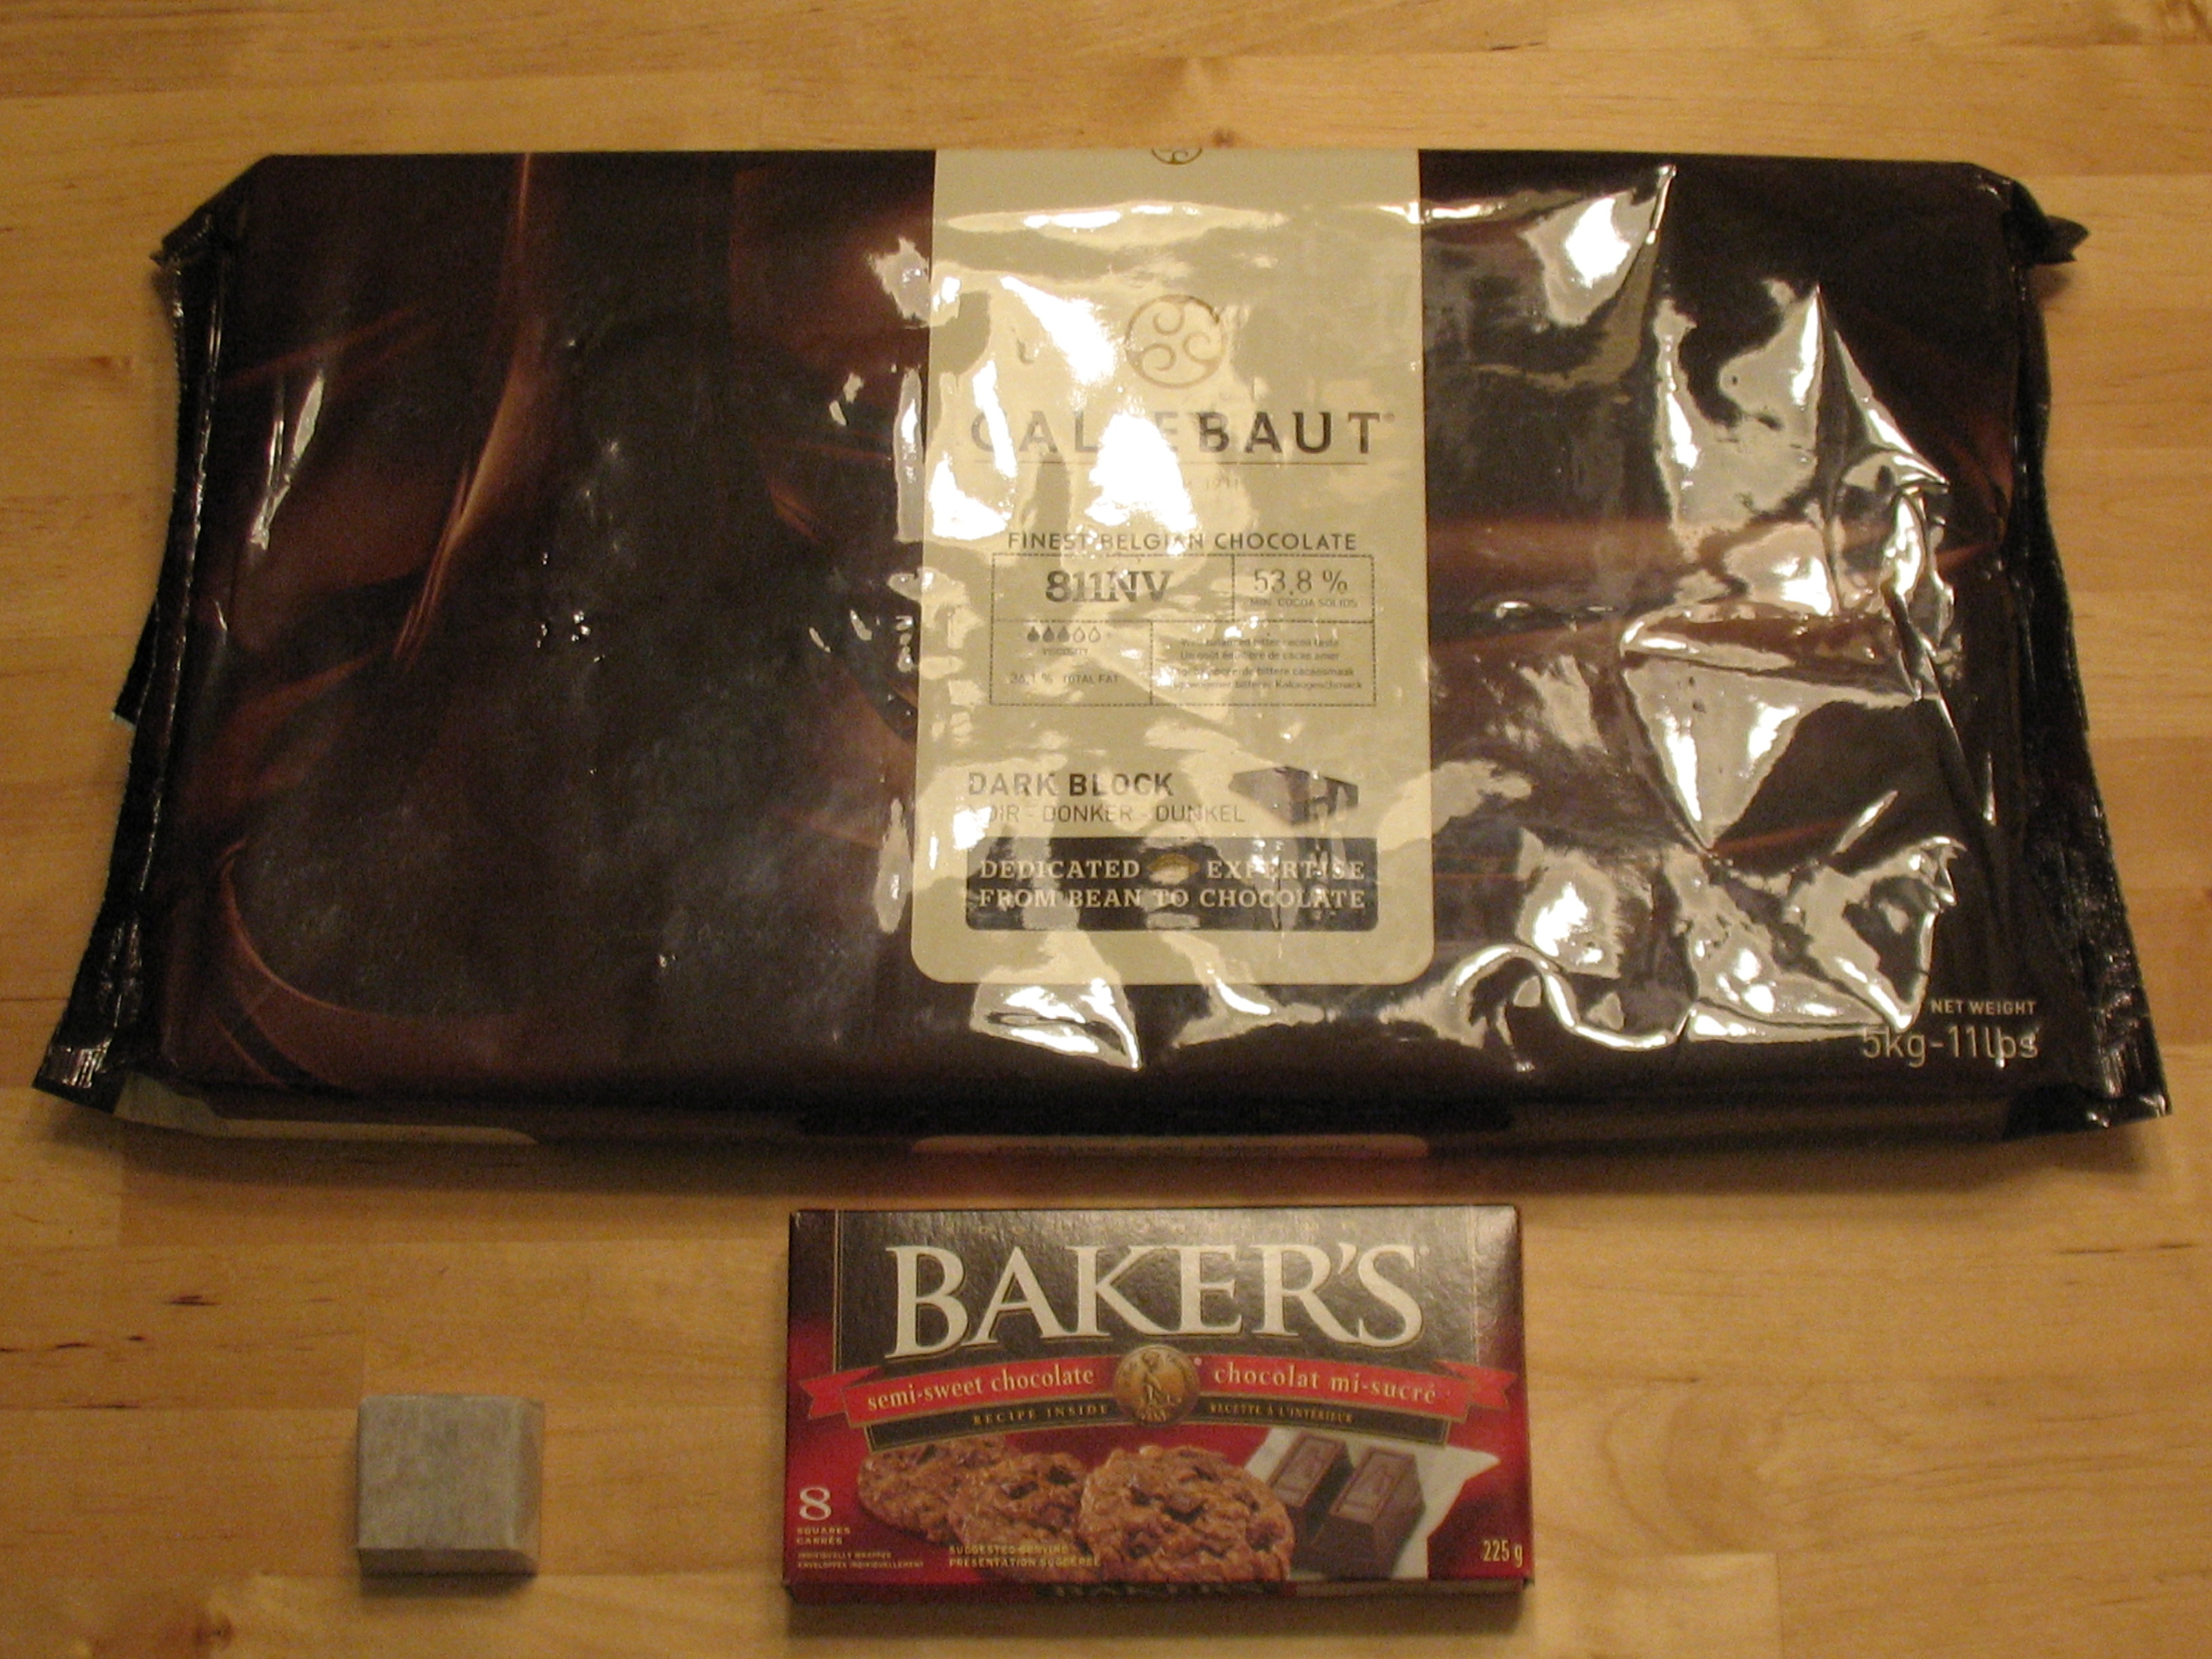
I hit up the St. Lawrence Market to re-stock my supply of Belgian chocolate. I buy my hard-to-find ingredients at Domino Foods, they sell delicious Callebaut chocolate. As for the pan, you don’t actually need a springform pan to make cheesecake, but it makes things easier, and those pans can also be used for other delicate desserts. I have four sizes; 9″, 7″, 6″, and 4″. I consulted Older Sister 2 for some advice, and got started.

Special kitchen implements I used:

  • electric beaters
  • frosting knife or thin blade
  • 7″ springform pan
  • parchment paper, plastic wrap, & heavy tinfoil
  • 9″ x 13″ deep baking pan

Crust ingredients:

  • 1¼ C chocolate cookie crumbs
  • 5 TBSP unsalted butter, melted

Filling ingredients:

  • 2 blocks of cream cheese, softened
  • ½ C granulated white sugar
  • 2 large eggs, at room temp
  • 1 TSP vanilla bean paste
  • 4 oz of Callebaut semi-sweet chocolate, melted
  • ¼ C Baileys Irish cream

Good to know before you start:

Some recipes, including this one, require that the crust be baked at a higher temperature, and once the filling is added it’s baked at a lower temperature. Don’t forget to adjust the oven heat.

Cheesecake will collapse and crack if exposed to sudden temperature changes, don’t open the oven door during baking, and don’t place the finished cake in a drafty area to cool. (A cracked cheesecake tastes fine.)

Never insert a knife or toothpick into a cheese cake to test it, see step 10.

When serving, let cheesecake stand at room temperature for 30 minutes for best flavour.

Step 1 – use centre rack. Pre-heat oven to 175°C / 350°F to bake the crust. If using a bain marie, (which prevents cracking), fill kettle and turn on Low, now.

Step 2 – grease springform pan and line bottom with parchment paper. Optional step: line outside of pan with heavy tinfoil to use in bain marie.

Step 3 – mix the cookie crumbs with melted butter:

Step 4 – press crumbs firmly into bottom of pan to form crust, bake in oven for 10 minutes AND THEN LOWER OVEN TO 150°C / 300°F.

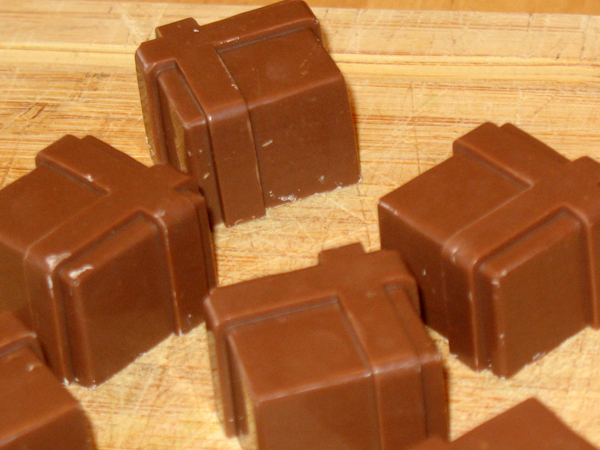
Step 5 – chop chocolate with a serrated blade and set it aside. Er… this was supposed to be 4 oz… but it’s more like 8 or 12. Oops.

Step 6 and 6.5 – gently beat the cream cheese, not too much and not too fast. Try 2 minutes on Low, and continually scrape down the sides of the bowl. I wish I had a Kitchen Aid mixer!

Don’t over-beat because that will add too much air to the mixture, creating air bubbles which collapse during the baking process, causing cracks.

After the cream cheese is beaten, add the sugar and beat until combined.

Then beat in the eggs (one at time), until combined.

Finally beat in the vanilla, and set aside.

Step 7 – melt the chocolate and stir in the Baileys. Normally I melt chocolate in a double boiler to temper it, but that is pointless for a dish destined for the oven. Instead, microwave on High for 30 seconds, stir, repeat until melted.

Step 8 – beat chocolate into cream cheese mixture (gently!)  I originally was going to use my red mixing bowls, but I read that cream cheese rises up high in the bowl so switched over to a big metal bowl instead.

Step 9 – “pour” mixture onto crust – since I used too much chocolate my filling was very dense, it had to be scooped out of the bowl, smooshed down, and smoothed out.  If your filling is normal (runnier), gently shake the pan to even it out and remove air bubbles.

Optional step: I set my springform pan into a 9×13″ baking pan, set that in the oven, and carefully poured hot water from the kettle into the larger pan. This  created a hot water bath that rose halfway up the side of the foil-wrapped springform pan. That served 2 purposes: a) prevents top from drying out, b) prevents cracking.  The hot water should never come in contact with the ingredients.

Step 10 – DID YOU LOWER THE OVEN TEMPERATURE EARLIER?

Bake cheesecake 50-60 minutes at 150°C / 300°F.

How do you know it’s done? The same way you check custard; gently shake it.

If the entire thing jiggles, give it another 5 minutes and check again.

If the edges are firm but the centre jiggles, it’s perfect.

It nothing jiggles at all it’s overdone.

Step 11 – remove from oven but do not open the springform pan.

Carefully use a frosting spatula or thin blade to loosen the pan away from the cake, go slowly around the edge of the pan, all the way down to the bottom. This will prevent the cake from tearing or collapsing when the spring is released after chilling. Be careful and take your time.

Cool on a wire rack for 1 hour.

The cake will firm up as it cools.

See the dark ring around the bottom of the pan?  That’s from the water bath.

Step 12 – cover and refrigerate overnight, or at least for 8 hours

Here’s my cake the next day, see the part in the centre that looks pale? That is where the plastic wrap touched the top. Oops.

Step 13 – remove tinfoil, and very carefully open the latch on the pan, and lift it away from the cake, hopefully it will stay intact:

Step 14 – cut the cake with a sharp, hot knife, cleaning the knife after each cut.  This prevents the filling from tearing or getting crumbs on it.

Alternatively, you can use a tight line; unflavoured dental floss, piano wire, or a new piece of fishing line – whatever works for you.

Cut it half, and then into fourths – I got 16 pieces out of this.

Step 15: serve and enjoy!  Cheesecake tastes best after standing at room temperature for 30 minutes.

Verdict:

I liked this and will make it again, with some adjustments.  The flavour was intense. I finished my slice throughout the day, 2 bites at a time.

I used 1/2 Cup of Baileys and found that was too much, that’s why I say above to use 1/4 Cup. However, the 4 people who have tasted this said the Baileys flavour was just right, so you might need to experiment with this.

Next time, I’ll definitely measure the chocolate more accurately, I need a better kitchen scale. I’ll let the cream cheese sit at room temperature for longer, 40 minutes wasn’t enough. I will also beat the cream cheese more, I was afraid of over-mixing and ended up not mixing enough, there were a few white bubbles in the filling. They tasted fine but were aesthetically irritating.

Overall I’m quite pleased with the result, it was my first cheesecake, and my own recipe, and it turned out wonderfully!