Chocolate fudge fail

Blast. I was really looking forward to this. How disappointing.

IMG_1914

This recipe comes from Old Tyme Fudge. I love that website. I’m pretty sure it’s a great recipe and I screwed up. Phooey.

I wrote up this post last night after I put the fudge sludge in the pan. So, just pretend it set and follow along.

Before you get started: Have you read my fudge guide? I have done this successfully before, I swear.

IMG_1889

Time required: 8.5 hours (about 1 hour of actual doing stuff)

Yields: about 30 pieces

Total cost if you have none of the ingredients: $34.

Cost per piece: $1.14

Kitchen implements I used:

  • KitchenAid mixer
  • 8″ square pan
  • tin foil
  • heavy-bottomed sauce pan (2.2 qt size is not big enough)
  • silicon spatula
  • lots of extra spoons

Ingredients:

  • 4 oz unsweetened chocolate (I used Callebaut Belgian chocolate)
  • 3 C sugar
  • 2 TBSP corn syrup
  • 1¼ C milk
  • 4 TBSP butter
  • 1 tsp vanilla

Instructions:

1. Line the square pan with foil and grease it. Also grease the entire inside of the sauce pan, all the way up the sides. Grease the flat beater of the mixer too.

2. Chop the chocolate and melt on Low heat until smooth.

IMG_1891

3. Combine everything in the sauce pan except the butter and the vanilla.  Heat on Medium, stirring constantly.

IMG_1892

And definitely using a bigger pot next time.

IMG_1893

4. Once mixture boils, reduce heat to Med-Low and STOP STIRRING. Insert candy thermometer.

Yikes. This is almost disaster territory. Perhaps this was a portent of things to come.

IMG_1897

5. Once mixture reaches 238°F / 114°C, remove from heat.

6. Carefully place pot into cold water bath. Add butter but DO NOT STIR.

IMG_1898

7. Let it cool (it only took 30 min this time) until temp falls to 120°F / 49°C.

IMG_1899

Once the mixture has cooled to this stage, there will be a skim on top, just ignore it. Transfer to mixing bowl and pour in the vanilla.

IMG_1900

8. Beat it. How long? Who knows.

IMG_1906

I planned to do 28 minutes on speed 2 which worked great for my penuche batch, but after 13 minutes it has acquired “that frosting look” which I’ve read about before.

IMG_1910

9. Pour into prepared pan and smooth, let sit at least 4 hours.

IMG_1911

10. Lift out of pan and score the top with a knife, then slice into squares.

What’s this what’s this?!

IMG_1914

Argh!!

IMG_1915

God, no! That is never a good sign. Fudge shouldn’t rise with the knife.

IMG_1916

Verdict: It tastes delicious but is a failure. Supposedly fudge is ready to be poured once it looks like frosting. Whoever said that can go directly to hell and not pass go. I will freeze this until I figure out what to do with it. I’ll try this again soon, stay tuned.

Playlist: 46 albums of Sailor Moon music!

Chocolate avocado pudding

I know. It sounds weird. But it’s strangely delicious.

IMG-20130508-00036

I found this recipe in a book called Healthy Desserts, there is no author listed but the byline says Culinary Notebooks. I got it at Chapters.

IMG-20130508-00024

Time required: 1.5 hours

Yields: 3-4 puddings

Total cost if you have none of the ingredients: $24

Cost per pudding: $6

Kitchen implements I used:

  • food processor
  • ramequins

Ingredients:

  • 3 avocados, peeled and pitted
  • ½ C cocoa
  • ⅔ C honey
  • 1 tsp vanilla
  • dash of coarse sea salt

Instructions:

1. Peel and pit the avocados, and use a butter knife to gently separate the peel from the fruit. I fumbled one and dropped half an avocado on the floor so I didn’t have enough. Curse and scream as desired.

IMG-20130508-00027

2. Puree until smooth, and add everything except the salt. Mix well.

IMG-20130508-00029

During the taste test it was way too bitter so I doubled the amount of honey from ⅓C to ⅔C which improved things dramatically, however I find it now tastes a bit too honeyed. Foiled again.

IMG-20130508-00030

3. Spoon into ramequins and sprinkle with sea salt.

IMG-20130508-00032

5. Cover in plastic wrap and chill for an hour.

IMG-20130508-00034

Verdict:

“Here, try it.”

“No thank you.”

“You… don’t want it? Why not??”

“You said it was bitter!”

“That was before I added more honey! Try it. Before my feelings are hurt.”

“Okay… it tastes… like chocolate pudding.”

“But do you like it?”

“It tastes like chocolate pudding.”

“So that’s a yes?”

Playlist: Bat for Lashes – Siren Song

All about fudge

Prepare to get schooled. I’ve added four how-to guides, all devoted to fudge. If you have never made fudge, or your fudge never turns out, this is for you. It’s written for the total newbie, and explains the science of good fudge making, how to actually beat it successfully, and the common problems that ruin fudge.

Fudge 101 – introduction to fudge

Fudge 102 – fudge for newbs

Fudge 201 – beating fudge

Fudge 202 – it’s all over but the crying

IMG_1853

What are you waiting for? Get fudging.


Penuche fudge – SUCCESS!!

Miracles really do happen. I made penuche fudge. And it set! Pardon me while I sob with joy.

IMG_1854

I guess the sixth time is the charm? It’s been over a year and a half since I first dabbled in making fudge, and it was such a discouraging endeavor I promised myself I’d wait a good long while before subjecting myself to such misery again.

I found this recipe on Old Tyme Fudge, and I followed it exactly (aside from one minor adjustment since I ran out of something.) I really like this site because the author writes very clear recipes, and has good tips for fudge newbs.

Before you get started:

Underbeaten fudge will never set, and overbeaten fudge will turn into a brick. The time window between those stages is razor-thin. Beating fudge to the proper consistency is probably the most difficult thing I’ve ever done in the kitchen, and I’m still learning.

If your fudge doesn’t set, or gets bricked, don’t get discouraged! You can freeze underbeaten fudge to be used as a topping for ice cream, and bricked fudge can be re-melted.

Don’t go trying to double recipes or substitute ingredients until you know what you’re doing.

Fudge must be stirred, and then not stirred, at specific times. If you stir at the wrong stage you will get grainy lumpy fudge which is worse than having no fudge at all.

Hot sugar is napalm. Once it’s getting close to the right temperature you have to watch it like a hawk and get ready to pounce. Turn off the tv, turn off the phone, shun the world when you are making fudge.

Humidity will ruin your fudge, unless you compensate for that by increasing the cooking time and temperature, but that’s more at the expert-level. If it’s wet outside don’t even bother.

IMG_1817

Time required: 8.5 hours (about 1 hour of actual doing stuff)

Yields: about 30 pieces

Total cost if you have none of the ingredients: $25

Cost per piece: $0.83 (can you price perfection?)

Kitchen implements I used:

  • KitchenAid mixer
  • 8″ square pan
  • tin foil
  • heavy-bottomed sauce pan
  • silicon spatula or sturdy wooden spoon
  • lots of extra spoons

Ingredients:

  • 4 C brown sugar (I used 3 C golden brown and 1 C dark brown)
  • 1½ C of 2% milk
  • pinch of salt
  • ¼ C golden corn syrup
  • 3 TBSP butter, unsalted
  • 1 TSP vanilla extract

Instructions:

1. Line the square pan with foil and grease it. Also grease the entire inside of the sauce pan, all the way up the sides. Grease the flat beater of the mixer too.

2. Combine everything in the sauce pan except the vanilla.  Heat on Medium, stirring constantly.

IMG_1819

Ugh, yummy!

IMG_1820

3. Once mixture boils, reduce heat to Med-Low and STOP STIRRING. Insert candy thermometer.

IMG_1824

4. Once mixture reaches 238°F / 114°C, remove from heat. It takes a long time for the sugar to reach the correct heat, mine took about an hour. Hence the beer.

5. Just as it’s about to hit the right temperature, remove from stove and carefully place pot into cold water bath.  DO NOT STIR. Sugar will keep getting hotter and hotter if you let it sit there, so the cold water bath will immediately bring down the temperature and prevents the fudge from overcooking.

IMG_1834

6. Let it cool for about an hour, until temp falls to 120°F / 49°C. Once the mixture has cooled to this stage, there will be a skim on top, just ignore it. Transfer to mixing bowl and pour in the vanilla.

IMG_1836

Also don’t worry about the fat that rises to the surface.

IMG_1838

7. People tell you “beat until it loses the gloss” or “beat until it lightens”. That’s really hard to judge when you are new. Today’s fudge took 28 minutes of beating on speeds 1, 2, and 3. In the past I’ve had fudge turn into a brick under 9 minutes, so there is a learning curve here.

It was a dark molasses colour at first.

IMG_1839

After about 10 minutes it had lightened considerably but was still runny.

IMG_1841

Now 20 minutes in and I’m worried, why isn’t it firming up? What have I done wrong?

IMG_1844

About 25 minutes, still seems fairly glossy, and runny, but when I raise the beater the ropey strands are getting stiff.

IMG_1846

After 28 minutes I couldn’t take it anymore and stopped. I am not sure if it’s because a KitchenAid beats with such force, but it seemed like the beater was moving too easily through the fudge. When I would stop to scrape the bowl it was harder to do by hand so I figured it must be close to done.

IMG_1847

8. Pour into prepared pan and let sit at least 4 hours.  Hmmm, air bubbles. I don’t remember air bubbles in fudge before.

IMG_1848

9. Lift out of pan and score the top with a knife, then slice into squares.

IMG_1850

Real fudge is creamy, and sort of shears away from the knife. It also melts on your tongue, and tastes amazing. Like this!!

IMG_1855

Verdict:

“Oh my God. Oh my God. Oh my God. It set. Come look, it set!!”

Sigh. So good. Am so happy.

Playlist: Celldweller – Stay With Me (Unlikely)

Grandma’s Scotch cakes – St. Patrick’s style

IMG_1787

This is my Grandma’s cookie recipe which was published in a local book by her church society. I have pimped them up for St. Patrick’s Day which is my favourite day of the year. Scotch cakes are really quick to put together! If you are a lazy froster like me they are even faster.

Toronto-20130317-00775

I had a lot of trouble with my camera today.

Time required: 1 hour

Yields: around 24-28 cookies depending on the size of your cookie cutter

Total cost if you have none of the ingredients: $38

Cost per cookie: $1.35

Kitchen implements I used:

  • KitchenAid
  • cookie cutter ala shamrock

Ingredients:

  • 2 C flour
  • 1 C butter, softened
  • ½ C icing sugar
  • ½ C powdered corn starch
  • ½ tsp salt
  • food colouring as desired
  • optional frosting (3 C icing sugar, 5 TBSP butter, 2 TBSP milk, 1 TBSP lemon juice, dash of vanilla, 2 drops mint oil)

Instructions:

1. Pre-heat oven to 204°C / 400°F.

2. Cream the butter.

3. Combine all other ingredients (except the dye) in a bowl, and slowly add to the butter and beat til just blended, then add dye. It will look crumbly when it’s done.

Toronto-20130317-00779

4. Roll the dough into a big ball and knead it for a few minutes, then separate dough into 2-3 balls.

5. One at a time, roll out each ball on a floured surface until about ¼” thick. Use awesome cookie cutter and transfer to pan.

Toronto-20130317-00781

6. Bake 7 minutes, cool in pan 1 min, then transfer to wire rack. The edges should be slightly golden.

Toronto-20130317-00784

7. Meanwhile make your frosting. Beat softened butter, then add icing sugar, milk, vanilla, and lemon juice. Beat until combined, then add dye and peppermint oil.

Peppermint oil is really strong, you do not want to overdo it here.

Frost your cookies and top with leprechaun poop if desired.

IMG_1786

Verdict: These were really good. Sláinte!

Playlist: Bon Jovi – Bad Medicine

KitchenAid mixer review

“Thou shall not covet thy sister’s appliance.”

I chanted those words to myself the first time I saw M’s glorious new acquisition. I am not often struck with home appliance lust, but there was something compelling about the mixer. I was so determined to own a KitchenAid that I started buying attachments before I got the mixer.

Their mixers are so shiny. And powerful. And expensive. They have a smooth, rounded design, high gloss finish, plenty of chrome, and a hint of retro. But are they worth the hype?

closeau

Functionality: There are two main types of KA mixers: tilt-head which have a smaller bowl and lots of colour choices, or the lift-bowls which have bigger bowl capacity but limited colour selection. For the hobby baker, the smaller tilt-head is a good choice.

Price: The mixers and accessories get marked down a lot the week after Christmas and Mother’s Day. If you are patient, you can get the one you want for a very good price.

Be aware the prices change a lot. You’ll see a huge variance in pricing (over $200) on the websites for Amazon.ca, Canadian Tire, Future Shop, and Wal-mart. My advice is figure out which model you want first, understand the specialty colours have a price mark-up, and when the one you want goes on sale, go for it!

IMG_9486

This is a KitchenAid Artisan 10-Speed 325 Watt Stand Mixer (model # KSM150PSBU) in cobalt blue.

I purchased my precious on May 4, 2011 from FutureShop.ca for $219.99 and the shipping was free. The after-tax total was $248.59 CAD. It came with a stainless steel bowl (no spout), and four attachments: flat beater, wire whip, pouring shield, and dough hook. For comparison the same model is currently selling for $500 before tax, so the sale price makes quite a difference!

Specs: The details below are from the Canadian KA website and the information is current as of today’s date. Most of the attachments are compatible with all mixer models but do your own research, there are some negative reviews online about people in Europe buying incompatible parts from the North American distributors.

Tilt-head mixers:
Architect series, 5-qt (4.73 L), 5 colours
Artisan series 5-qt (4.73 L), 25 colours
Classic series, 4.5-qt (4.26 L), 2 colours
Ultra Power Plus, 4.5-qt (4.26 L), 3 colours

Bowl-lift mixers:
Professional 600 series, 6-qt (5.68 L), 4 colours
Professional 7-qt (6.6 L), 1 colour

Colour: Obviously the Artisan has the most colour selection. Buying a stand mixer is like buying a car, you can research all you want online but you won’t get a real sense of the colour until you see it in person. Personally I think the cobalt blue is more of a deep rich violet blue, but I love it anyway.

Attachment and accessories: I have the ice cream maker attachment (part # KICA0WH) which I received in Oct 2012 as a gift. It comes with four pieces: freeze bowl, dasher, adapter ring, and drive assembly. It is pretty awesome, and I recommend it.

IMG_1348

I misunderstood the instructions, which indicate that some (not all) tilt-head mixers require the adapter ring to make the bowl fit into the mixer. Mine does not require the ring.

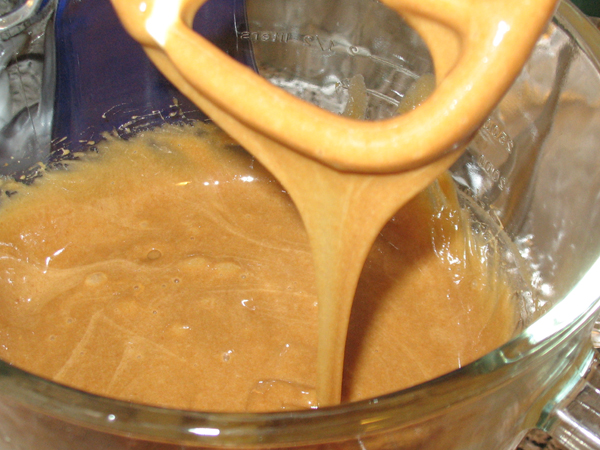
I have a spare mixing bowl so I can make batter and icing without stopping to clean the bowl. I purchased the 5 quart glass bowl with lid (model # K5GB) before I purchased the mixer actually… I found it for $20 at an in-store sale at a Future Shop in Toronto. I’ve noticed that Wal-mart sells the same bowl for $80 but they reduce it to $20 around Christmas.

IMG_0794

I chilled it here to make whipped cream. This is definitely worth waiting for the sale. It’s also a lot wider than the stainless steel bowl that comes with the Artisan, so it’s easier to pour into while the mixer is running.

Buyer beware: As with any mass-produced product, there are lemons and angry buyers. I would definitely recommend you research product reviews before you buy.

A common complaint about KA mixers is that after a time, black grease drips down into the bowl. This is food-grade oil used to lubricate the motor, and KA recommends you run the mixer regularly to prevent this drip down.

You will need to adjust the beater height and tighten the attachment bolt periodically.

When mine was brand new, I’d notice some purple dye would come off when I wiped it down. This has not led to any discolouration however.

You may need to adjust the mixing time on some recipes because the KA mixer goes fast, so flour-heavy mixtures may become over beaten until you get used to the high speed. My first attempt to make whipped cream was a disaster.

Was it worth it? I think so.

I use my KitchenAid mixer in almost everything I bake. Before I got one, I used a little plastic stand mixer which bounced across the counter as it ran, unless I stood there to hold it in place. I don’t have that problem anymore, the KA mixer is solid, so I can start it and walk away to work on something else. I’ve had it for 22 months and so far everything has run smoothly.

I’m not going to lie, what initially attracted me was THE SHINY and the beautiful colours. It is my trusty tool to make lots of delicious goodies. I’m glad I bought it.

I asked Boyfriend Unit to provide his unbiased opinion, “Was Nemo a good purchase?”

His response? “I can’t provide an unbiased opinion. Since you bought it, I get to eat so many good things.”

Ninjabread men

IMG_1781

CHUCK NORRIS! These ninjas are cut out for action!

My friend M (actually I have two friends named M, but this one is the boy) gave me a very cool gift last year and I have been waiting for December to use it. It’s a set of 3 ninja cookie cutters. M has a penchant for gifting me with ninja-related presents and the cookie cutters were just SO AWESOME.

IMG_1763

Ingredients:

  •  ⅔ C shortening
  • ½ C brown sugar, packed
  • 2 TSP ginger, ground
  • 1 TSP cinnamon
  • ¼ TSP cloves, ground
  • pinch of salt
  • 1 egg
  • ¾ C molasses
  • 3 C flour
  • 1 TSP baking soda
  • ½ TSP baking powder

Instructions:

1. Moving like the wind, pre-heat your oven to 190°C / 375°F.

2. Quietly cream together the shortening, sugar, spices, and salt.

3. Beat in egg, to death. Add molasses and blend into the night.

IMG_1765

4. Sift together flour, baking soda, and baking powder. Add dry mixture to the wet with deadly accuracy. Cream together as if your life depends on it.

IMG_1766

5. Roll the dough to ⅛ thickness, as even and smooth as the deadliest katana. Your hands move like a whisper, cutting the dark shapes into the dough.

IMG_1769

6. Release the ninjas. Transfer them to a baking sheet that has been greased with lightning or lined with parchment paper.

IMG_1770

7. Bake 6-7 min. Cool on rack. (Here is Boyfriend taking them out of the oven for me.)

IMG_1773

Oh noes! The ninjas are burnt. Let’s try another round.

IMG_1771

8. Frost with traditional ninja accessories. (I used my basic butter cream and divided the bowl of frosting in thirds. One part I left plain, and the other two I added highly concentrated no-taste black and no-taste red pigment. To achieve a darker black, I added cocoa to that bowl because it’s a lot easier to get black frosting if you start with chocolate frosting.)

IMG_1776

I didn’t use the red dye yet, I’m going to let it sit overnight to darken. Stay tuned for more ninjas later this weekend.

IMG_1781

Go ninja go!

IMG_1776

Verdict:

Making these was a lot of fun. The first few ninjabread that I rolled did not turn out so well. As I was transferring them to the cookie sheet, I squished them. They ended up misshapen and burnt.

For the second batch I got Boyfriend Unit to hold a piece of parchment paper tightly against the cookie pan, and I  plopped the dough right on to that, and rolled it out, cut the shapes, and then just peeled the excess away so the ninjas did not have to be moved. It worked much better.

The ninjas tasted pretty nice. I’ve never made gingerbreads before, they are tricky to work with. I have new respect for my sister J’s skills.

Playlist: Placebo – Running Up That Hill

Nanny’s date squares

My nanny was a fabulous cook. I remember most of her cooking quite fondly, especially her date squares. When I was in elementary school, each afternoon I would walk to Nanny’s house, and she would be waiting with lunch ready for me. We would chat, and watch Batman and Fun House, and then she would waive me off, and sing, “Off you go, into the wild blue yonder!” as I walked back up the hill to school. I haven’t eaten a date square since she died.

IMG_1761

Mom sent me this recipe (basically the Purity recipe, with extra dates). I opened the carton of dates today, and the smell hit me. I picked up my knife and put it down. I put the dates back in the carton. Then I dumped them out again. For a moment it felt like I was back in Nanny’s kitchen. But I opened my eyes, and there was just me, and a pile of dates, waiting to be chopped. Would these be close to my memory of her date squares?

Time required: 3 hr (2 hr is cooling time)

Yields: 48 squares

Total cost if you have none of the ingredients: $30

Cost per square: 62 cents

IMG_1753

Kitchen implements I used:

  • 8″ square pan
  • tin foil
  • pastry blender

Ingredients:

  • 1 lb pitted dates, halved
  • 1 TBSP brown sugar
  • ½ C water
  • 1 C flour
  • ½ tsp baking soda
  • ⅛ tsp salt
  • 1 C butter, softened
  • 1 C lightly-packed brown sugar
  • 2 C rolled oats

Instructions:

1. Pre-heat oven to 162°C / 325°F. Line pan with foil and grease.

2. In a sauce pan combine: dates, sugar, and water. Bring to a boil and simmer for 5 min or until it reaches the mushy consistency of jam. Set aside to cool.

IMG_1754

I worried that I scorched the dates, and put more water in them and simmered for another 5 minutes.

IMG_1755

3. In a large bowl combine: flour, baking soda, and salt.

4. Cut in butter.

IMG_1757

5. Cut in brown sugar and oats. My pastry blender got gunked up by the oats so I used my hands for this part.

IMG_1758

6. Press half of the mixture into greased pan. Couldn’t take a picture of this as both hands were covered in food by this point.

7. Cover evenly with date filling. I used a spoon to smooth it down.

8. Cover with remaining topping mixture. It doesn’t really crumble, but you can pinch it apart and drop it randomly, it’s not supposed to be completely covered so it doesn’t matter if there are gaps.

IMG_1759

9. Bake 35-40 min until light golden brown.

10. Cool completely before cutting.

IMG_1760

Hmm. Looks right. Smells right.

IMG_1762

Verdict: And tastes right. These were good; not as good as Nanny’s, but pretty good. I was afraid they would suck, and I would be sad. But they were good, and I was still a bit sad. But a little happy too.

Date squares are gloriously sticky, juicy, sweet, and a little bit crunchy. They go great with a cup of tea, which I am enjoying right now.

Playlist: Stateless – Bloodstream

Christmas chocolates ver 2.0


‘Twas the night before Christmas, and up in the city,
We made lots of chocolate, but not in a jiffy
The boxes were packed and sent on the train,
In hopes that my peeps would enjoy them again.

IMG_1752

What is better than chocolate? If you guessed “not very much” you would be right, and if you guessed “homemade chocolates” you’re be righter. More right? Whatever.

I have just finished eating a chocolate, which we made last week as Christmas gifts for family and friends. Last year we had lots of pretty boxes. I sort of forgot to order more boxes and we ran out this time. Luckily Boyfriend channeled MacGyver and made me some DIY boxes.

IMG_1746

I was really excited to make chocolates again this year because we got all the extra chocolate moulds I wanted, and had two of each shape, which makes it a lot easier to do.  Here is the map.

map-revised

Tried two new flavours this year: milk chocolate and toasted almond, and semi-sweet chocolate caramel chews. Said bye-bye to the dulche de leche and chocolate ganache.

I am so over the idea of Toblerone ganache. It never works out. “Toblerone goo” would be more apt. Never again! I’m just melting solid Toblerone bars from now on.

IMG_1751

I really love making chocolates. Just looking at them fills me with joy. I have a few more boxes to give to some friends. 😉

IMG_1747

I also made my peppermint bark. Le yum.

IMG_0170

What type of chocolate is your favourite?


Cola molasses cookies

It’s only my favourite thing in the world.


I love Coke. I like the way the curved glass bottle fits my hand, I like how frost rimes the neck of the bottle, and my ears perk up when I hear a bottle being opened. I love how Coke tastes, and the way it fizzes going down. I also love molasses cookies and wondered if the two flavours were complimentary. I’ve wanted to try this for awhile.

Efforts to secure Coca-Cola extract failed, so I ordered some of LorAnn’s Cola flavouring and added it to molasses cookies. Afraid to use too much extract, I added 5 drops to a basic molasses recipe, and voila.

So how did it taste?


It was weird. You could smell the cola, but when you bit into the cookie, it was very faint. It almost tasted like the cookies had cola hot spots, some bites had a wallop of flavour, and some you couldn’t taste it at all. (Perhaps I under-mixed the batter?)

I wasn’t overly sold on the cookie recipe I started with, so I’m going to tinker around with it.